Imagine walking into a child’s bedroom and feeling an instant burst of inspiration—that’s the magic of a thoughtfully designed space! Child bedroom ideas are endlessly popular because they turn an everyday room into a whimsical, inspiring playground where imagination can run wild. Whether it’s a themed decor, clever storage solutions, or cozy reading nooks, these ideas help create a fun, functional haven tailored to a child’s personality and interests.
In this article, you’ll discover a delightful variety of creative bedroom ideas that can transform any child’s space into a vibrant retreat. From adventurous themes to minimalist chic, each idea offers practical tips and inspiring visuals to spark your imagination. Get ready to reimagine your child’s room into a joyful, personalized sanctuary that they’ll love waking up in every day!
1. Colorful Wall Murals for an Inspiring Focal Point
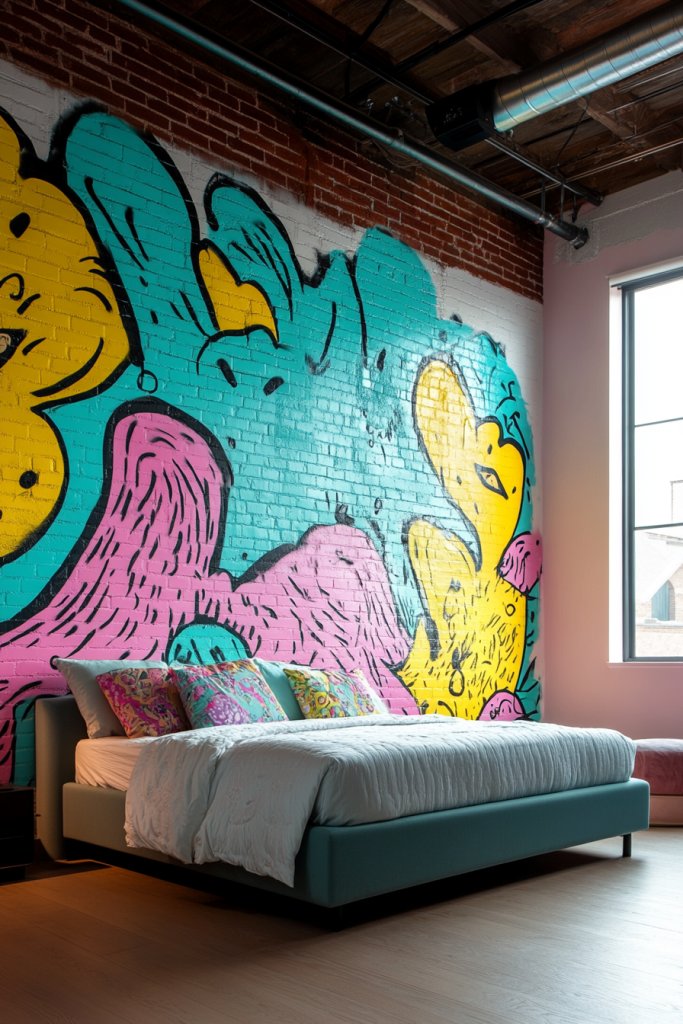
Kids often look for a space that sparks their imagination, but plain walls just don’t cut it anymore. A dull, empty wall can feel uninspiring and uninvolving, making the room seem lifeless. Parents and guardians want a creative environment that energizes and motivates kids daily. The solution? Bright, engaging murals that transform boring walls into vibrant storytelling canvases.
Imagine a wall bursting with a whimsical jungle scene or a sprawling galaxy filled with stars. The colors pop—vivid blues, lush greens, and radiant yellows—drawing attention instantly. You might see a hand-painted mural with textured elements like layered paints or removable decals that add depth. The room feels alive, with a sense of adventure inviting kids to dream big every time they enter.
Murals can be customized for different themes such as animals, space, or fantasy worlds to suit your child’s interests. For small rooms, opt for a single wall mural to avoid overwhelming the space. Seasonal themes like spring blossoms or winter wonderlands can be painted or swapped out periodically. You can also choose removable wallpaper for a quick, mess-free update that matches evolving tastes.
Start by selecting a theme that excites your child. Gather materials like peel-and-stick wallpaper or high-quality paints and brushes. Tape down stencils for clean outlines or freehand if you’re feeling daring. Prepare the wall by cleaning and priming it, then carefully apply the mural, smoothing out bubbles. If painting, consider using sponges or textured brushes for added dimension. Finish with a protective clear coat for longevity.
Add personalized touches like your child’s name incorporated into the mural or favorite characters hidden within the scene. Use glow-in-the-dark paint for stars or fairy lights for a subtle glow at night. Incorporate textured elements like raised paints or fabric patches for tactile engagement. Let your kid contribute ideas or even help with small tasks to make the mural truly theirs.
A vibrant mural turns a child’s room into a space of endless possibilities. It’s a reflection of their personality and interests, boosting confidence and creativity. Plus, a fun, colorful environment makes cleanup and bedtime routines more enjoyable. Ready to turn a blank wall into a masterpiece that fuels their imagination? It’s easier than you think and incredibly rewarding!
2. Cozy Reading Nook with Built-in Shelves and Cushions
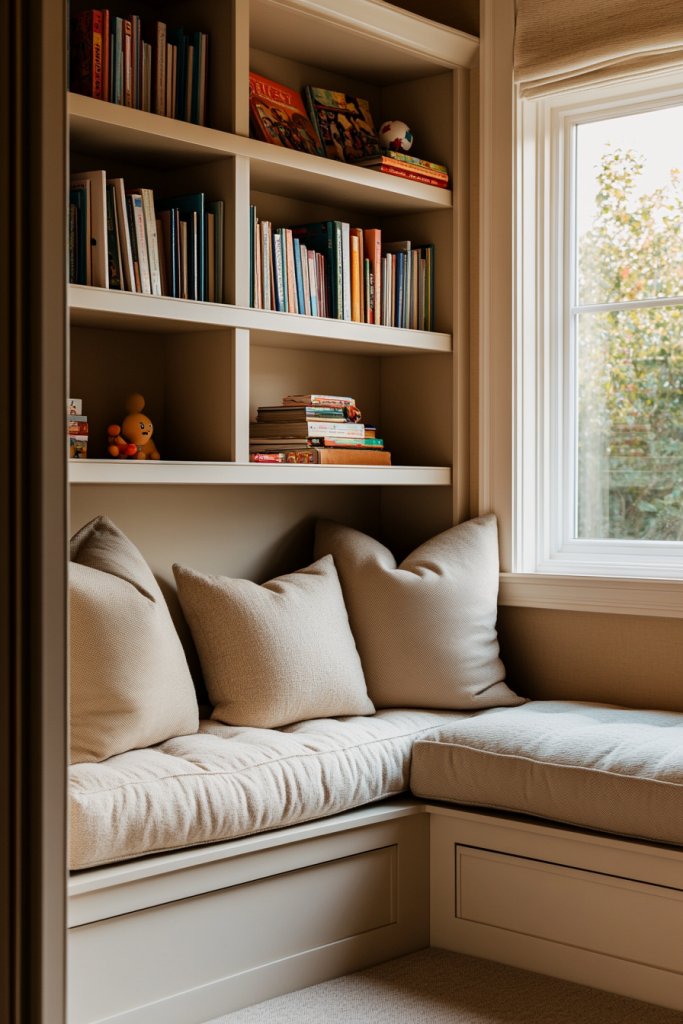
Kids need a quiet retreat where they can escape, relax, and dive into stories. But often, their rooms lack a dedicated space just for reading, leading to cluttered corners or uncomfortable spots. Creating a cozy nook addresses this by offering a special hideaway that invites reading and quiet time. It’s the perfect remedy for restless afternoons and a great way to foster a love for books.
Picture a snug corner with a plush, oversized cushion or bean bags piled high with soft throws. Built-in shelves line the wall, filled with colorful books and playful accessories. The space is framed with warm wood tones or painted panels that contrast with the room’s walls, making it feel like a private sanctuary. Soft lighting, like a string of fairy lights or a small lamp, completes the ambiance, creating a perfect reading environment.
Design the nook with a theme, such as nautical, fairy tale, or jungle, matching your child’s personality. For small rooms, opt for space-saving designs like corner shelves with a fold-down seat. During colder months, layer with cozy textiles like fleece blankets or faux fur throws. For older kids, incorporate a small bookshelf or a foldable wall desk nearby for a combined reading and study zone.
Choose a corner or alcove that gets good light or install a soft reading lamp. Build or buy a custom or modular shelving unit that fits perfectly, ensuring it’s sturdy. Add a thick cushion or custom foam seat, covered with washable fabric. Decorate with throw pillows or textured blankets for extra comfort. Install soft, warm lighting—preferably adjustable—to create a welcoming glow. Keep everything within easy reach for little hands.
Personalize the space with your child’s favorite colors, patterns, or characters on the cushions and shelves. Add a small chalkboard or corkboard nearby for notes or doodles. Incorporate themed accessories like a pirate flag or princess crown to make the nook uniquely theirs. Rotate books and decor items seasonally to keep the space fresh and engaging.
A dedicated reading nook encourages quiet moments and independent reading, nurturing confidence in storytelling. It transforms reading from a chore into a treat, fostering a lifelong love for books. Plus, having their own special space boosts their sense of ownership and pride. Ready to craft a magical hideaway that makes every story time feel like an adventure? It’s simpler than you think and so worth it!
3. Loft Bed with Play Area underneath
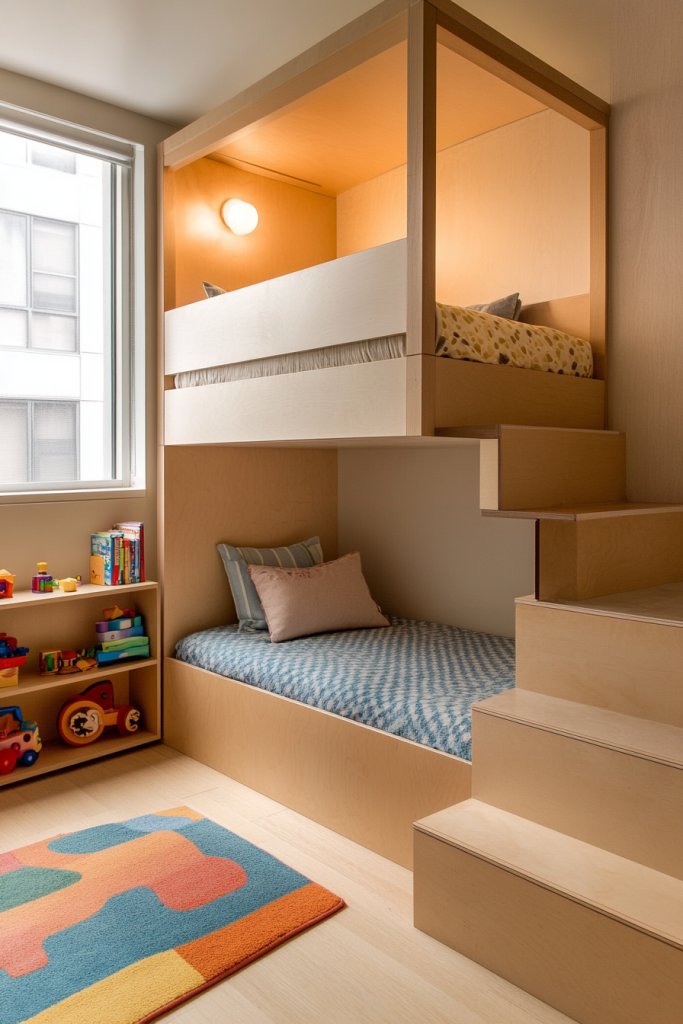
Small bedrooms often leave kids craving more space for play and study, but cramming everything in just doesn’t work. A loft bed cleverly frees up floor space, giving kids a dedicated zone underneath for fun or work. It combines sleeping, playing, and studying into one smart setup, making the room feel larger and more functional. Who wouldn’t want a hidden playground above their bed?
Imagine a sleek metal or wooden loft with a cozy mattress perched above. Beneath, there’s a mini play zone with a tent, cushions, or a small desk for crafts and homework. Bright, cheerful colors and textured fabrics make the space inviting. The open design leaves room for a mini slide or climbing wall, turning the room into a mini adventure park. It’s a playful twist on traditional furniture that sparks joy.
Choose a loft style that matches your child’s personality—industrial, Scandinavian, or whimsical. For small rooms, opt for compact lofts with integrated storage or desks underneath. Seasonal decor like fairy lights or themed bedding can change the vibe. For older kids, add a small bookshelf or a chalkboard for notes under the bed. Customize safety rails and ladder options based on age and activity level.
Measure your space carefully to select a loft size that fits comfortably. Purchase or build a sturdy frame with safety rails and a secure ladder. Decorate the play zone with soft mats, cushions, or a mini tent to encourage imaginative play. Set up a small desk or storage bins underneath for toys or school supplies. Ensure the ladder is easy to climb and check stability regularly. Use non-slip mats for safety.
Add themed bedding, wall decals, or hanging accessories that reflect your child’s interests. Personalize the play area with their favorite toys or artwork stored in colorful bins. Use removable decals or paint to match room decor and update it easily as tastes change. Incorporate a small chalkboard or magnetic board for notes and doodles. Keep the space clutter-free and inviting.
A loft bed with a play zone maximizes small spaces while nurturing independence and creativity. It transforms the room into a multifunctional adventure hub that kids will love. Plus, it teaches them to organize their space and take ownership of their environment. Ready to elevate your child’s room into a playful paradise? It’s easier than you think and endlessly rewarding!
4. Themed Bedroom Zones for Different Activities
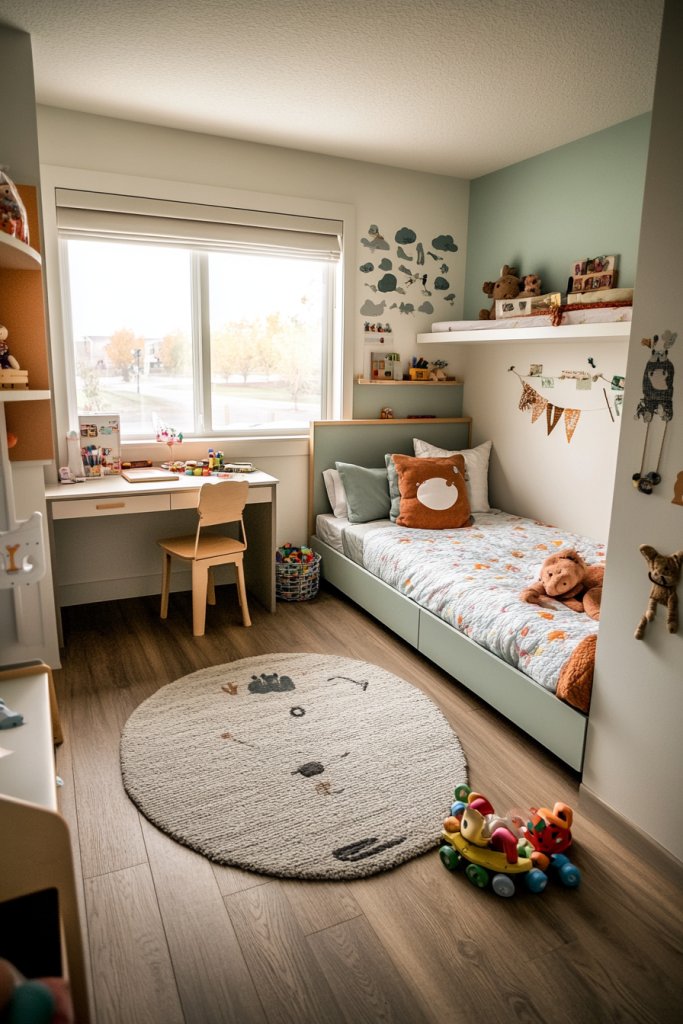
Kids often get distracted or bored when their room isn’t organized by activity, making it hard for them to focus or relax. Separating the space into themed zones helps signal different functions—like play, homework, or rest—and encourages better habits. It turns a chaotic room into an inviting, purposeful environment. Who knew that a few clever zones could make such a difference?
Picture a room divided by colorful rugs, curtains, or furniture placement into distinct areas. One corner becomes an art studio with a small table, art supplies, and a chalkboard wall. Another zone is a cozy reading nook with a bean bag and shelves. The play area might feature a pretend kitchen or dress-up corner. Bright, cheerful colors and themed accessories make each zone special and inviting.
Use rugs or mats to define zones for different activities, adjusting for room size. For a more mature look, incorporate sleek furniture and subtle color schemes. Seasonal themes like a beach corner or winter wonderland can refresh the space. For multifunctional rooms, combine study and play zones with foldable or modular furniture. Tailor each zone to your child’s current interests, updating as they grow.
Start by deciding the main activities and mapping out the best spots for each. Use rugs, curtains, or furniture placement to create clear boundaries. Incorporate storage solutions like labeled bins or shelves in each zone for easy organization. Add themed decor—posters, textiles, or accessories—that match each area’s purpose. Keep pathways clear for easy access and safety. Adjust furniture heights and storage based on age.
Let your child pick the theme for each zone—pirates, princesses, space explorers—and involve them in decorating. Use removable decals, fabric banners, or themed textiles to switch things up. Include personal items like favorite toys or books in each zone. Rotate decor and accessories periodically to keep the space fresh and exciting. Personal touches make each zone feel uniquely theirs.
Defined activity zones help children develop routines and independence. They learn to clean up after themselves and respect designated spaces. A well-organized room boosts their confidence and sense of control. Plus, it makes daily transitions smoother for everyone involved. Ready to turn a single room into a multi-purpose wonderland? It’s a simple step that pays off big time!
5. DIY Wall Pegboard for Art and Accessories
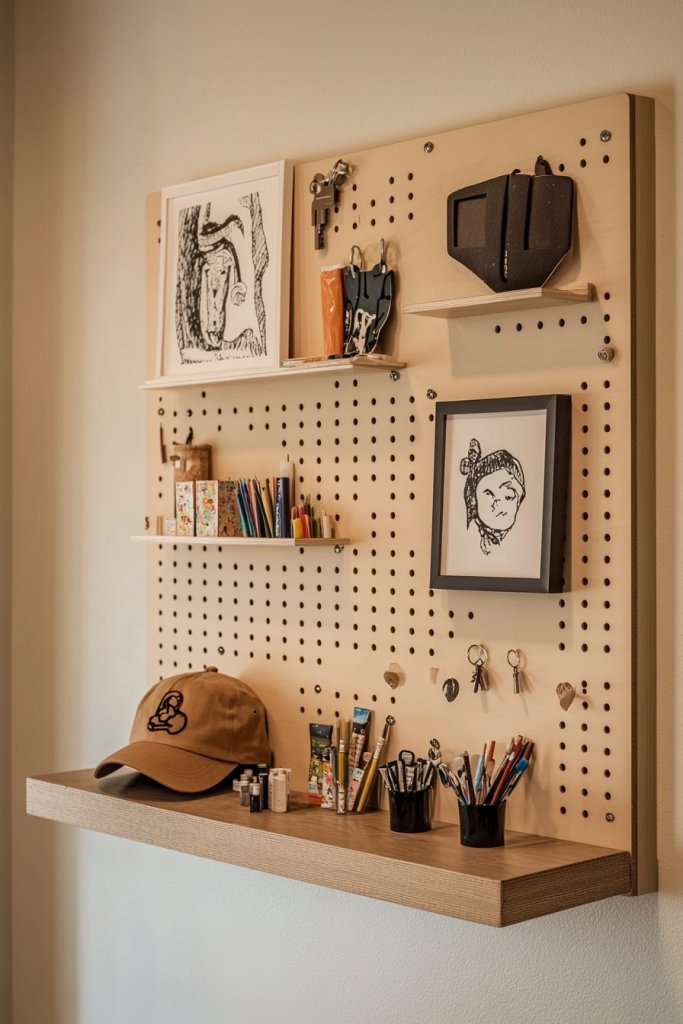
Kids love to display their artwork and keep their favorite accessories within reach, but clutter quickly takes over. A pegboard offers a practical, customizable solution that keeps everything organized and accessible. It turns a plain wall into a functional gallery that encourages creativity and tidiness. Who knew a simple board could be so versatile?
Envision a colorful pegboard mounted at your child’s eye level, filled with hooks, baskets, and clips. Small art supplies, medals, or favorite toys hang neatly, while baskets hold craft materials. The textured surface adds visual interest, and bright paint or a patterned frame makes it a focal point. The overall look is playful yet organized, inspiring your kid to create and display their best work.
Choose a pegboard in bold colors or neutral tones to match your decor. Customize with different hooks, baskets, or even small shelves for added storage. For a more mature look, opt for sleek metal or wood designs. You can also paint the pegboard with chalkboard paint for a dual-purpose surface. Adjust the arrangement seasonally or as interests change.
Select a sturdy, lightweight pegboard that fits your space. Mount it securely on the wall using appropriate anchors and tools. Arrange hooks, baskets, and clips in a pattern that suits your child’s needs. Use labeled containers for art supplies or collectibles to keep everything tidy. Encourage your child to swap out displays or reorganize regularly. Keep cleaning and maintenance simple with occasional dusting.
Decorate the pegboard with themed decals or painted designs to match your child’s personality. Incorporate their favorite colors or motifs for a personalized touch. Use the space to showcase their latest artwork or craft projects. Rotate items seasonally or for special occasions to keep the display fresh. Let your child decide what to hang and how to arrange it for a sense of ownership.
A DIY pegboard boosts your child’s organizational skills and pride in their space. It makes it easy for them to find and put away their belongings, encouraging independence. Plus, it’s a fun way to display their creativity and personal achievements. Ready to turn a blank wall into a functional art gallery? It’s simple, affordable, and hugely rewarding!
6. Creative Storage Solutions with Colorful Bins and Shelves
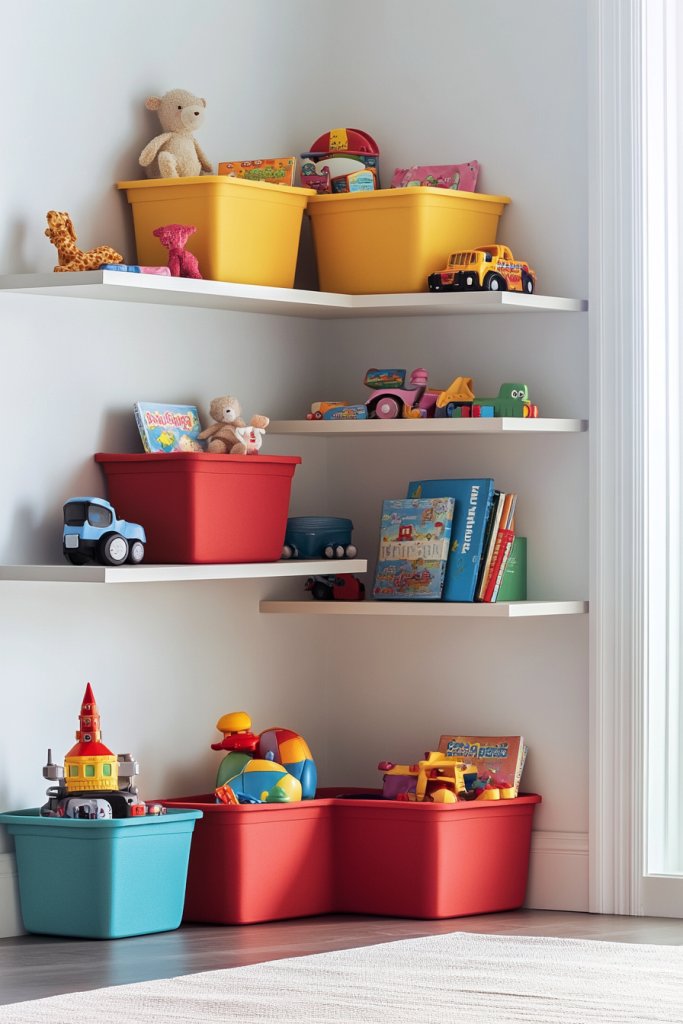
Clutter can turn a child’s room into chaos, making it hard to find toys, clothes, or books when needed. Creative storage solutions help keep everything in its place without sacrificing style. Bright, colorful bins and open shelves add a playful touch while making organization effortless. Who says storage has to be boring?
Picture a wall lined with vibrant, stackable bins in various sizes and colors, all neatly labeled. Floating shelves display books, games, or decorative items, adding visual interest. The bins are made of durable fabric or plastic, featuring fun patterns or labels. Their cheerful colors contrast with neutral walls, creating a lively, inviting environment full of personality.
Mix and match colors to match your child’s favorite hues or room theme. Use clear bins for visibility or opaque for a cleaner look. Incorporate modular shelving units that grow with your child’s needs. For small spaces, stackable bins maximize vertical storage, while larger rooms can have designated zones. Seasonal or thematic bins can be swapped out for variety and freshness.
Start by assessing what items need storage and selecting bins and shelves accordingly. Label bins with words or pictures for easy identification. Mount shelves at accessible heights for your child, encouraging independence. Use a mix of open and closed storage to hide clutter or display special items. Regularly review and reorganize to keep the space functional. Opt for washable, durable materials for easy maintenance.
Personalize storage with custom labels, decals, or fabric covers. Incorporate your child’s artwork or favorite characters on the bins. Use decorative hardware or paint to match the room’s decor. Let your kid choose the bin colors or themes, making organization a fun activity. Rotate or update the storage solutions as their interests change.
Creative storage solutions teach kids responsibility and organization skills early on. It helps them take pride in keeping their space tidy and makes cleaning less of a chore. A well-organized room feels more spacious and peaceful, fostering calmness and focus. Ready to add a splash of color and order to your child’s room? It’s easier than you think and makes a big difference!
7. Personalized Name Wall Art with Bold Typography
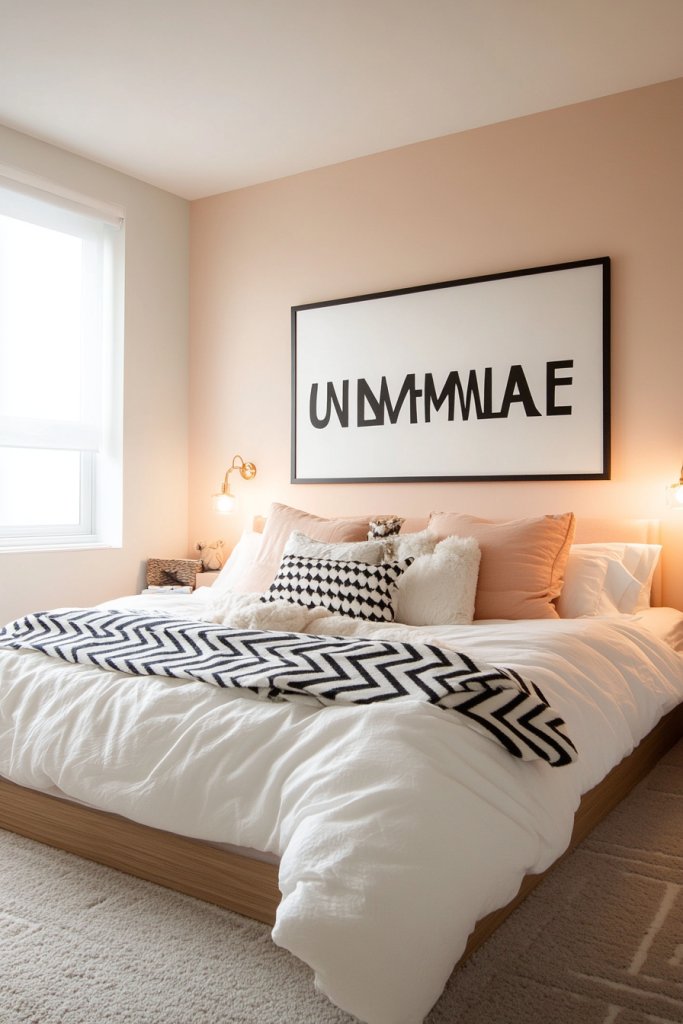
A child’s room often feels incomplete without a personal touch that makes it uniquely theirs. Generic decor lacks character and can feel impersonal. Custom name wall art adds a bold statement piece that anchors the room and boosts your child’s sense of identity. It’s a simple, impactful way to make the space truly theirs.
Visualize a wall where your child’s name is spelled out in large, colorful letters or playful fonts. The letters could be made from wood, foam, or even fabric, adding texture and dimension. Bright colors and contrasting backgrounds make the name pop, drawing immediate attention. Surround it with themed accessories or decals that match their personality for a cohesive look.
Choose from minimalist, whimsical, or bold typography styles based on your child’s taste. Use materials like painted wood, letter decals, or 3D foam for added depth. Incorporate different color schemes, from monochrome to rainbow, to suit the overall room decor. For a seasonal update, swap out the background or add decorative elements around the name.
Design or purchase a custom-made name sign that fits your space. Mount it securely on the wall using appropriate hardware. Consider incorporating LED backlighting or shadow effects for extra flair. Use painter’s tape and level tools to ensure precise placement. You can also DIY with stencils, paint, or craft foam for a budget-friendly approach. Finish with a protective sealant if using paint or foam.
Add personal touches like favorite colors, motifs, or symbols around the name. Incorporate photos or mini shelves nearby for keepsakes. Use removable decals or paint that can be refreshed as tastes change. Encourage your child to help choose fonts and colors, making it a fun craft project. Keep it simple to ensure it remains a lasting focal point.
A personalized name art boosts your child’s confidence and sense of belonging. It makes their room feel special and uniquely theirs, encouraging pride and ownership. Plus, it’s a quick project that adds personality without clutter. Ready to create a bold statement piece that celebrates your child’s individuality? It’s a small effort with a big impact!
8. Modular Furniture for Flexible Room Layouts
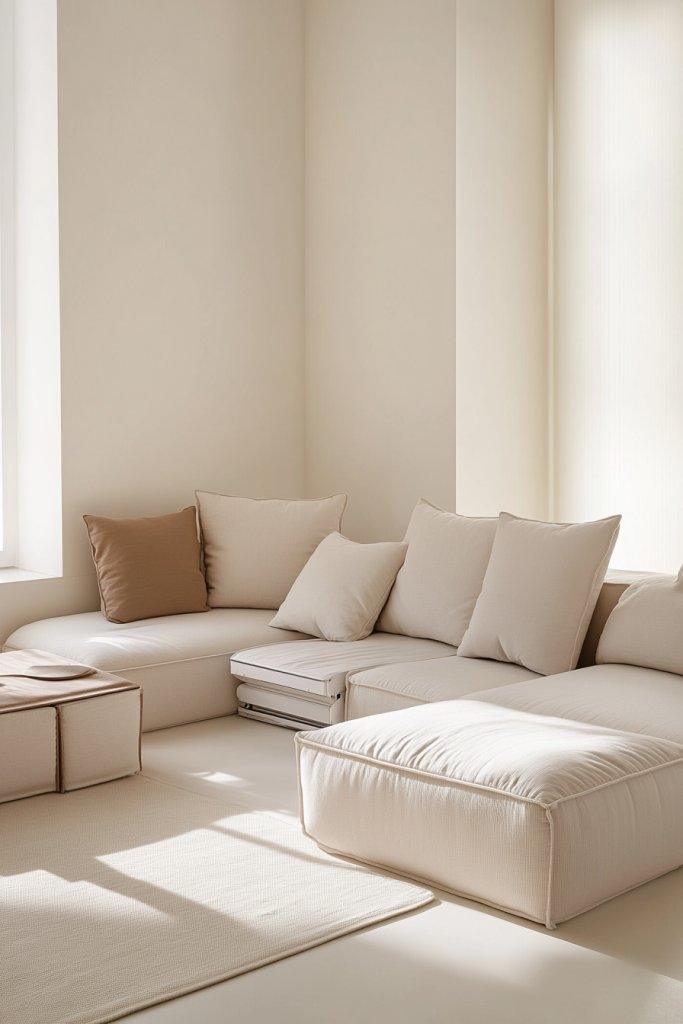
Kids grow fast, and their needs change even faster. Rigid furniture can quickly become outdated or hinder room flexibility. Modular furniture offers a smart solution that adapts to different ages, preferences, and space constraints. It’s like Legos for your child’s room—building and evolving with ease. Who says furniture can’t be fun and functional?
Imagine a set of stackable, interlocking pieces—like beds, storage units, and desks—that can be rearranged effortlessly. Bright colors or neutral tones allow customization, and the pieces stack or slide into new configurations. The furniture looks sleek and modern, with a playful edge that kids love. The result is a dynamic, adaptable space that transforms as needed, from a study zone to a sleep area.
Choose modular designs that suit your room size and style—minimalist for a sleek look or colorful for a playful vibe. For small rooms, stack or fold furniture to save space. As your child grows, swap smaller units for larger ones or add new pieces. Seasonal or themed modules can be added temporarily to refresh the space. The key is flexibility—pick pieces that grow with your child.
Start by assessing your space and your child’s current needs. Select modular pieces that can serve multiple functions—like a bed that doubles as a sofa or a storage cube that becomes a side table. Assemble the units following manufacturer instructions or customize with your own touches. Arrange the modules in different configurations and test stability. Use tools like levelers and anchors for safety. Keep instructions handy for future reconfigurations.
Personalize with themed panels, paint, or decals that reflect your child’s interests. Add cushions, throws, or small accessories for comfort and style. Incorporate adjustable shelves or hooks for extra storage. Let your child participate in rearranging the furniture for a sense of ownership. Keep the design open-ended so it can evolve with their changing tastes.
Modular furniture teaches kids adaptability and creativity, encouraging independent decision-making. It keeps their environment fresh and engaging, reducing boredom. As they see their space change and grow, it builds confidence in their ability to shape their surroundings. Ready to invest in furniture that’s as flexible as your child’s imagination? It’s smarter and more fun than traditional options—and it lasts!
9. Hanging Canopy or Tent for a Magical Hideaway

Kids often dream of having their own secret hideout, a space to escape and imagine. But building a real fort or clubhouse can be complicated and bulky. A hanging canopy or small tent offers a quick, stylish way to create a magical retreat right in their room. It transforms ordinary space into an enchanting sanctuary where fantasies come alive.
Imagine a soft fabric canopy draped over a corner or suspended from the ceiling, with fairy lights or soft textiles inside. The tent could be decorated with whimsical patterns, hanging plush toys, or textured fabrics that invite touch. The space underneath becomes a cozy nest filled with fairy lights, cushions, or plush rugs, creating an inviting, dreamy environment. It’s an instant escape from the everyday.
Choose from various styles—boho, fairy-tale, or jungle-themed—based on your child’s interests. For small rooms, a suspended canopy saves space and adds a floating, airy feel. For older kids, customize with personalized banners or themed fabrics. Seasonal updates or removable covers make it easy to refresh the look. Use lightweight, washable fabrics for easy cleaning and maintenance.
Securely hang the canopy from ceiling hooks or a sturdy ceiling beam, ensuring it’s safe and stable. Choose breathable fabrics that filter light softly and add decorative elements inside, like string lights or cushions. For tents, set up a frame or use a flexible fabric structure, anchoring it with clips or ties. Keep the space underneath clutter-free for easy access. Regularly check hooks and attachments for safety.
Let your child pick the fabric pattern or theme—rainbows, stars, animals, or fairy tale motifs. Decorate with hanging ornaments or textured textiles for added sensory appeal. Personalize the interior with small accessories or their favorite plush toys stored nearby. Rotate covers or add seasonal decorations to keep the space exciting. Make it their personal adventure zone.
A magical hideaway boosts imagination and independence, giving kids a special place of their own. It encourages quiet play and relaxation, fostering emotional comfort. Plus, it’s a delightful design feature that sparks joy and curiosity. Ready to create a whimsical sanctuary that your child will adore? It’s easier and more affordable than you think—and so magical!
10. Chalkboard or Whiteboard Wall for Creative Expression
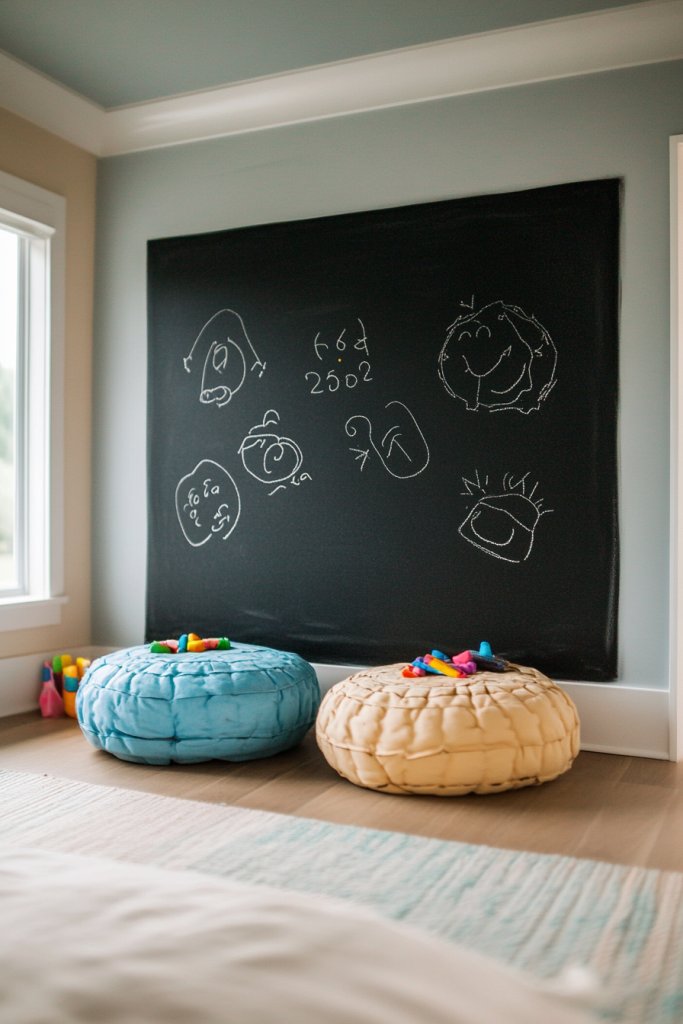
Kids need a space to express themselves freely, doodle, or practice writing without making a mess everywhere. A chalkboard or whiteboard wall provides a dedicated canvas for creativity and learning, all in one place. It helps develop fine motor skills and encourages self-expression while keeping clutter off desks and floors. Who knew a simple wall could become a genius idea?
Visualize a wall painted with chalkboard or whiteboard paint, spanning a section of the room. Your child draws colorful pictures, writes stories, or solves math problems, using bright chalk or markers. The surface invites spontaneous creativity, and the surrounding space can be decorated with themed decals or colorful borders. It’s a dynamic, interactive feature that grows with their interests.
Opt for full-wall coverage or a large panel to maximize space. Use themed borders or patterns to make it stand out. For older kids, opt for magnetic whiteboards that double as display areas for photos or notes. Change the paint color or add removable decals for seasonal updates. Keep supplies nearby in bins or holders for easy access and cleanup.
Prepare the wall by cleaning and priming it for paint adhesion. Apply multiple coats of chalkboard or whiteboard paint, following manufacturer instructions. Install magnetic strips or clips if desired. Mount or hang small containers for chalk, markers, and erasers. Encourage your child to use it daily for doodles, homework, or messages. Regularly wipe and refresh the surface for best results.
Add personalized labels or themed decorations around the wall. Incorporate your child’s artwork or favorite quotes for inspiration. Use colorful chalk or marker sets to motivate frequent use. Rotate themes or encourage seasonal drawings to keep the space lively. Involve your child in decorating or updating the area for a sense of ownership.
A creative wall fosters independence, confidence, and a love for learning. It becomes a go-to spot for expressing ideas and practicing skills. Plus, it keeps messy art projects contained and organized. Ready to turn a plain wall into your child’s personal art studio? It’s simple, affordable, and endlessly rewarding!
11. Upcycled Furniture with a Whimsical Twist
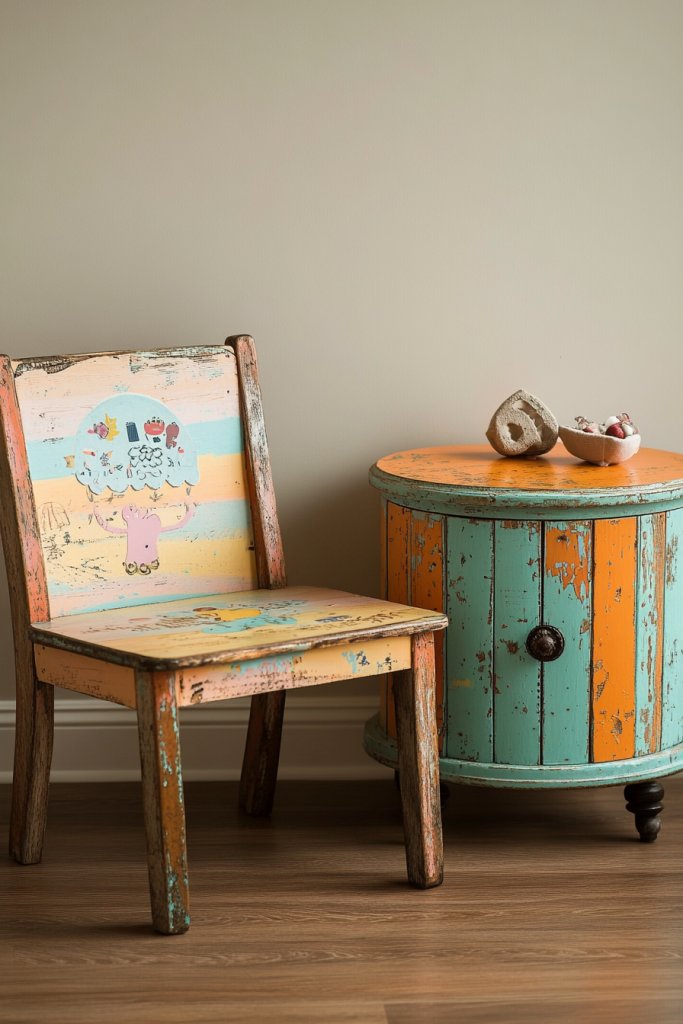
Kids’ furniture can quickly look outdated or bland, and buying new pieces adds up fast. Upcycling old furniture is a budget-friendly way to create unique, whimsical pieces that reflect your child’s personality. Plus, it’s eco-friendly and adds character to their space. Who knew that a vintage find could become the star of the room?
Picture a vintage dresser painted in bright, cheerful colors with playful hardware or decals. A repurposed wooden crate becomes a charming bookshelf or toy chest, decorated with stencils or stickers. An old chair painted with bold patterns or textured finishes adds a quirky touch. These pieces blend nostalgia with fun, turning ordinary furniture into statement decor.
Choose furniture with interesting shapes or details that lend themselves to upcycling. Use non-toxic paint, stencils, or removable decals to add whimsy. For a cohesive look, pick a color palette or theme—like fairy tales or jungle animals—and update furniture accordingly. Incorporate textured fabrics or decorative hardware for extra flair. Seasonal or themed updates keep the look fresh.
Start by sourcing vintage or secondhand furniture from thrift stores or online marketplaces. Clean thoroughly, sand rough edges, and repair if needed. Paint with kid-safe, washable paints, and add decorative elements like decals, stencils, or hardware. Seal the surfaces with a protective finish. Arrange the furniture thoughtfully, balancing functionality and style. Regular touch-ups keep pieces looking fresh.
Involve your child in choosing colors and designs, making it a fun DIY project. Add their name or favorite motifs with stencils or decals. Use themed hardware or knobs to match their interests. Mix and match different textures, like fabric upholstery or textured paint, for added interest. Rotate or refresh furniture pieces seasonally to keep the room lively.
Upcycled furniture shows kids the value of creativity, sustainability, and resourcefulness. It inspires them to see potential in old items and develop their own DIY skills. A personalized, whimsical space boosts their confidence and makes the room a reflection of their uniqueness. Ready to give vintage furniture a new life? It’s easier and more rewarding than you think—and it adds charm beyond compare!
12. Floating Shelves with Curated Collectibles
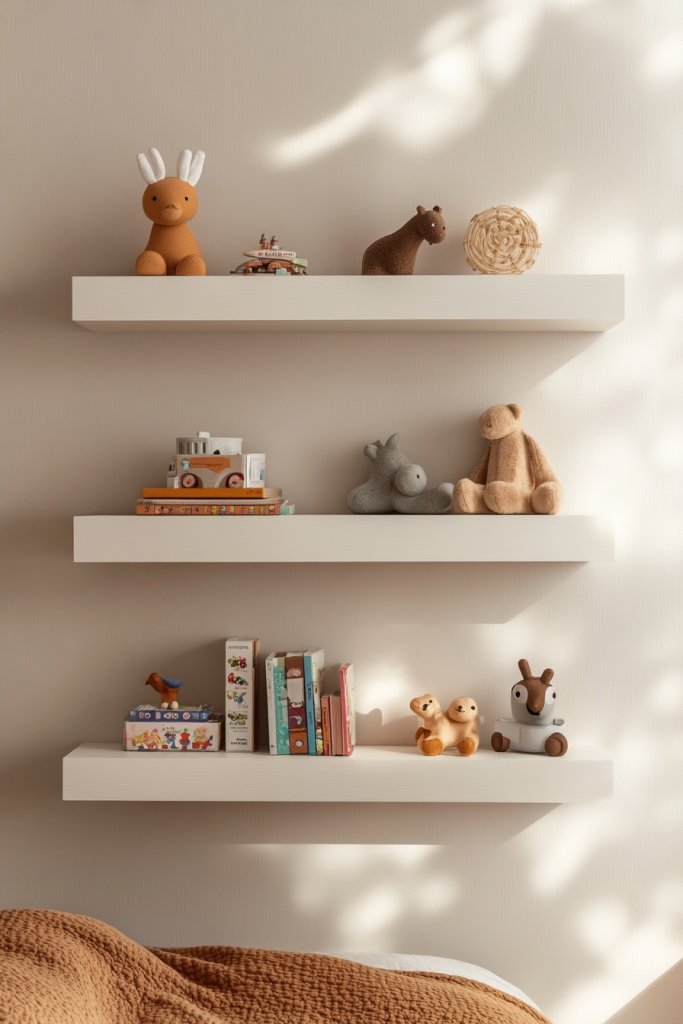
Cluttered surfaces and crowded shelves make a room feel chaotic, especially with kids’ endless collections. Floating shelves offer a sleek, space-saving way to display favorite toys, books, or decorative items. They keep things organized while showcasing your child’s personality. Who doesn’t love a tidy, curated display?
Imagine a set of slim floating shelves arranged in a staggered pattern on the wall. They hold a mix of colorful books, playful figurines, or themed collectibles, all neatly arranged. The shelves blend seamlessly into the wall, creating a modern gallery effect. Brightly colored or painted brackets add a touch of fun, drawing the eye to curated displays that tell a story.
Opt for different lengths and depths of shelves to add visual interest. Use themed or matching brackets for a cohesive look, or mix colors for playful contrast. Combine open shelves with small cubbies or baskets for hidden storage. For a more mature aesthetic, stick to neutral tones and minimalist arrangements. Seasonal or special collections can be rotated regularly.
Decide the layout and mark positions carefully, using a level for straight lines. Install sturdy anchors suitable for wall type and shelf weight. Arrange collectibles thoughtfully, balancing colors and sizes for visual harmony. Use small label clips or tags for organization, especially for books or toys. Regularly dust and update displays to keep them fresh and engaging.
Let your child choose what to display—favorite toys, artwork, or souvenirs. Add personalized labels or decorative elements like themed stickers or paint. Incorporate small framed photos or artwork nearby for a gallery vibe. Rotate items seasonally or for special occasions to keep the display vibrant and meaningful. Use decorative hardware or paint to match the decor.
Curated shelves teach kids to appreciate organization and presentation. They develop a sense of pride in their collections and learn to care for their belongings. The display becomes a reflection of their personality and interests, boosting self-esteem. Ready to create a stylish, organized showcase in your child’s room? It’s simple and totally customizable—go for it!
13. Multi-functional Desk with Built-in Storage

A cluttered, inefficient workspace can kill focus and make homework a chore. Kids need a desk that maximizes functionality without taking over the room. A multi-functional desk with built-in storage solves this by combining work surface, organization, and style. It’s the ultimate setup for a growing child juggling schoolwork and hobbies.
Picture a sleek desk with a smooth surface for writing or drawing, flanked by drawers and cubbies for supplies. The design is modern, with bright colors or natural wood finishes that blend into the room. Small shelves or pegboards above hold tools and decor, turning the desk into a mini command center. Everything is within arm’s reach, making work and play seamless.
Choose a style that suits your child’s personality—bright and playful or minimalist and sleek. For small rooms, opt for wall-mounted or fold-down desks to save space. Incorporate adjustable shelves or modular units that grow with your child. Decorate with colorful organizers, bins, or themed motifs that motivate and inspire. Add a comfortable, adjustable chair to complete the setup.
Measure your available space and select a desk with ample storage options. Assemble according to the instructions, paying attention to stability and safety. Organize supplies in labeled bins or drawers, and use vertical space for additional storage like pegboards or wall pockets. Install lighting—preferably a flexible desk lamp—without cluttering the surface. Encourage your child to keep it tidy by involving them in organization.
Add personal touches like fun drawer pulls, themed accessories, or custom decals. Use colorful storage bins or labels to make organization fun and easy. Incorporate a corkboard or magnetic strip for notes and reminders. Let your child choose their favorite colors or motifs to make the space truly theirs. Rotate accessories seasonally for ongoing freshness.
A well-designed, organized desk builds confidence and independence in your child. It encourages responsibility for their space and supplies, fostering good habits early on. An inspiring workspace boosts focus and motivation, turning homework into a more positive experience. Ready to create a functional, personalized study zone? It’s easier than you think and highly rewarding!
14. Playful Wall Decals and Removable Stickers
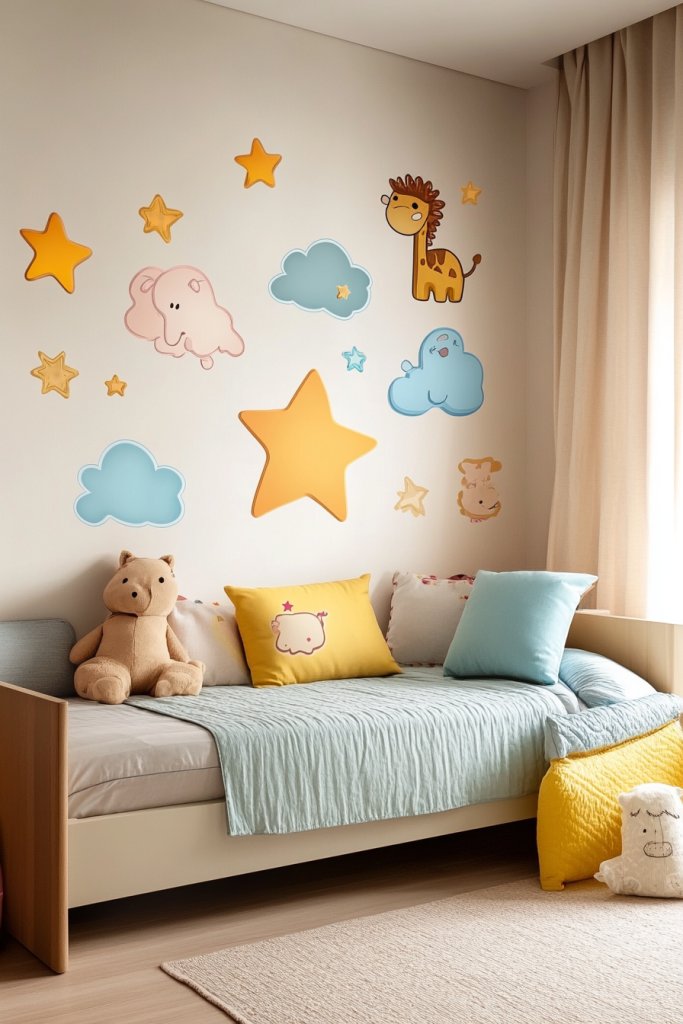
Kids love changing their environment, but wall paint or permanent decor limits creativity. Playful wall decals and removable stickers offer an easy, mess-free way to update and personalize the room frequently. They add instant character and fun without the commitment—perfect for growing kids with changing tastes. Who’s ready to decorate on a whim?
Envision a wall decorated with vibrant decals of animals, stars, or superheroes, arranged in dynamic patterns. The stickers can be layered, moved, or removed easily, allowing for endless customization. Textured or 3D decals add depth and tactile interest, making the wall come alive. The colors pop against neutral or pastel backgrounds, creating a lively, engaging backdrop.
Choose decals that match your child’s current interests—animals, space, fairy tales, or sports. Mix and match different themes for a playful, eclectic look. Use large decals as focal points or smaller stickers to fill empty spaces. Seasonal or holiday-themed decals can be swapped out regularly. For older kids, opt for sleek, minimal designs that can evolve into sophisticated decor.
Clean the wall surface thoroughly before application for best adhesion. Arrange decals on the floor first to plan placement. Peel and stick carefully, smoothing out bubbles or wrinkles. For larger decals, use a squeegee or credit card to ensure adhesion. Remove or reposition decals easily without damaging paint. Keep an inventory of stickers for quick updates.
Encourage your child to create their own scenes by combining stickers, or add personal touches like their name or favorite characters. Incorporate framed photos or mini artwork alongside decals for a mixed-media look. Use themed decals for holidays or special events to keep the decor fresh. Let your kid be the decorator—this boosts ownership and creativity.
Decorating with removable stickers fosters a sense of control and pride in their space. It encourages artistic expression and experimentation without long-term commitment. The room becomes a dynamic, ever-changing canvas for their imagination. Are you ready to transform your child’s room into a playful, personalized paradise? It’s fun, simple, and endlessly customizable!
15. DIY Art Station with Craft Supplies Storage
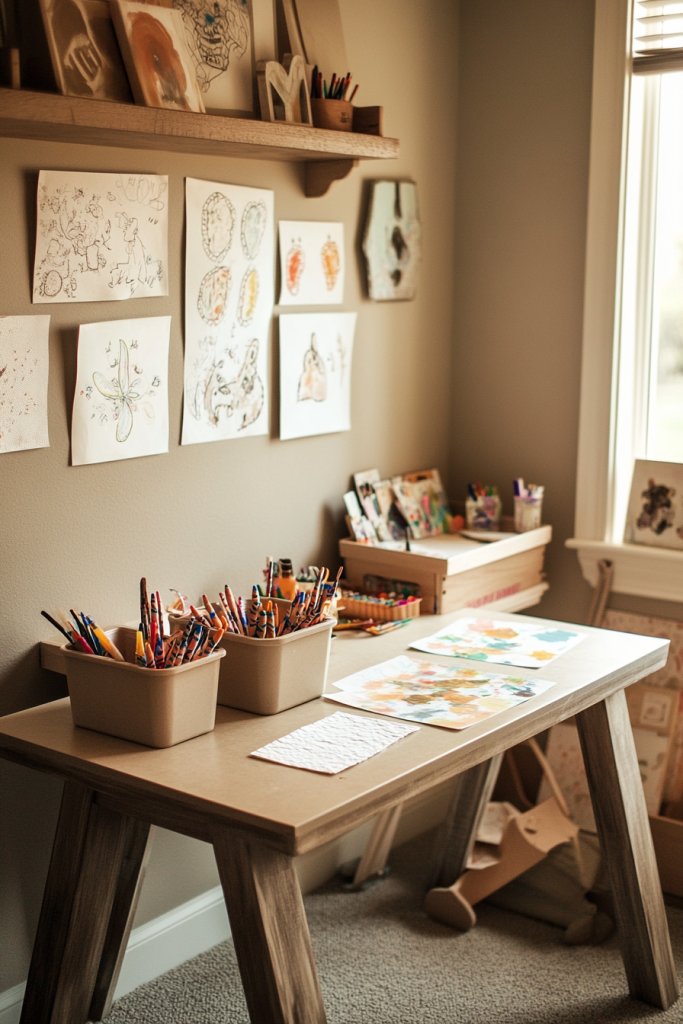
Kids are naturally artistic, but messy craft supplies often clutter the room, discouraging spontaneous creativity. An organized art station inspires frequent, mess-free projects and nurtures their creative confidence. It’s the perfect way to keep their supplies accessible yet tidy. Who wouldn’t want a dedicated space for endless masterpieces?
Imagine a compact corner with a sturdy table or desk, topped with a colorful mat or textured surface. Storage bins or baskets hold paints, markers, and paper, all labeled for easy access. Small pegboards or wall-mounted organizers keep brushes and tools tidy. Bright containers and themed decor make the space lively and inviting, encouraging your child to create anytime inspiration strikes.
Design the station with adjustable shelves, foldable tables, or wall-mounted units to fit your space. Use transparent or colorful containers to motivate organization and make supplies easy to find. For older kids, incorporate a corkboard or magnetic strip for notes and ideas. Seasonal themes or motivational quotes can add personality. Keep the setup flexible to grow with your child’s evolving interests.
Choose a suitable corner or underutilized space and set up a sturdy work surface. Organize supplies in clear, labeled bins or drawers that are easy to access. Install wall-mounted organizers for tools and frequently used items. Cover the surface with a wipeable mat or textured surface for easy cleanup. Encourage your child to put supplies away after each use to maintain order. Refresh supplies and decor periodically.
Let your child pick colors, themes, or motifs for the station—like animals, superheroes, or floral patterns. Add personalized labels or artwork to bins and containers. Incorporate their favorite colors or decorative elements to boost ownership. Rotate supplies or update decor seasonally to keep the space engaging. Involve them in organizing and decorating to foster responsibility.
An organized art station fosters independence and a love for creative expression. It teaches responsibility and helps develop fine motor skills and planning. Seeing their projects come to life in a dedicated space builds confidence and pride. Ready to turn a corner into a colorful, inspiring studio? It’s simple, fun, and hugely rewarding!
16. Nature-inspired Elements with Faux Trees and Rock Decor
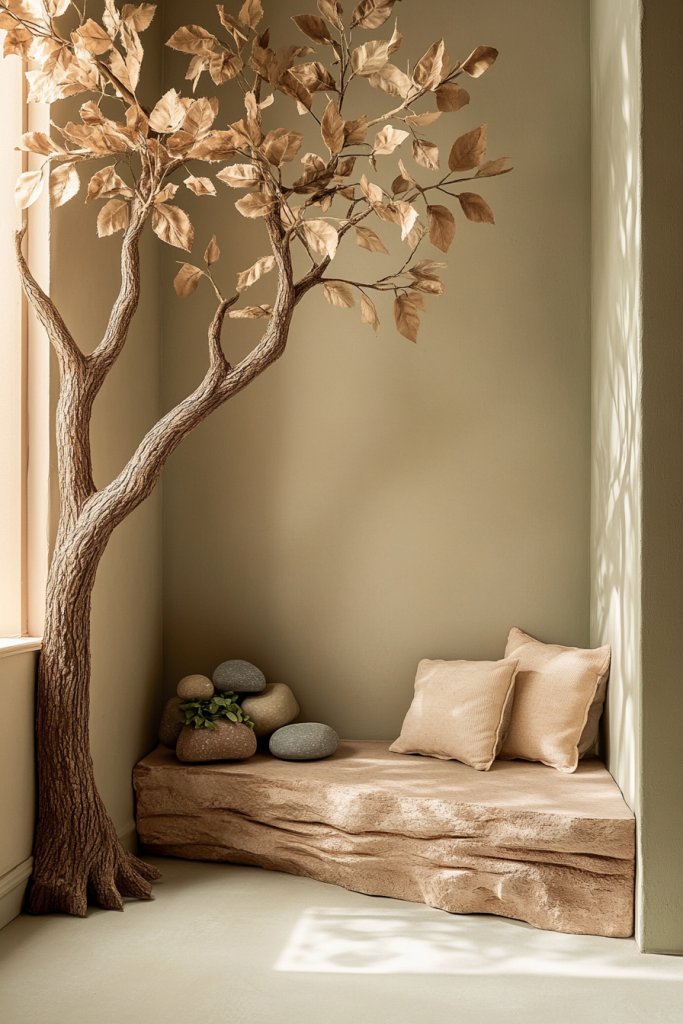
Kids are naturally curious about nature, but bringing the outdoors inside is tricky—until now. Faux trees, earthy tones, and rock accents create a calming, natural vibe that sparks curiosity and tranquility. It’s a fresh way to connect your child’s room with the outdoors without the mess or maintenance of real plants. Ready to create a peaceful woodland retreat?
Picture a small faux tree with textured leaves and a sturdy trunk, placed in a corner or next to a window. Rock-shaped decor and earthy-toned rugs ground the space, evoking a natural landscape. Wooden or stone-like accents add texture and warmth, while earthy color palettes—greens, browns, and beiges—bring a soothing effect. The room feels like a mini forest, inspiring exploration and calmness.
Choose faux trees in different sizes or styles—bonsai, pines, or leafy trees—to suit your space. Incorporate natural textures through woven baskets, jute rugs, or stone-like accessories. Seasonal decor like faux moss or floral accents can refresh the look. Use earthy, neutral palettes for a serene environment or add pops of color in accessories. It’s all about creating a balanced, nature-inspired retreat.
Select high-quality faux trees with realistic textures and secure them in sturdy planters or bases. Arrange rocks and earth-toned decor around for a natural landscape effect. Use soft lighting—like warm LED strips or spotlights—to highlight features. Incorporate textured fabrics or woven baskets for additional natural elements. Keep the space clutter-free and periodically clean surfaces for longevity. Mixing textures enhances the natural feel.
Personalize with themed accessories—like animal figurines, woodland motifs, or themed bedding. Add framed nature-inspired artwork or DIY projects. Use earthy textiles, like linen or burlap, for curtains and cushions. Incorporate your child’s favorite outdoor activities or animals as decor motifs. Seasonal updates with faux foliage or moss can keep the look fresh and inspiring.
A nature-inspired room cultivates calmness, focus, and curiosity. It fosters a connection with the environment and encourages outdoor play and exploration. The natural elements create a peaceful, nurturing space that promotes emotional well-being. Ready to bring the outdoors inside in a stylish, low-maintenance way? It’s simple and endlessly soothing!
17. Incorporate Movement with Balance Beams or Stepping Stones
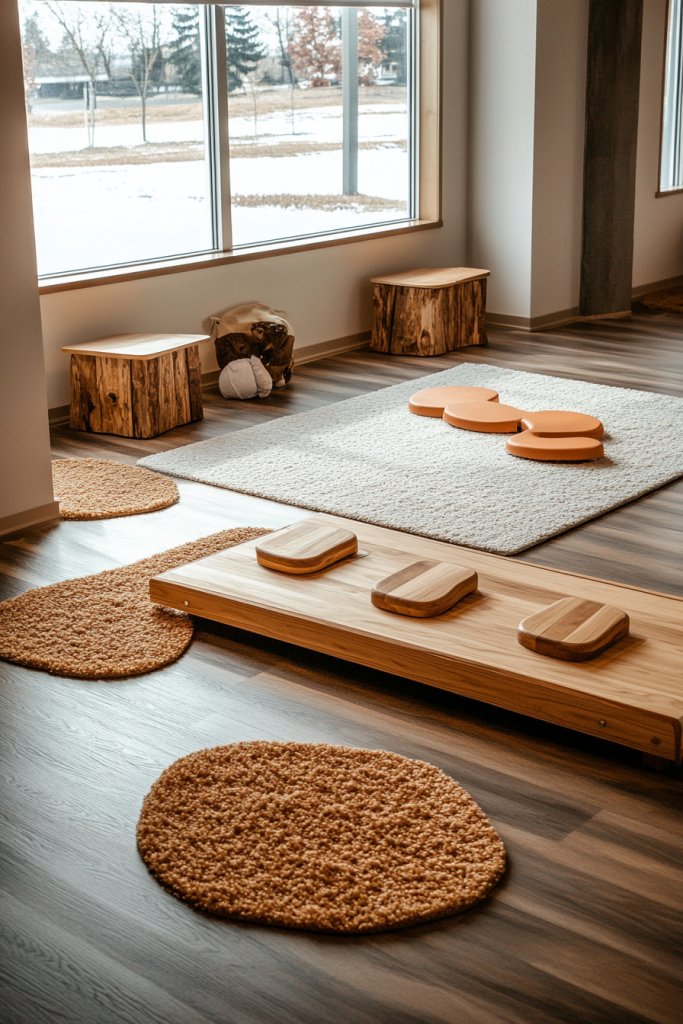
Kids have boundless energy and need opportunities to move, jump, and balance. Static furniture and furniture-only spaces can feel dull, making active play difficult indoors. Including movement elements like balance beams or stepping stones transforms the room into a mini gym and play zone. Who says a kid’s room can’t be a fun, active space?
Imagine a line of colorful foam stepping stones leading to a cozy reading nook or play area. A low balance beam, painted in bright hues, runs across a corner or along a wall. The textured surfaces invite foot and hand exploration, encouraging coordination and balance. The colorful setup sparks activity and adds a playful, inviting vibe. It’s a mini obstacle course right in their room.
Choose foam, wood, or cushioned balance beams that suit your space and safety needs. Incorporate stepping stones in different shapes, sizes, or colors for visual interest. Use textured mats or rugs underneath for added grip and comfort. For small rooms, opt for foldable or lightweight options that can be stored easily. Seasonal or themed options—like jungle or space motifs—can add extra fun.
Securely install or place balance beams on a flat, non-slip surface to prevent accidents. Arrange stepping stones in a pattern that encourages movement and exploration. Use cushioned mats underneath for safety and comfort. Regularly inspect stability and clean surfaces for slip resistance. Encourage your child to practice balancing and jumping, making it a fun routine. Keep pathways clear for safety.
Decorate with themed stickers, colorful paint, or textured tape for added visual appeal. Let your child choose their favorite themes—jungle, space, or sports—to personalize their obstacle course. Rotate or add new movement elements with seasons or interests to keep the room lively. Use storage to keep extra mats or accessories handy. Make it a space they love to move in.
Incorporating movement helps develop gross motor skills and coordination, boosting confidence. It turns active play into a natural part of their daily routine. A room filled with fun movement elements encourages healthy activity and independence. Ready to energize your child’s room with fun, active features? It’s easier than you think and incredibly beneficial!
18. Use of Bright Accent Walls with Geometric or Abstract Patterns
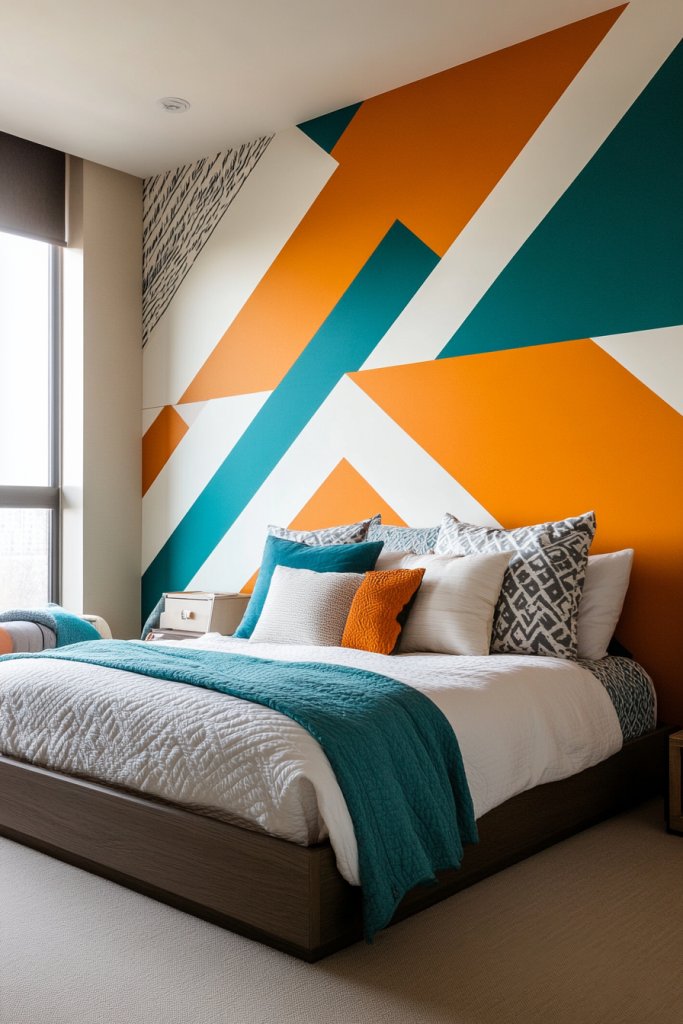
A plain wall can make a room feel dull and uninspired, especially in a child’s space full of personality. An accent wall with bold geometric or abstract patterns adds a striking visual element that energizes the entire room. It acts as a focal point, tying together decor themes and sparking creativity. Who wouldn’t want a statement wall that’s all about fun?
Picture a wall painted with dynamic triangles, circles, or freeform shapes in a rainbow of bright colors. The patterns can be crisp or loosely abstract, depending on your style. The textured or matte finishes create depth, and contrasting colors make the patterns pop. The wall energizes the space, inspiring playful moods and imaginative play. It’s like art that the kids can live inside.
Opt for geometric patterns with tape or painter’s stencils for precision or freehand abstract designs for a more organic look. Use colors that complement or contrast with the rest of the room for maximum impact. For a more sophisticated look, stick to a monochrome palette with subtle patterns. Seasonal or themed accents can be added with removable decals or overlays.
Prepare the wall by cleaning and priming for smooth paint application. Use painter’s tape or stencils to create sharp lines or shapes. Apply multiple coats for vibrant color and crisp edges. Consider textured paints or metallic finishes for added dimension. Once dry, remove tape carefully. Complement with matching decor to enhance the overall look.
Involve your child in choosing the pattern, colors, or shapes to foster ownership. Add metallic or glow-in-the-dark paints for extra flair. Decorate the room with themed accessories that match the accent wall, creating a cohesive style. Change the patterns periodically for a fresh look that keeps the room exciting. Personal touches turn an accent wall into a signature feature.
A bold accent wall transforms the room into a vibrant, energetic space that encourages creativity. It makes the room feel more dynamic and personal, boosting your child’s confidence in their environment. Plus, it’s a fun DIY project that can involve your little one. Ready to make a statement that truly captures their personality? It’s easier than you think and endlessly impactful!
Conclusion
These child bedroom ideas showcase a wonderful mix of themes, colors, and clever design tricks, all aimed at making a child’s space both fun and functional. By trying out some of these inspiring ideas, you can create a unique environment that nurtures creativity and comfort. Don’t be afraid to get creative and make their room a true reflection of their personality—after all, a well-designed space can spark joy and imagination every single day!
Leave a Reply