Ever wished your small space could feel bigger, brighter, and bursting with personality—all without breaking the bank? Cute DIY room decor ideas are taking over Pinterest because they offer a perfect blend of creativity, personalization, and practicality. They allow you to transform any tiny corner into a cozy retreat, all while showcasing your unique style and ingenuity.
Who doesn’t love the idea of customizing their space with simple, budget-friendly projects that make a big impact? In this article, you’ll discover a treasure trove of inspiring and practical decor ideas designed specifically for small rooms. From clever storage hacks to charming decorative touches, these DIY solutions are perfect for maximizing every inch of your space. Whether you’re looking for space-saving furniture, stylish organizers, or decorative accents, you’ll find a variety of ideas that will spark your creativity and help you craft a cute, functional sanctuary tailored just for you.
1. Multi-Functional Wall Shelves for Extra Storage and Style

Imagine turning a blank wall into a sleek, stylish storage hub that also elevates your room’s decor—this is the magic of multi-functional wall shelves. They’re not just for holding books or decorative items; they also help keep your space organized and visually appealing, especially in small rooms where every inch counts.
Visualize a set of minimalist wooden shelves painted in a soft matte white or natural oak finish, arranged asymmetrically to create a dynamic look. Each shelf hosts a mix of small potted succulents, framed photos, and a few decorative ceramics with textured glazes in muted tones.
The shelves are mounted close to the ceiling, drawing the eye upward and making the room feel taller, while the open design keeps the space feeling airy. The overall aesthetic is clean, modern, and cozy—perfect for adding personality without clutter.
Getting started is simple: gather wooden or metal shelves—pre-made or DIY with inexpensive planks and brackets. Securely attach them to your wall using appropriate anchors, depending on your wall type.
Decorate with lightweight objects like small potted plants, framed quotes, or vintage collectibles. For a quick upgrade, paint or stain the shelves beforehand to match your room’s color palette. This project requires basic tools like a drill, level, and screwdriver, making it accessible for most DIYers.
2. DIY Over-the-Door Organizers to Maximize Vertical Space
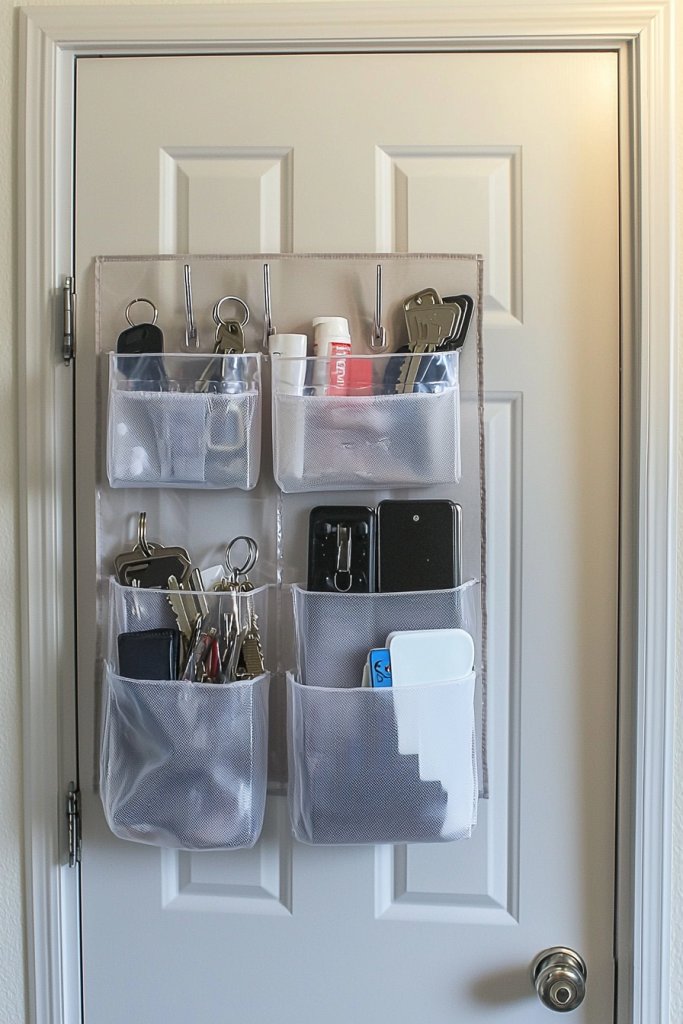
Over-the-door organizers are a game-changer for small rooms, transforming unused door space into a handy storage zone. They keep everyday essentials within reach and free up valuable drawer or shelf space, making your room look neater and more spacious.
Picture a sturdy fabric or plastic organizer hanging over your door, with multiple clear pockets or small compartments. Filled with accessories like scarves, belts, or small toiletries, the organizer adds a splash of color and texture—think soft pastel pinks, blues, or vibrant patterns—while keeping clutter at bay.
When closed, it creates a tidy, streamlined look, and when open, it reveals a neatly arranged display of your favorite items. This setup is especially ideal for small bedrooms, dorms, or apartments.
To make one yourself, start with a fabric or mesh shoe organizer or a DIY version using sturdy canvas or nylon. Attach it to your door with heavy-duty hooks or adhesive strips, ensuring they won’t damage the surface.
Customize the pockets by sewing or gluing clear plastic pockets or fabric bins, which are easy to find at craft stores or repurpose from old accessories. The process is straightforward and affordable, requiring just basic sewing or glueing skills, making it perfect for DIY beginners.
3. Creative Under-Bed Storage Solutions with Stylish Baskets
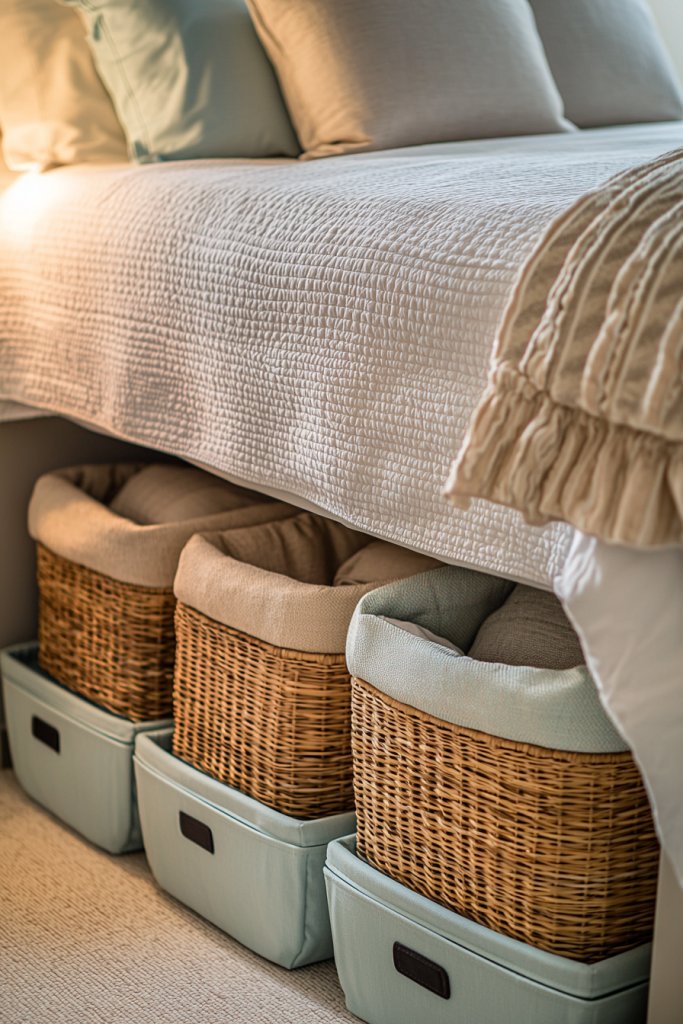
The space beneath your bed is a goldmine for hidden storage, especially in small rooms where closet space might be limited. Using stylish baskets or bins under the bed keeps your belongings out of sight while adding a decorative touch to your space.
Visualize a series of woven wicker or soft fabric baskets in neutral tones—cream, blush, or charcoal—lined up neatly under your bed frame. These baskets are not only functional but also add warmth and texture to your room.
Inside, you could store seasonal clothing, extra bedding, or shoes. The baskets can have handles or lids, making it easy to pull them out or keep contents concealed.
When organized, the space feels tidy and inviting, with a cozy, boutique-like vibe. To create this DIY solution, choose sturdy, lightweight baskets or storage bins that fit your under-bed clearance.
You can repurpose woven baskets, fabric storage cubes, or even cardboard boxes covered with decorative paper. Elevate the look with a soft rug or throw blanket draped over the edge for added style.
Measure your space carefully, then arrange your baskets in a way that’s easy to access. This project is budget-friendly and simple, requiring minimal assembly and perfect for anyone wanting a quick, attractive storage hack.
4. Clever Corner Shelving Units for Display and Storage
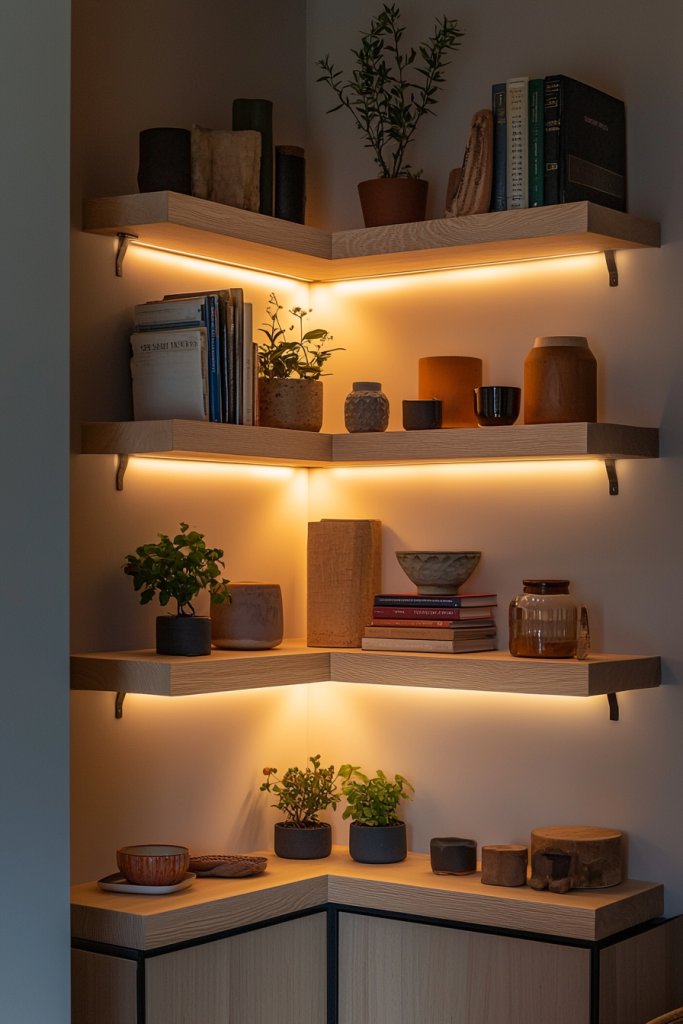
Corners are often overlooked, but they hold immense potential for extra storage and display space. Corner shelving units are clever solutions that utilize these often-wasted areas to add both functionality and visual interest.
Imagine a sleek, triangular shelf made from painted wood or metal, fitting snugly into a corner. The shelves are decorated with small houseplants, candles, or framed photos, creating a cozy vignette that draws the eye.
The layered shelves add depth and dimension, making the room feel more dynamic. The arrangement offers space for books or decorative objects without encroaching on the main living area, keeping your small space open and uncluttered.
To build or buy one, start with pre-made corner shelves or DIY with inexpensive materials like wood or MDF cut into triangles. Mount them securely using appropriate anchors and brackets.
Decorate with a mix of lightweight objects—think ceramic figurines, small baskets, or framed art—keeping the display balanced and visually appealing. This approach is beginner-friendly, requiring only basic tools and materials, and it transforms awkward corners into charming focal points.
5. Foldable or Stackable Furniture Pieces for Flexible Living Areas
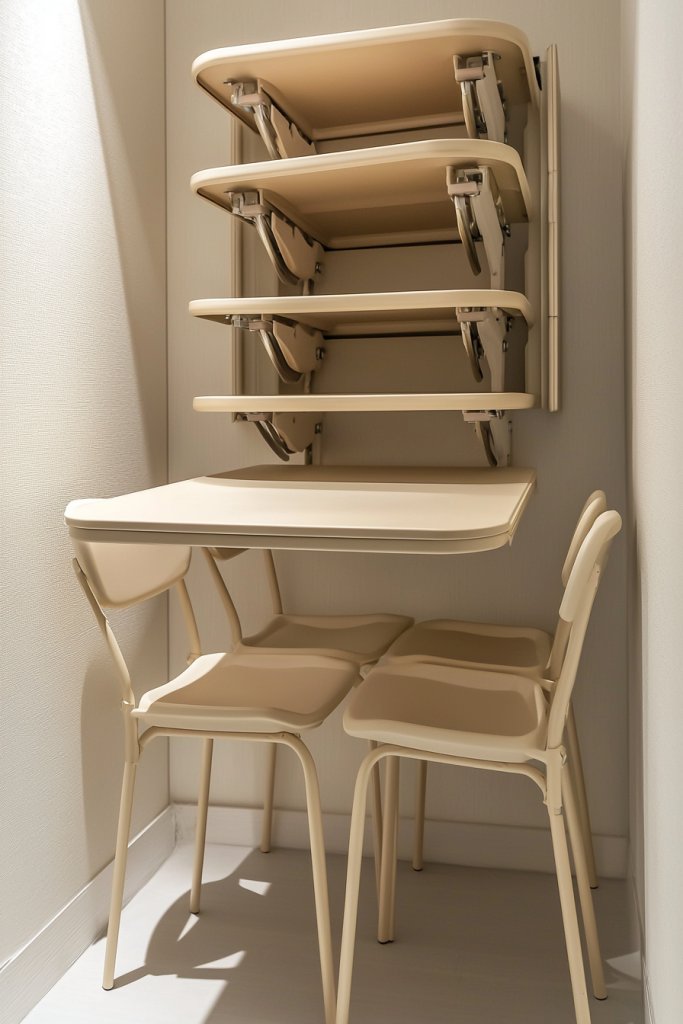
In small rooms, adaptable furniture is essential for maximizing space. Foldable or stackable furniture allows you to easily switch between functional setups, making your space versatile for different activities or guests.
Picture a compact foldable desk in a neutral wood finish that unfolds when you need a workspace and folds away when not in use. Pair it with stackable chairs or stools that can be tucked neatly behind or under the desk.
Alternatively, think of a stackable storage ottoman that doubles as seating during the day and opens up to reveal hidden storage for blankets or books. These pieces help maintain an open, airy feel while providing comfort and utility.
To implement, source foldable tables, wall-mounted drop-leaf desks, or stackable stools from stores or repurpose existing furniture. For a DIY approach, craft a simple foldable table with purchased hinges and a sturdy tabletop or stack wooden crates to create a customizable seating or storage unit.
Focus on lightweight, durable materials like bamboo, plywood, or metal for ease of use. These versatile solutions are beginner-friendly and cost-effective, perfect for adapting your small space to your lifestyle needs effortlessly.
6. DIY Floating Nightstands for Compact Bedside Space
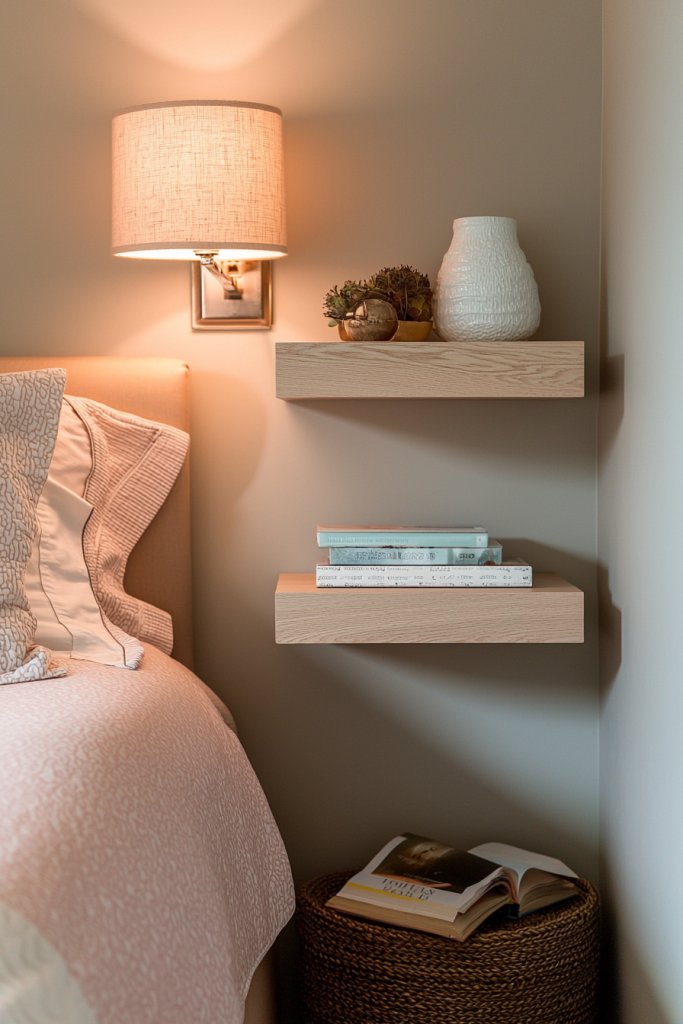
Creating a floating nightstand is a game-changer for small bedrooms, offering a sleek, clutter-free look while maximizing limited space. This idea combines minimalism with functionality, making your bedside area both stylish and practical.
Imagine a simple wooden plank, painted in a soft pastel hue like blush pink or calming mint green, mounted securely to the wall with invisible brackets. The floating surface is smooth to the touch, with a subtle matte finish that complements cozy bedding — think a fluffy white comforter and textured throw pillows.
Below, a small shelf or a narrow ledge holds a favorite book, a small potted plant, or a cute ceramic lamp, all seemingly floating in mid-air. The overall effect feels airy and modern, with clean lines that visually expand the room.
Soft lighting, such as fairy lights or a small LED strip, can add warmth and ambiance, making the space inviting. To make your own DIY floating nightstand, start by selecting a sturdy wooden board—plywood or reclaimed wood work well—and cut it to your desired size, typically around 24 inches long and 8 inches deep.
Mount the board using invisible metal brackets or L-brackets hidden behind the wood for a seamless look; ensure they are anchored into wall studs for stability. Sand and paint or stain the wood to match your decor.
Finally, install the brackets and secure your plank, then decorate with your favorite small items. This simple project can be completed in an afternoon, transforming your bedside area into a minimalist oasis.
7. DIY Upholstered Storage Ottomans for Seating and Hidden Storage
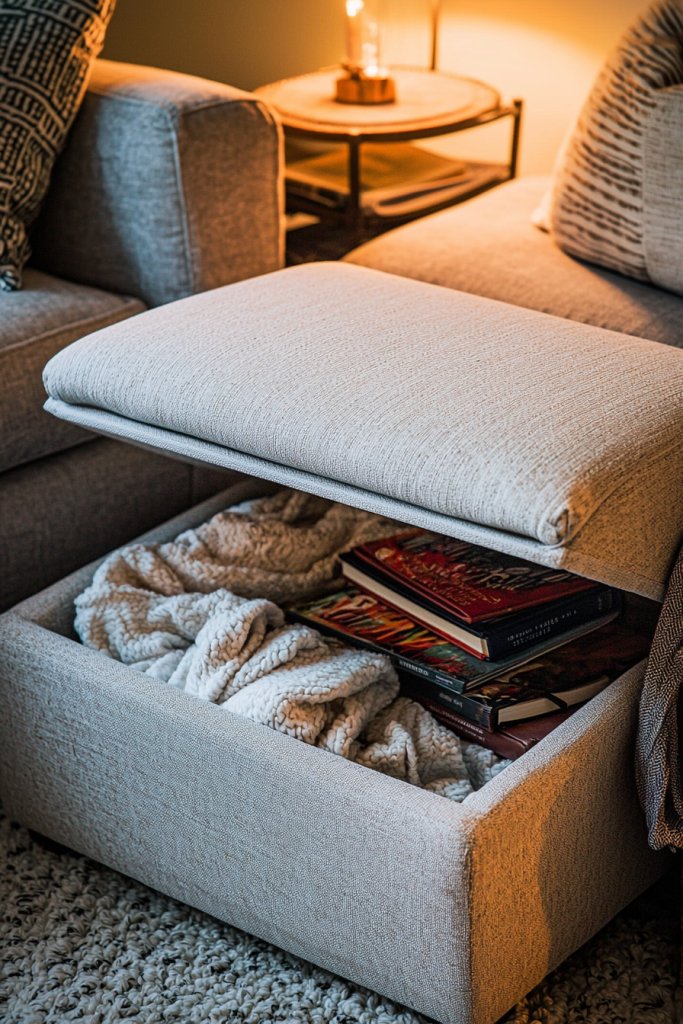
An upholstered storage ottoman is a versatile piece that adds comfort and function to any small room, providing both extra seating and a discreet spot to store blankets, books, or other essentials. Picture a plush, square ottoman topped with a soft cream or blush fabric, featuring a textured surface like chunky knit or velvet for added coziness.
The lid lifts up easily to reveal a spacious storage compartment inside, perfect for tidying away clutter without sacrificing style. The base is sturdy, with short wooden or metal legs that lift it slightly off the floor, making it easy to clean underneath.
This piece invites you to sit down comfortably while also serving as a decorative accent—think a cozy throw draped over the edge and a few decorative pillows nearby, creating an inviting, lived-in vibe. To DIY this project, start with a large storage bin or a wooden crate as the core structure.
Wrap it with foam padding (about 2-3 inches thick) for comfort, then cover it with a decorative fabric like linen or velvet, secured with a staple gun underneath. Attach a hinge or a soft-close lid to make opening and closing smooth.
For the finishing touch, add decorative trim or piping around the edges for a polished look. This DIY ottoman is straightforward and budget-friendly, offering both practical storage and stylish seating in one compact piece.
8. Magnetic or Peel-and-Stick Wall Organizer Boards
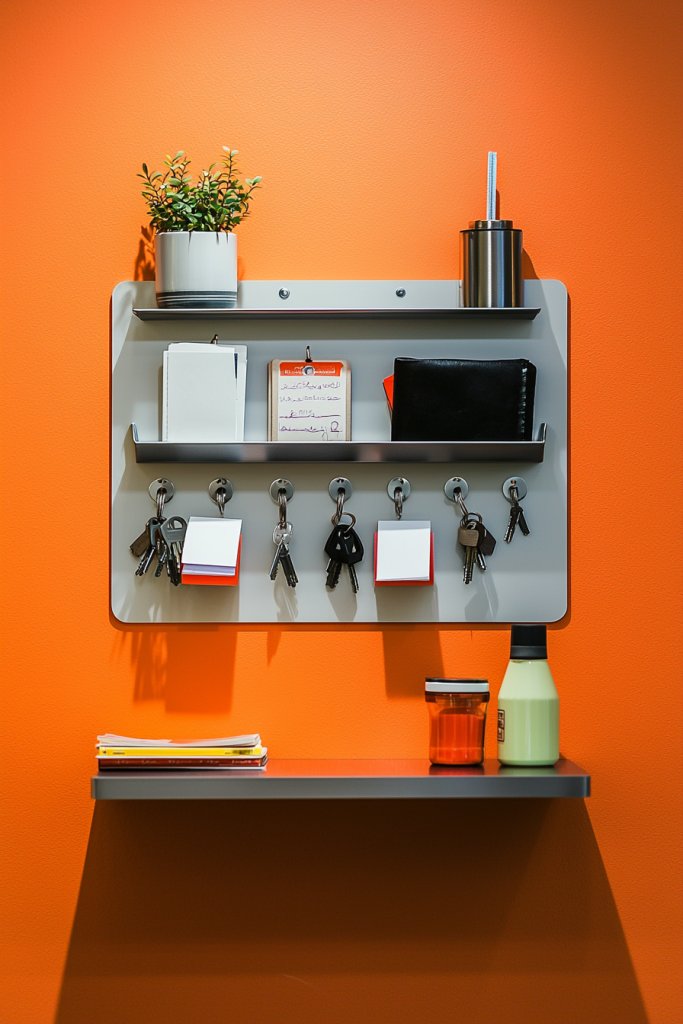
Maximize vertical space with a magnetic or peel-and-stick wall organizer board, turning a blank wall into a functional and decorative hub for your everyday essentials. Visualize a sleek, chalkboard-style or metallic panel, about the size of a small poster, mounted on your wall above your desk or beside your bed.
It features tiny magnetic or adhesive hooks to hold keys, jewelry, or small accessories, while the surface itself can be used for notes, reminders, or decorative magnets. In a modern or boho-inspired room, you might see the board framed in reclaimed wood, with colorful magnets or stylish clips holding photos or postcards.
The overall look is both practical and charming, adding a touch of personality while keeping clutter off surfaces. Installing this DIY organizer is simple: select a magnetic board or peel-and-stick panel available at craft stores or online.
Clean the wall surface thoroughly, then mount the board with double-sided tape or adhesive strips for a no-damage option, or use screws for a more permanent fix. Add hooks, clips, or small baskets as needed. This setup offers a customizable, quick-to-implement solution to keep your essentials organized and within reach, with the flexibility to change the layout anytime.
9. Customizable Pegboard Walls for Accessories and Small Items
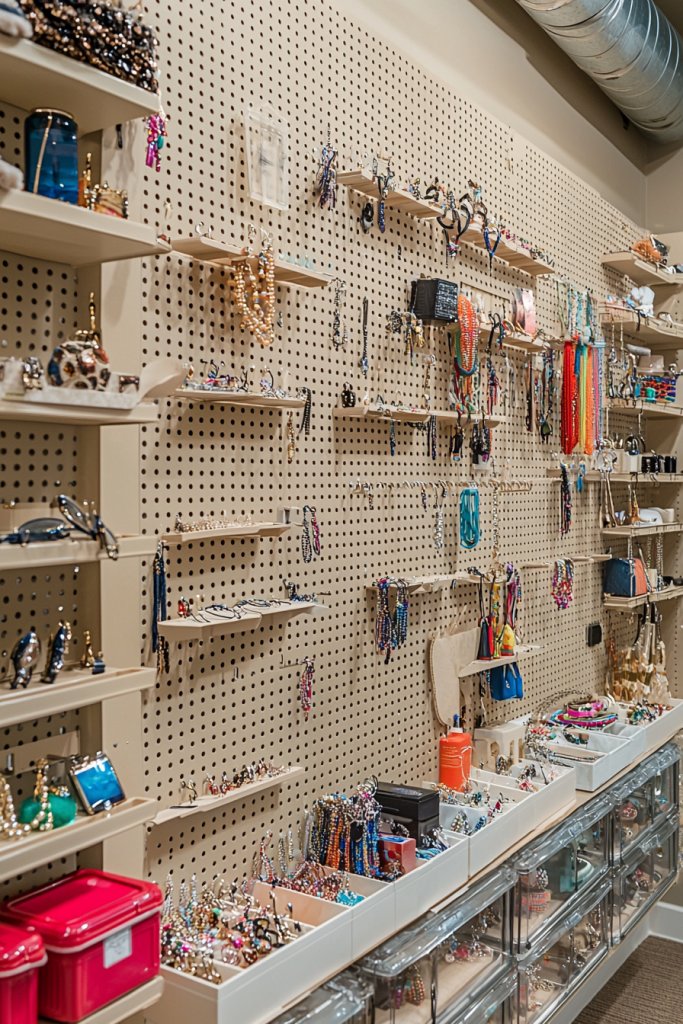
A pegboard wall is a highly adaptable and eye-catching way to organize accessories, jewelry, or small decor items, especially in tiny rooms where every inch counts. Picture a large, grid-like pegboard painted in a neutral tone—think matte black, white, or soft blush—mounted on a blank wall.
You can hang hooks, baskets, or small shelves on the grid to display earrings, sunglasses, handbags, or decorative objects like tiny sculptures or candles. The beauty lies in its flexibility: you can rearrange hooks and containers as your needs change, creating a personalized display that’s both functional and stylish.
Add small decorative elements, like fairy lights or washi tape accents, to enhance the visual appeal. To DIY a pegboard wall, start with a standard perforated board made of metal or wood—available at hardware or craft stores.
Cut it to fit your space if needed. Paint or leave it natural, then secure it to the wall with screws or hooks into studs for stability.
Use a variety of hooks, baskets, and small shelves—many of which are inexpensive and readily available—to organize your accessories. This project is beginner-friendly, quick to assemble, and offers endless customization options, making your small space both tidy and uniquely decorated.
10. Upcycled Crates or Pallets as Space-Saving Coffee Tables

Transforming old crates or pallets into a stylish coffee table is a budget-friendly, eco-conscious way to add storage and personality to your small living space. Visualize a rustic coffee table composed of two or three painted or stained wooden crates stacked or arranged side by side.
The crates, in shades like soft white, pastel blue, or natural wood, serve as both a surface and hidden storage for books, magazines, or blankets. The top can be topped with a glass or wooden plank for a smooth surface, or simply left as is for a more casual look.
Decorate with small potted plants, candles, or decorative trays to enhance its charm. The result is a functional piece that adds warmth and character, while cleverly hiding clutter.
To DIY, source wooden crates or pallets from thrift stores, hardware stores, or online marketplaces. Sand rough edges for safety, then paint or stain to match your decor.
Stack or arrange the crates in your preferred formation, securing them with screws or brackets if needed for extra stability. Add a top surface—a thick piece of glass, reclaimed wood, or a pre-made tabletop—secured with adhesive or brackets. This project is accessible for beginners and highly customizable, turning recycled materials into a chic, space-efficient centerpiece.
11. Compact DIY Desk Solutions with Built-In Storage
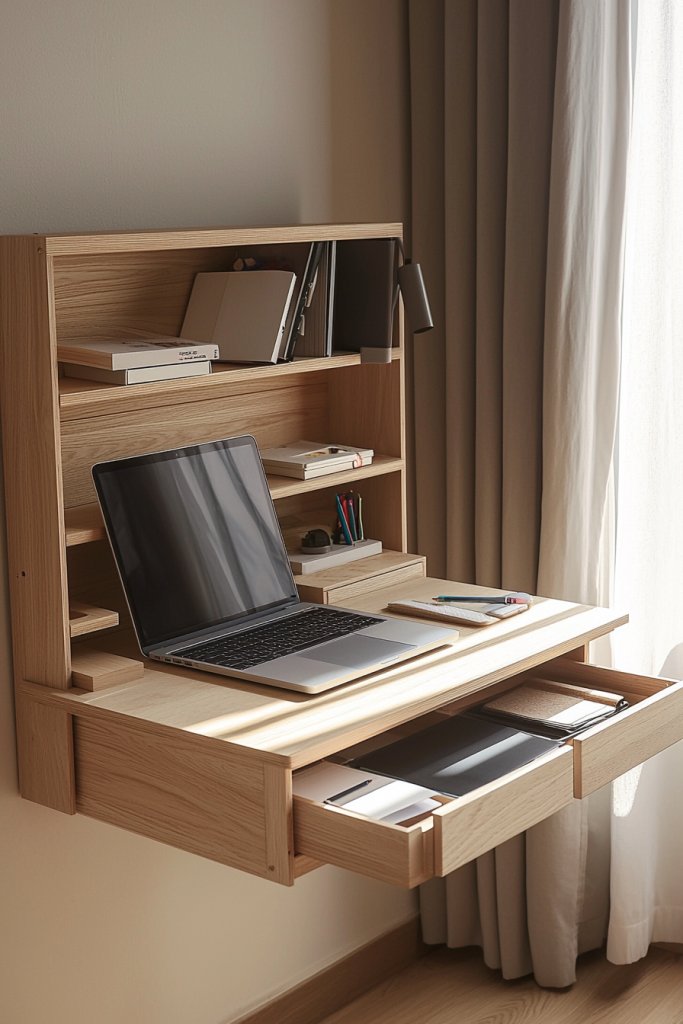
Creating a functional desk in a small space can feel like a puzzle, but DIY solutions can make it both practical and stylish. Custom-built desks with integrated storage maximize every inch, helping you keep work essentials organized without cluttering your room.
This approach transforms a simple workspace into a seamless part of your decor, perfect for studying, working from home, or hobby projects. Imagine a sleek, narrow desk painted in a soft pastel or neutral tone, with open cubbies underneath and small drawers built into the tabletop.
The surface might feature a smooth wood finish or a colorful laminated top, complemented by minimalist handles or no hardware at all. The storage compartments are designed to hold notebooks, stationery, or tech accessories, all tucked away yet easily accessible.
This setup not only keeps your workspace neat but adds a clean, modern aesthetic to your room that feels open and inviting. Getting started is straightforward: measure your space carefully and sketch a simple design.
Use plywood or reclaimed wood for the main structure, then add small baskets or containers inside the compartments for extra organization. You can install a fold-down desktop if space is tight or attach wall-mounted shelves above for additional storage.
Basic tools like a drill, saw, and screwdriver are enough to assemble the pieces. Finish with a coat of paint or varnish, and your custom, clutter-free desk is ready to use!
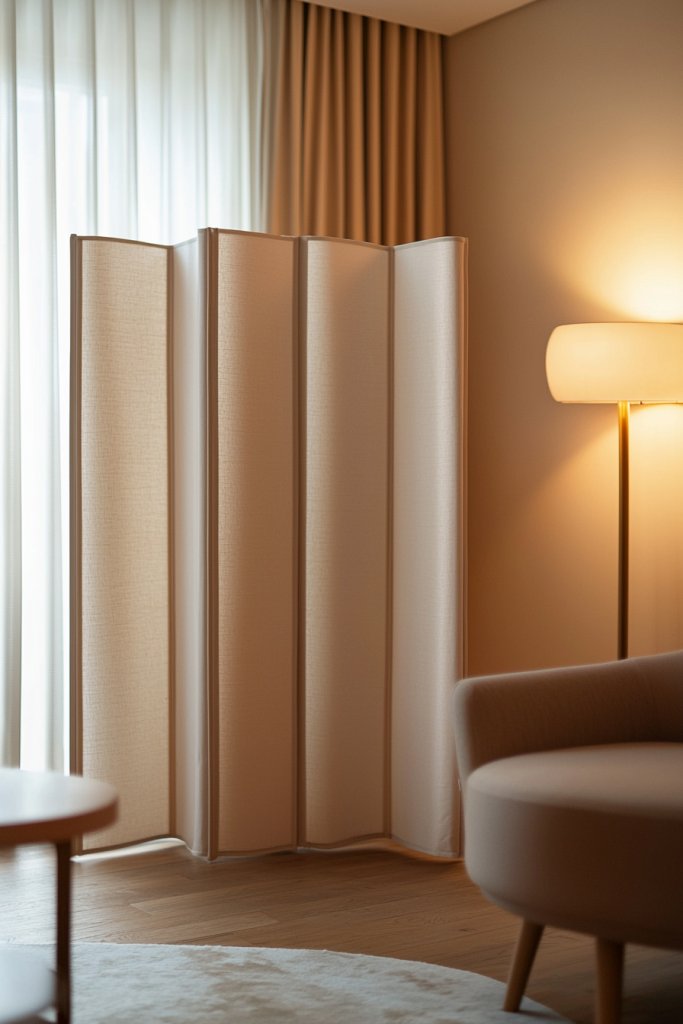
12. Layered or Modular Textile Room Dividers for Privacy and Decor
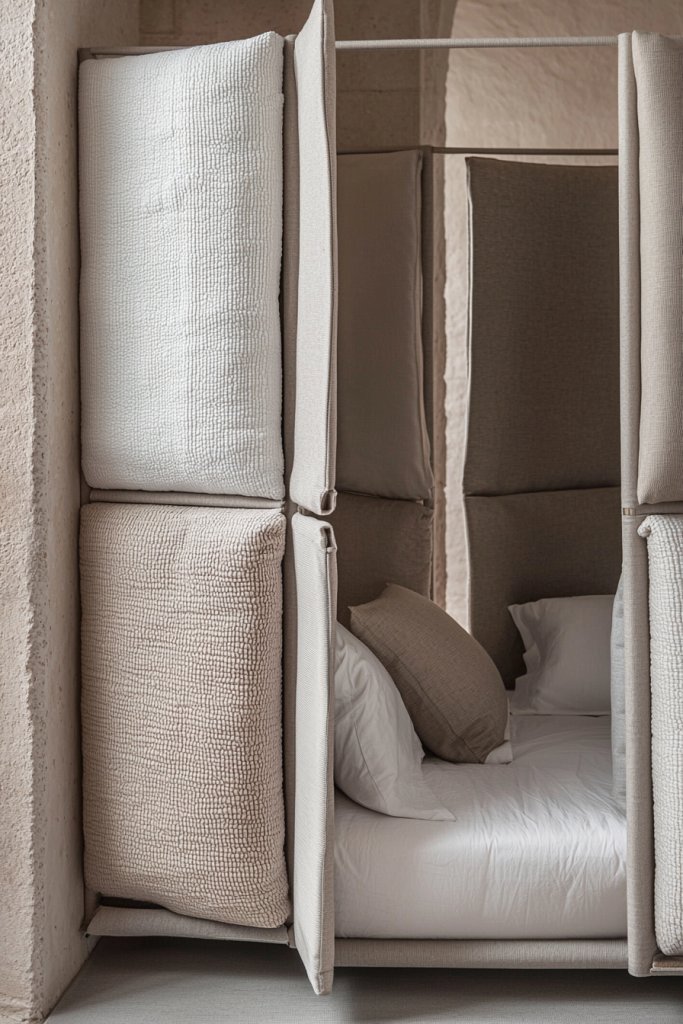
Layered or modular textile room dividers are an inventive way to carve out private zones in a small room while adding texture and color. These soft barriers can be easily assembled, moved, or customized to suit your mood or needs, making your space versatile and visually appealing.
They’re especially great for shared rooms or creating cozy nooks without permanently sacrificing space. Picture a series of lightweight fabric panels in cheerful patterns—think blush pink florals, soft greys, or playful stripes—hung on sleek, unobtrusive rods or tension wires.
They can be layered with sheer curtains for a dreamy, layered effect or combined with plush throws and decorative pillows for a cozy feel. When assembled, they form a semi-private enclosure that’s both functional and beautiful, with gentle movement and tactile softness that invites comfort.
These dividers also offer a charming backdrop for photos or relaxed lounging. To make your own, start with adjustable tension rods or a tension wire system that fits your space.
Choose fabrics like linen, cotton, or faux fur for different textures and budget options. Sew or attach the fabrics in panels, adding decorative trims or tassels for extra flair.
Hang the panels in overlapping layers or in a modular fashion, allowing you to customize the height and width as needed. This DIY project is quick, affordable, and adaptable—perfect for transforming a small room into a cozy sanctuary.
13. Vertical Jewelry and Accessory Holders to Save Dresser Space
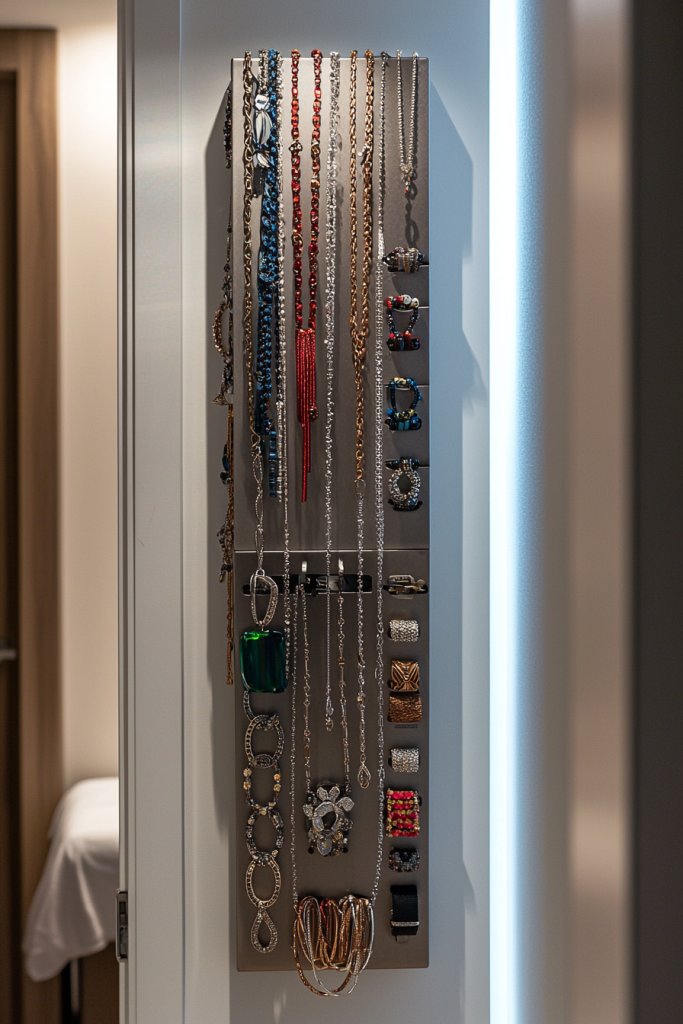
Maximize your small space by turning vertical surfaces into chic, organized jewelry and accessory stations. Vertical holders keep your favorite pieces visible and accessible while freeing up dresser or tabletop space.
They add a decorative element to your room, turning clutter into a curated display of your personal style. Visualize a slim, wall-mounted board with rows of small hooks or pegs—made from wood, cork, or metal—holding necklaces, earrings, and bracelets in a neat cascade.
Alternatively, a tall, narrow acrylic or wire stand with multiple tiers provides space for rings, watches, and hair accessories. Brightly painted or natural wood finishes create a fresh, modern look, while small decorative trays or bowls at the base can hold loose items like pins or keys.
These organizers are both functional and visually appealing, turning your accessories into an eye-catching feature. To DIY, repurpose a wooden plank or an old picture frame by attaching hooks or nails in rows.
Use adhesive-backed hooks or pre-made jewelry hangers for a quick upgrade. For a more decorative touch, paint or stencil the background, or add washi tape borders. Mount your creation on the wall at an accessible height, and you’ll instantly have a clutter-free, stylish space to showcase your jewelry collection—perfect for small rooms where every inch counts.
14. DIY Tiered Plant Stands for Decorative and Space-Efficient Display
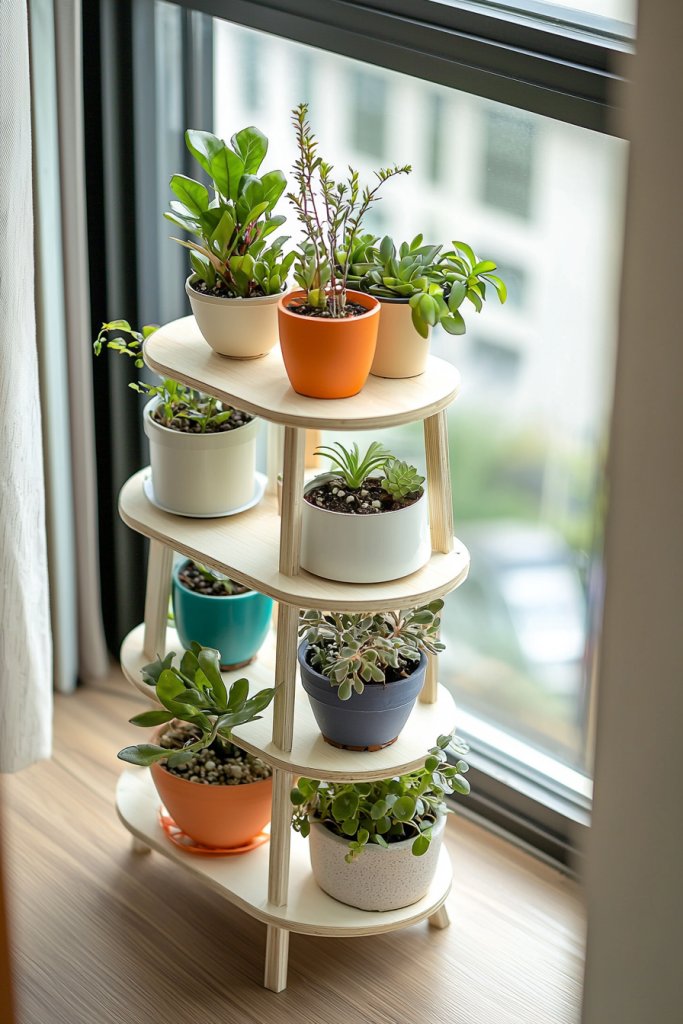
While plants are often associated with decor, tiered plant stands are a clever way to display multiple small potted plants or decorative objects without taking up much space. These multi-level stands add visual interest, elevate your favorite items, and help you utilize vertical space efficiently in a small room.
Imagine a wooden or metal stand with three or more tiers, each designed to hold small plants, succulents, or decorative accents like candles or figurines. The tiers are arranged in a cascading fashion, creating a dynamic display that draws the eye upward.
Choose neutral tones or paint the stand in cheerful colors to match your decor. The stand can be placed in a corner, beside a window, or as a centerpiece, adding height and depth to your room’s layout.
Building your own is simple: gather wood planks or metal rods, cut to your desired lengths, and assemble with screws or brackets. For added stability, incorporate a central pole or support beams.
Finish with paint or stain for a polished look. This DIY tiered stand not only saves space but also introduces layered visual interest, making your small room feel more lively and curated.
15. Lightweight, Collapsible Room Partitions for Flexible Space Use
Flexible room partitions are essential for small spaces, allowing you to create temporary privacy or define different zones without committing to permanent walls. Collapsible and lightweight, these DIY partitions can be moved or stored easily, giving you the freedom to adapt your room layout for work, rest, or entertaining.
Visualize a series of fabric panels or lightweight screens connected by hinges or hooks, in vibrant colors or neutral tones. They can be folded flat when not in use or expanded to create a cozy nook or separate workspace.
Using materials like canvas, linen, or even repurposed bedsheets, combined with simple wooden or metal frames, makes for an inexpensive yet effective divider. The result is a versatile, airy barrier that adds a decorative touch while serving practical needs.
To DIY, attach fabric panels to a foldable frame made from PVC pipes, wooden dowels, or lightweight metal rods. You can add decorative elements like tassels, fringe, or painted patterns for extra personality.
Place the partition in your room to instantly redefine the space, then fold and store it when not needed. This simple project offers both privacy and style, perfect for transforming small rooms into multi-functional spaces.
16. Creative Use of Mirror Walls to Create Illusions of Space
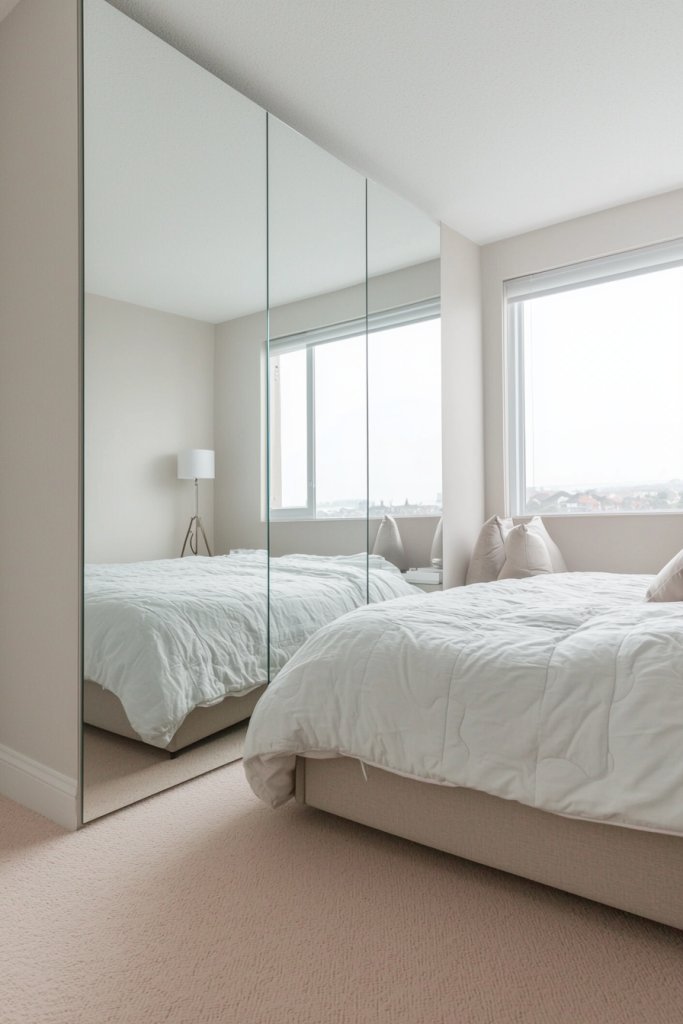
Transforming a small room with mirror walls can instantly make it feel larger and more open, turning a practical idea into a stunning design feature. This clever approach plays with reflections, giving the illusion of depth and space where it might otherwise feel cramped.
Imagine a wall covered in sleek, frameless mirrors that stretch from floor to ceiling, reflecting the soft glow of string lights and colorful decor accents. The mirrors subtly double the visual area, bouncing light around the room and creating a bright, airy atmosphere.
The reflective surface can be arranged in geometric patterns or a simple, continuous pane for a minimalist look, with a faint shimmer that adds a touch of sophistication. When done right, the space feels expansive, and the mirrors themselves become a focal point that enhances the overall aesthetic.
Getting started is simpler than you might think: first, measure the wall area you want to transform. Choose high-quality mirror sheets or large acrylic panels for an easy DIY project—these can be cut to size at your local hardware store.
Secure the mirrors using strong adhesive strips or mounting brackets, ensuring they’re level and safely attached. To avoid sharp edges, consider adding trim or framing for a polished finish. With just a few tools and materials, you’ll create a stunning illusion of space that’s both functional and visually captivating.
17. DIY Hanging Racks for Clothing and Accessories
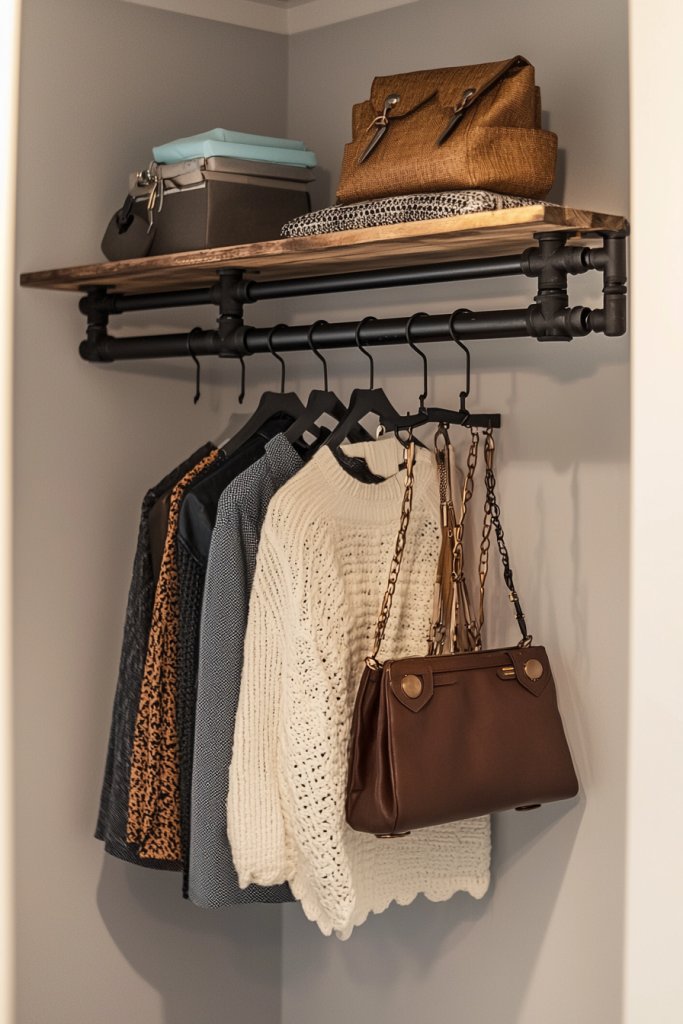
Hanging racks are a game-changer for small rooms, providing a stylish and practical way to organize clothes, bags, and jewelry without sacrificing floor space. They bring an industrial-chic vibe while keeping everything within easy reach, making your room feel more open and clutter-free.
Picture a sleek metal pipe or wooden dowel suspended from the ceiling or mounted on the wall, with decorative hooks or hangers holding your favorite outfits, scarves, or hats. You could also incorporate a few floating shelves above for additional storage or display.
The rack is often finished in matte black, brushed gold, or rustic wood tones, adding a modern yet cozy touch. It’s not just functional; it’s a visual statement piece that adds personality and charm to your space.
To create your own hanging rack, start by selecting your materials—a sturdy wooden dowel or metal pipe and strong wall anchors or ceiling hooks. Measure and mark where you want the rack to hang, then install the hooks securely into the wall or ceiling.
Use decorative hooks or S-hooks to hang your items, which allows for easy customization. For a DIY touch, you can paint or stain the wood or metal to match your room’s color scheme. With minimal tools and effort, you’ll have an attractive, space-saving storage solution that doubles as decor.
18. Upcycled Ladder Shelves for Books, Decor, and Storage
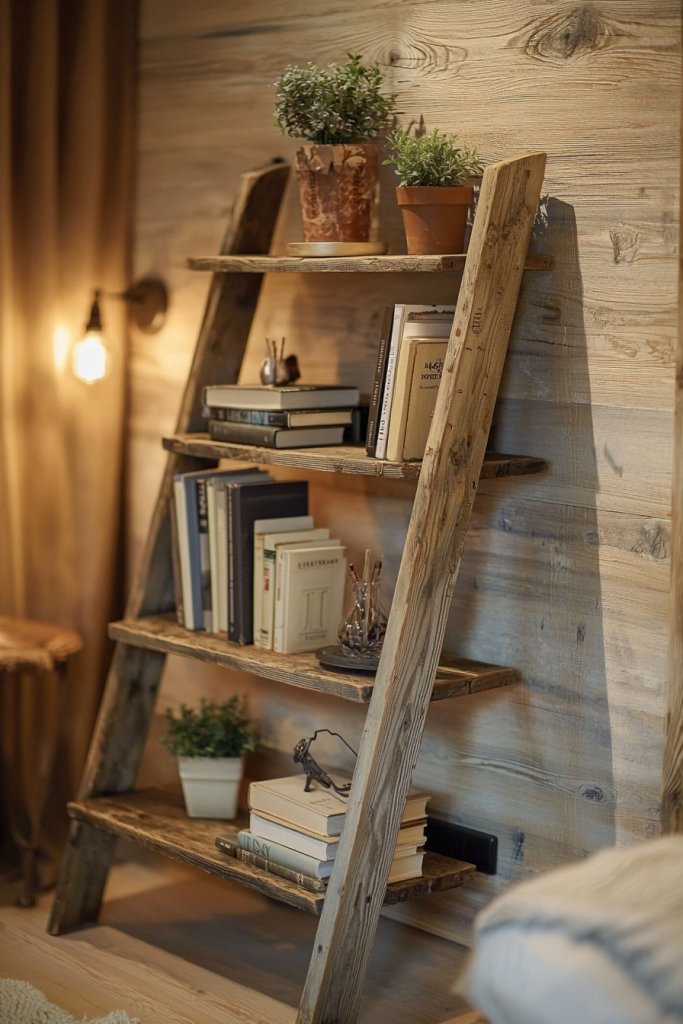
Using an old ladder as a shelf adds rustic charm and clever storage to small rooms, turning a previously unused item into a functional decor feature. It offers multiple levels for books, plants, or decorative objects, freeing up surface space and creating a focal point.
Picture a vintage wooden ladder leaned against a wall, with each rung holding neatly arranged books, woven baskets, or small potted succulents. The natural wood texture adds warmth and character, while the staggered shelves provide visual interest.
You can paint or stain the ladder to match your color palette, making it a versatile piece that complements both modern and bohemian styles. It’s not just practical; it’s a conversation starter and a unique design element.
To DIY this idea, find an old wooden ladder—or build one from scratch using wood planks and sturdy hinges. Sand and paint or stain it for a finished look.
Secure the ladder against the wall at an angle or upright, using wall brackets if needed for stability. Decorate the rungs with your favorite items, focusing on balance and accessibility. This upcycled project is budget-friendly, eco-conscious, and ideal for adding character and storage without cluttering your small space.
19. Clever Use of Under-Window Spaces for Storage or Seating
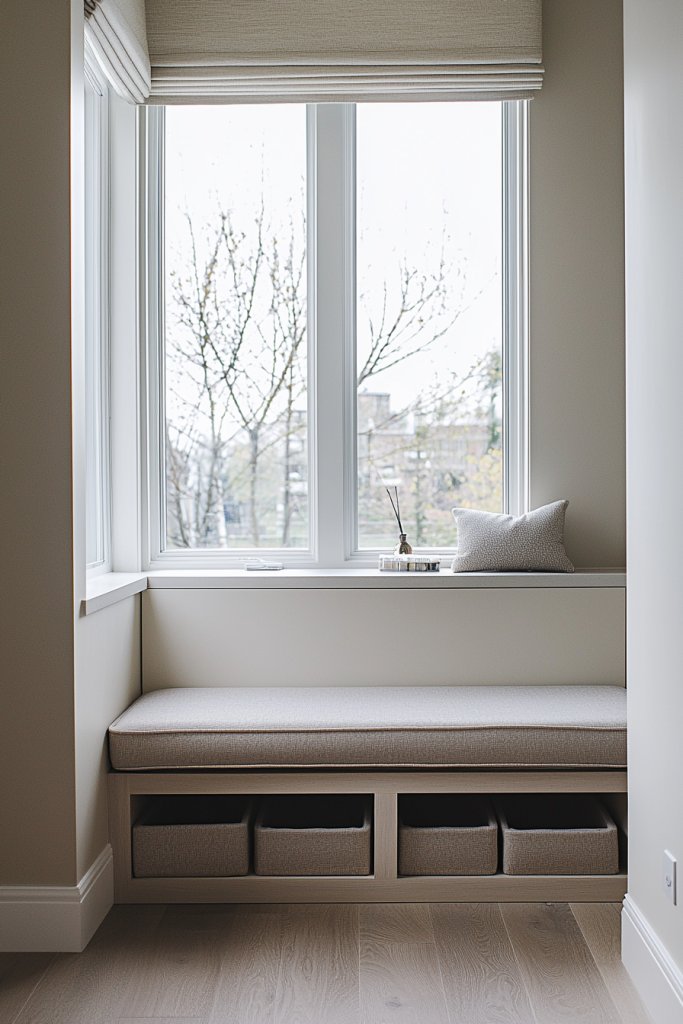
The often-overlooked space beneath a window is perfect for clever storage or cozy seating, especially in small rooms where every inch counts. This multifunctional use of space can dramatically increase functionality while maintaining an open feel.
Visualize a sturdy built-in bench with a cushioned top nestled beneath a window, with storage compartments or baskets tucked underneath for toys, books, or linens. Alternatively, install shallow shelves or cubbies to hold decorative boxes or display small decor pieces, making the area both practical and pretty.
Choosing light-colored paints or natural wood keeps the space feeling airy, while soft textiles like a plush throw and cushions invite relaxation. This approach maximizes underutilized space and creates a welcoming nook.
To implement, measure your window ledge and decide whether you want a bench or shelving. For a seat, build or buy a compact wooden bench with hinged lid storage or use pre-made storage ottomans.
For shelving, install floating brackets and add baskets or decorative bins for organization. Finish with a cozy cushion or decorative textiles to make the space inviting. With simple tools and materials, you can turn an awkward corner into a practical, stylish feature that enhances your small room’s comfort and efficiency.
20. DIY Fabric Banners and Textiles to Add Color and Texture Without Cluttering
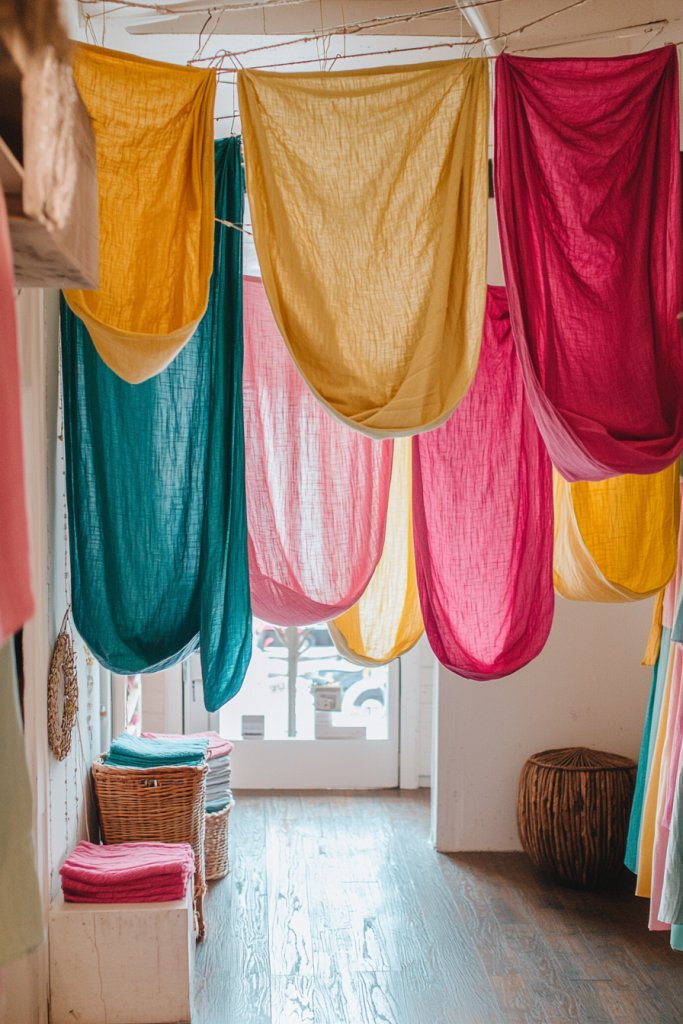
Adding vibrant textiles is a quick way to infuse personality into a small room without sacrificing space. Fabric banners, bunting, or hanging textiles create a playful and cozy vibe, softening harsh lines and adding warmth.
Think of a string of colorful pennant banners with cheerful patterns draped across a blank wall, or a woven tapestry with intricate designs that introduces rich texture. These textiles come in a variety of materials, from lightweight cotton and linen to plush velvet or chunky knit throws, allowing you to choose based on your aesthetic and comfort preferences.
Opt for bold colors like blush pink, mustard yellow, or deep teal to brighten up the space or go for muted earth tones for a calming effect. The key is to layer textiles in a way that feels intentional but not cluttered, making the room feel welcoming and lively.
Imagine walking into a small bedroom where a soft, cream-colored throw with a chunky knit texture is casually draped over a corner of the bed, catching the eye with its tactile appeal. Over the window, a pastel pink fabric banner with tassels gently sways in the breeze, adding a cheerful touch.
A woven wall hanging with fringed edges and a mix of warm hues creates visual interest without overwhelming the space. The textures blend beautifully—smooth cotton, plush velvet, and rough jute—creating a layered, inviting environment.
These textiles also absorb sound, making the room feel cozier, and their lightweight nature means they’re easy to change out seasonally or whenever you want a fresh look. Getting started is simple and budget-friendly.
For a DIY fabric banner, cut triangles or rectangles from your favorite fabric scraps, then sew or glue them onto a length of twine or ribbon. You can also use iron-on adhesive for a no-sew approach.
For throws and cushions, choose textured fabrics like boucle, faux fur, or woven cotton, and sew simple covers with a basic sewing kit or even no-sew adhesive for quick updates. Incorporate decorative tassels or pom-poms made from yarn for extra flair. These textiles are easy to swap out, so you can switch colors and styles as your mood or season changes, keeping your small space fresh and lively.
21. Customized Drawer Organizers to Maximize Closet and Dresser Space
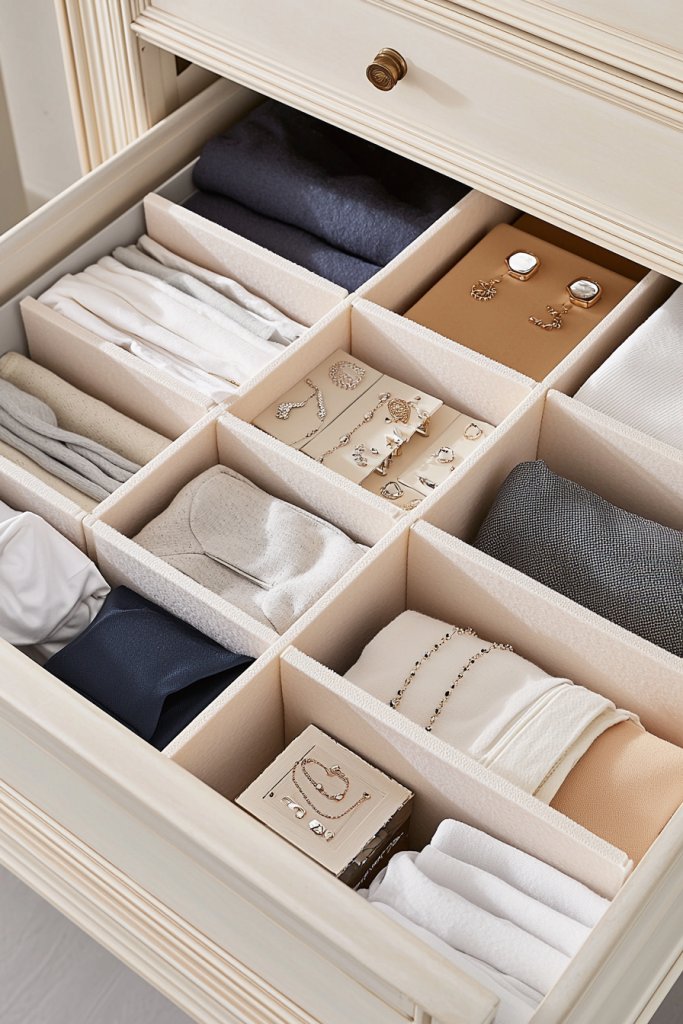
Transforming cluttered drawers into organized, efficient spaces makes a huge difference in small rooms, where every inch counts. Customized drawer dividers and organizers allow you to neatly separate socks, jewelry, underwear, or accessories, preventing chaos and saving time.
You can create your own using simple materials like cardboard, foam board, or repurposed plastic containers, or buy adjustable dividers that fit your drawer dimensions. Using clear or neutral-colored containers helps you see everything at a glance, streamlining your morning routine and reducing stress.
Tailoring these organizers to your specific storage needs ensures that each item has a designated spot, keeping your space tidy and functional. Picture opening a neatly arranged dresser drawer: socks are rolled and stacked in one section, while delicate jewelry pieces are stored in small, labeled compartments made from repurposed cardboard.
A separate section houses your favorite scarves or belts, each folded or hung neatly. The organizers are compact but versatile—clear plastic containers with dividers, small fabric pouches, or DIY cardboard trays—each fitting perfectly into your drawer.
This setup not only maximizes space but also creates a sense of calm and order, making daily dressing a breeze. The visual appeal is clean and minimalist, with everything easily accessible, reducing clutter and making your room feel more spacious.
Creating customized drawer organizers is affordable and straightforward. Measure your drawer’s dimensions carefully and cut cardboard or foam board to fit snugly inside.
Use washi tape, fabric, or paint to decorate and differentiate sections, adding a personal touch. Small plastic containers or divided spice jars work well for jewelry and tiny accessories.
For a more durable solution, purchase adjustable plastic dividers or modular drawer inserts online—these are easy to install and remove for cleaning. Regularly declutter and re-define your sections to keep the system functional and fresh. With a little effort, you’ll enjoy a streamlined, clutter-free space that makes everything easier to find.
22. Hidden Storage Ideas in Staircase or Step Designs
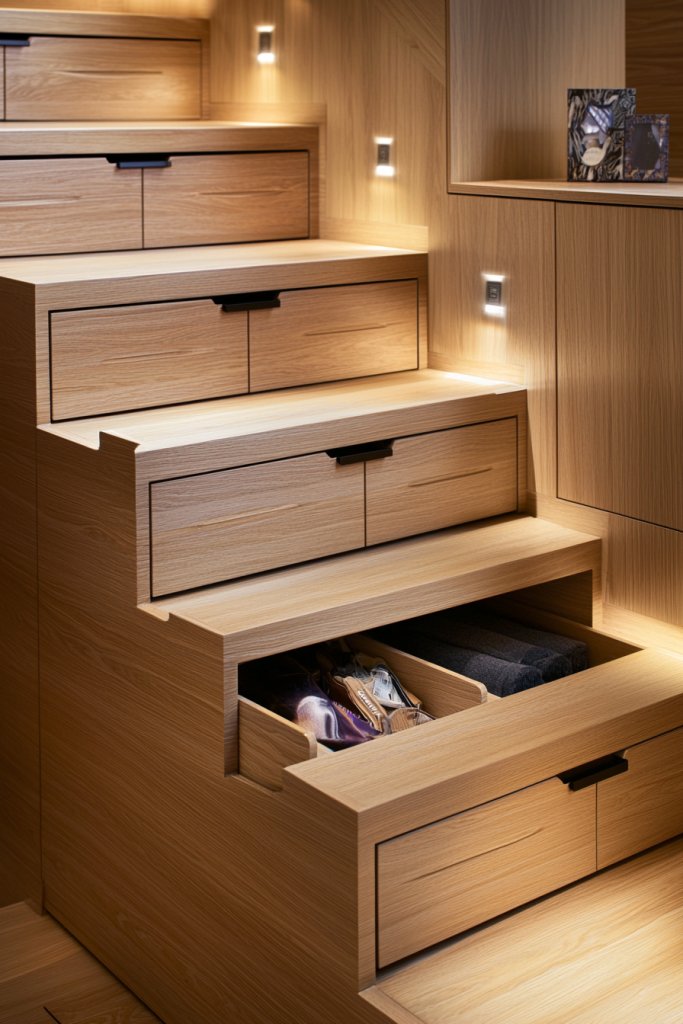
Maximizing every inch of a small room often means turning everyday elements into clever storage solutions—such as staircase or step designs. These areas can hide bulky items out of sight while maintaining a sleek, minimalist look.
For instance, the space beneath a staircase can be transformed into pull-out drawers or cabinets for shoes, books, or seasonal decor. Alternatively, the steps of a staircase can incorporate built-in storage compartments—like hidden drawers inside each riser—that are accessible yet discreet.
These features cleverly utilize vertical space, making your room appear larger while providing ample storage for essentials that might otherwise create clutter. Imagine a staircase where each riser lifts to reveal a shallow, pull-out drawer filled with shoes or extra blankets.
The steps themselves are crafted from wood or MDF, with hinges and handles that blend seamlessly into the design. The area beneath the staircase is fitted with custom cabinets or open cubbies, perfect for storing larger items like luggage or cleaning supplies.
The overall effect is a sleek, hidden storage system that keeps your room tidy and maximizes every available space. The design can be tailored to match your room’s style—from modern with clean lines to rustic with warm wood finishes—making it both functional and attractive.
Implementation is accessible with some basic carpentry skills or DIY kits. Start by measuring the dimensions of your staircase or step area.
For stairs, you can purchase pre-made storage risers or craft your own using plywood or MDF, attaching hinges and handles for easy access. For under-stair storage, build or buy modular cabinets that fit precisely into the space, ensuring they open smoothly.
Label or organize the compartments with baskets or boxes for different categories of items. This method not only declutters your room but also adds a surprising design element—hidden storage that’s both practical and stylish. With patience and some basic tools, this project can be completed in a weekend, transforming your small space into an organized haven.
Conclusion
With so many creative DIY decor ideas—from multi-functional wall shelves and clever storage solutions to stylish upcycled furniture and space-maximizing organizers—there’s a perfect project for every small space challenge. These ideas not only enhance your room’s charm but also make your space more functional and personalized.
Don’t hesitate to try them out and transform your home into a cozy, stylish sanctuary. Get inspired, get creative, and make your small space truly shine!
Leave a Reply