Ever feel like your garage is more chaos than storage haven? You’re not alone! Garage organization ideas have become wildly popular because they offer simple solutions to a common problem—how to maximize limited space while keeping everything easily accessible. A tidy garage not only boosts your home’s overall look but also makes daily chores and DIY projects way more enjoyable.
In this article, you’ll find a treasure trove of inspiration and practical tips to transform your cluttered garage into a well-organized space. From clever storage hacks to stylish touches, we cover a wide variety of ideas suitable for every need and style. Get ready to discover creative ways to optimize your space, simplify your life, and turn your garage into a functional, inviting area you’ll actually enjoy using!
1. Install Overhead Ceiling Racks for Seasonal Storage
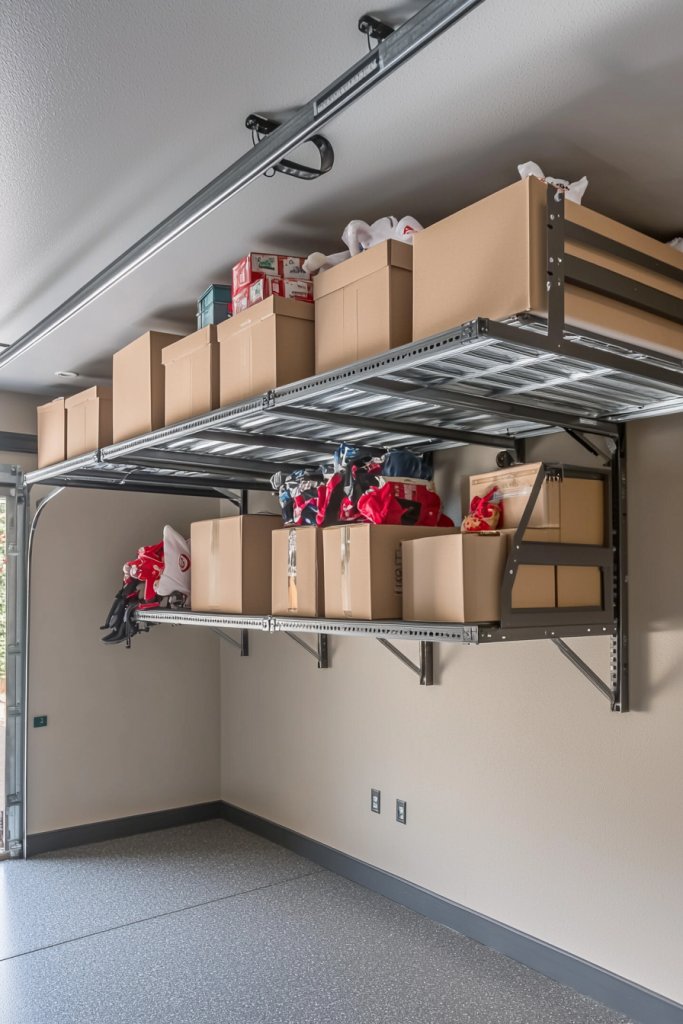
Maximizing space in your garage becomes effortless with overhead ceiling racks, especially for seasonal items that aren’t used year-round. This clever solution helps keep your floors clear and your garage look tidy, while providing ample storage for holiday decorations, camping gear, or bulky sports equipment.
Imagine sturdy metal racks suspended from the ceiling, painted in neutral tones like matte black or silver that blend seamlessly with garage walls. These racks hold large plastic bins or boxes filled with Christmas ornaments, Halloween costumes, or summer beach gear.
The space above your car becomes an organized storage zone, with items easily accessible by a step ladder or small stool. The overall feel is open and clutter-free, with a sense of order and efficiency that makes your garage inviting rather than cramped.
To implement, start by measuring your ceiling height and selecting heavy-duty overhead racks designed for garage use—many come with adjustable brackets. Securely attach the racks to ceiling joists using a drill and appropriate anchors.
Then, place labeled plastic bins or sturdy storage boxes onto the racks, ensuring weight distribution is balanced. For added safety, consider installing safety straps or guardrails. This simple upgrade transforms unused vertical space into a practical, invisible storage solution that keeps seasonal items out of the way but still within reach.
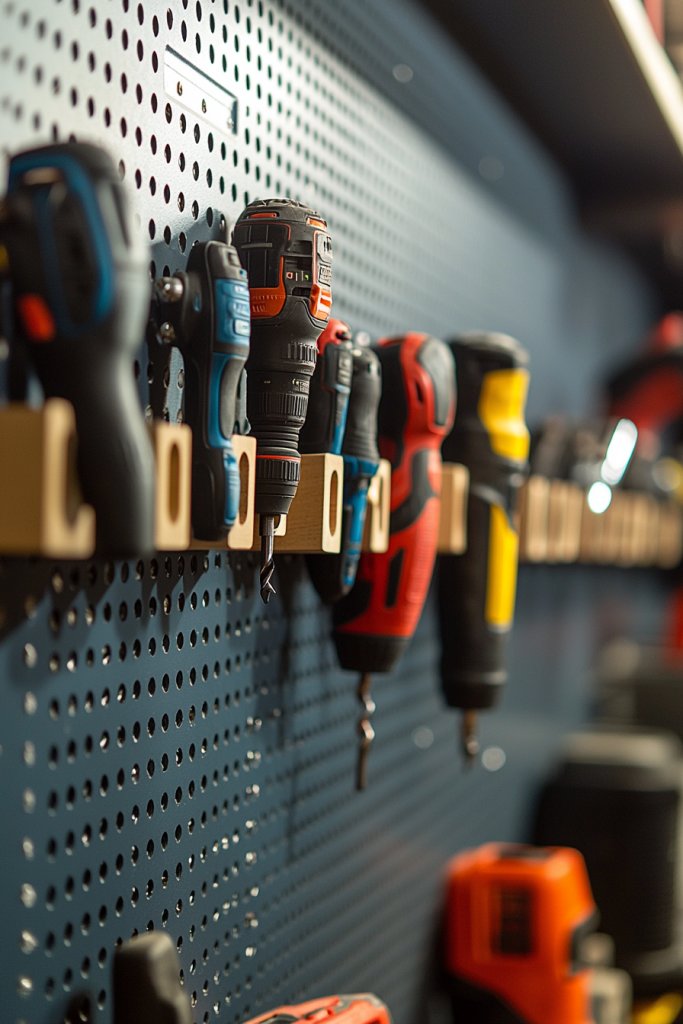
2. Use Wall-Mounted Pegboards for Tools and Accessories

A wall-mounted pegboard is a game-changer for organizing tools and small accessories, turning cluttered drawers into a sleek, accessible display. It allows you to customize your storage with hooks, baskets, and shelves, making every tool easy to find and put away.
Visualize a large, honeycomb-patterned pegboard painted in a bold color like navy blue or classic white, mounted on a blank garage wall. Metal hooks hold a variety of tools—screwdrivers, pliers, hammers—each in its designated spot.
Small baskets hang from the grid to contain nails, screws, or other tiny hardware, while a few adjustable shelves display spray cans or cleaning supplies. The tactile surface invites a quick glance and effortless access, with tools neatly aligned in a way that’s both functional and visually satisfying.
The overall aesthetic is industrial-chic, with a sense of order that reduces stress and saves time during projects. To set up, purchase a durable pegboard panel (preferably made from metal or high-quality MDF).
Mount it securely to your wall using screws and anchors, aligning it at a comfortable height. Decide on your tool layout before hanging, grouping similar items together.
Use a variety of hooks, baskets, and shelves—many are adjustable—to accommodate different sizes and types of tools. Label each section with simple tags or paint markings for quick identification. With this setup, your garage transforms into a well-organized workshop that makes DIY projects more enjoyable and less chaotic.
3. Incorporate Stylish Storage Cabinets and Lockers
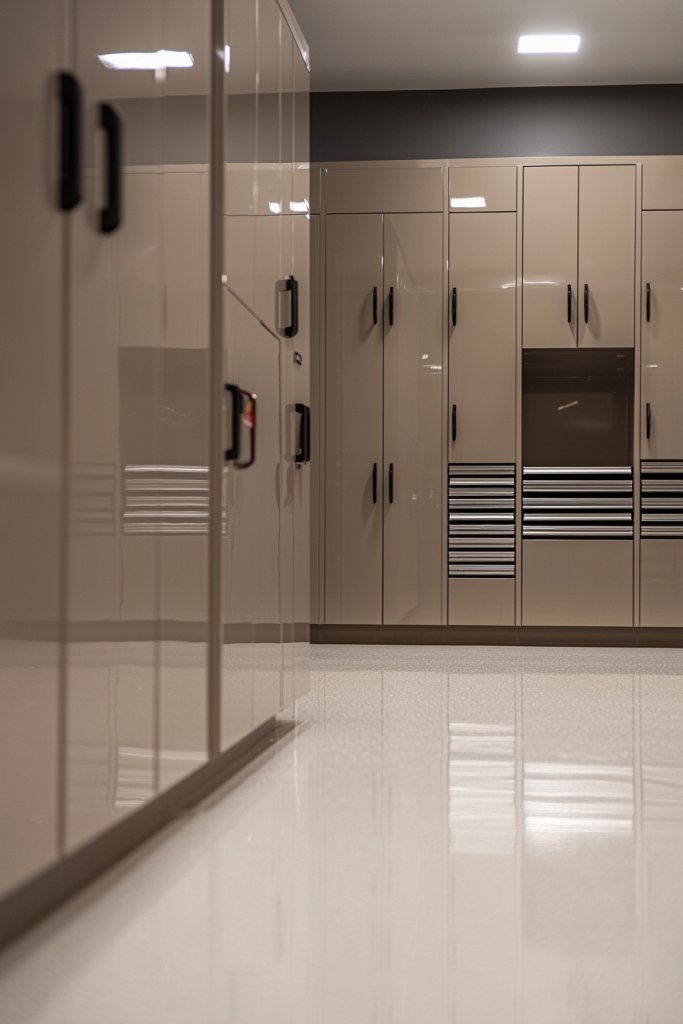
Stylish storage cabinets and lockers are the perfect blend of function and design, providing a clutter-free look while hiding away tools, supplies, and outdoor gear. They elevate the ambiance of your garage, making it feel more like an extension of your home.
Picture sleek, matte-finish cabinets in shades like charcoal gray, soft beige, or bold navy, with clean lines and minimal hardware. These cabinets sit flush against the wall, with some featuring glass doors to display neatly organized bins or baskets inside.
The doors hide the mess of everyday clutter, while the solid surfaces offer a tidy workspace or a place to set down items temporarily. The overall vibe is modern and inviting, with a tidy, cohesive aesthetic that complements your home’s decor.
To incorporate, choose durable cabinets made from moisture-resistant materials—metal, high-quality wood, or laminate. Measure your available wall space and select sizes that fit well without overcrowding.
Install the units securely to studs with a level and drill, ensuring safety and stability. Inside, use storage bins or baskets to keep smaller items organized.
Consider adding decorative labels or handles for a polished look. This investment creates a versatile storage solution that keeps your garage neat and stylish, perfect for everyday use or special projects.
4. Utilize Slim Rolling Carts for Flexible Storage

Slim rolling carts are the ultimate in versatile, mobile storage, allowing you to easily move supplies around your garage as needed. They’re ideal for organizing cleaning supplies, small tools, or craft materials while maintaining a sleek profile.
Imagine a narrow, stainless-steel or plastic cart with multiple tiers, each fitted with small bins or drawers. It rolls smoothly on casters, allowing you to pull it out for quick access or tuck it away when not in use.
The cart can be stationed near your workbench, laundry area, or storage zones, with a clean, minimalist look in neutral tones like gray or black. Its compact size doesn’t take up much space, yet it offers ample room to keep your essentials organized and within reach.
The tactile experience is one of convenience—just wheel it over, grab what you need, and roll it back out of sight. Getting started is straightforward: select a slim cart with sturdy wheels and enough tiers for your needs.
Use labeled small bins or removable trays to categorize items like rags, cleaning sprays, or small hand tools. Place the cart in a convenient location, and customize the contents based on your routine.
For added durability, opt for materials like heavy-duty plastic or painted metal that resist rust and wear. This simple addition enhances your garage’s flexibility, making chores quicker and storage more adaptable.
5. Hang Bikes and Sports Equipment on Wall Racks

Wall-mounted racks for bikes and sports gear are a smart way to free up floor space and keep your outdoor equipment organized and protected. They turn clutter into a visually appealing display while making gear easily accessible.
Picture a sturdy wall rack in a matte black or galvanized finish, holding two or three bikes by their frames or wheels. Adjacent to the bikes, hooks and bins store helmets, skateboards, baseball bats, or tennis rackets.
The equipment hangs neatly, with colorful helmets and sports gear adding a vibrant touch against the garage’s neutral wall. The overall effect is functional yet stylish, with a sense of order that inspires outdoor activity and reduces tripping hazards.
To install, choose heavy-duty wall brackets or racks rated for your gear’s weight—most come with mounting instructions. Locate wall studs with a stud finder for secure anchoring, then drill and attach the racks firmly.
Hang bikes by their frames or wheels, adjusting the height as needed for clearance. Use hooks for smaller items like helmets or skateboards, and label storage zones if desired. This setup not only saves space but also creates a dedicated area that celebrates your active lifestyle, making gear tidy and ready for the next adventure.
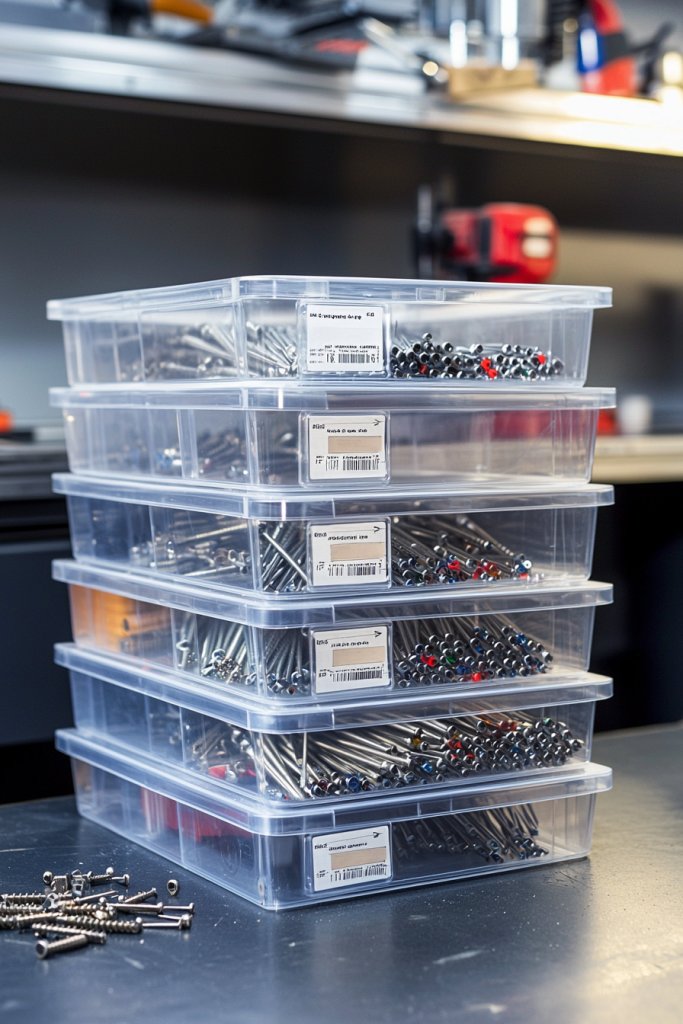
6. Implement Clear Plastic Bins for Visible Storage
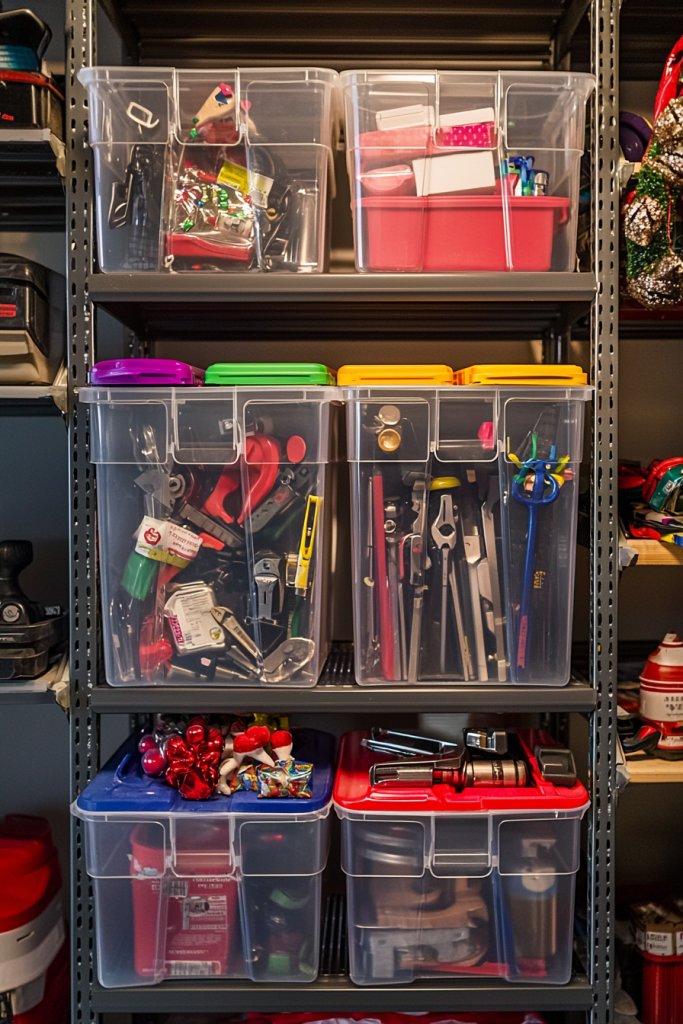
Imagine opening your garage and instantly seeing where everything is—no more rummaging through cluttered shelves or guessing which box holds your holiday decorations. Clear plastic bins are game-changers for maintaining an organized space because they combine practicality with a clean, modern look.
Their transparent surfaces allow you to quickly identify contents, saving you time and frustration, especially when searching for small hardware, screws, or seasonal items. Plus, they come in various sizes, making it easy to stack and maximize vertical space while keeping everything accessible.
Visually, these bins are sleek and functional. Picture a series of sturdy, stackable containers in neutral tones like clear, frosted, or even muted pastels, neatly arranged on shelves or the floor.
Inside, small parts like nails and screws are sorted into smaller, labeled containers, while larger bins hold bulky items such as holiday lights or gardening tools. The textured lid edges provide a secure fit, and the transparency creates an airy, uncluttered aesthetic that brightens the whole garage.
The smell is neutral, and the smooth surfaces make cleaning a breeze. Overall, these bins create a tidy, streamlined appearance that’s as pleasing to the eye as it is practical.
Getting started is simple: purchase a variety of clear plastic bins—think medium-sized for general storage and smaller ones for tiny hardware. Label each container with a permanent marker or printable labels for quick identification.
Stack the bins on sturdy shelving units or directly on the garage floor, organizing by category or frequency of use. For a budget-friendly option, repurpose clear storage containers from your home or buy stackable bins in bulk online. Just ensure they are durable, with tight-fitting lids, and you’ll have a neat, visible storage system that makes your garage instantly more organized.
7. Create a Dedicated Workshop Zone with Workbenches and Tool Walls
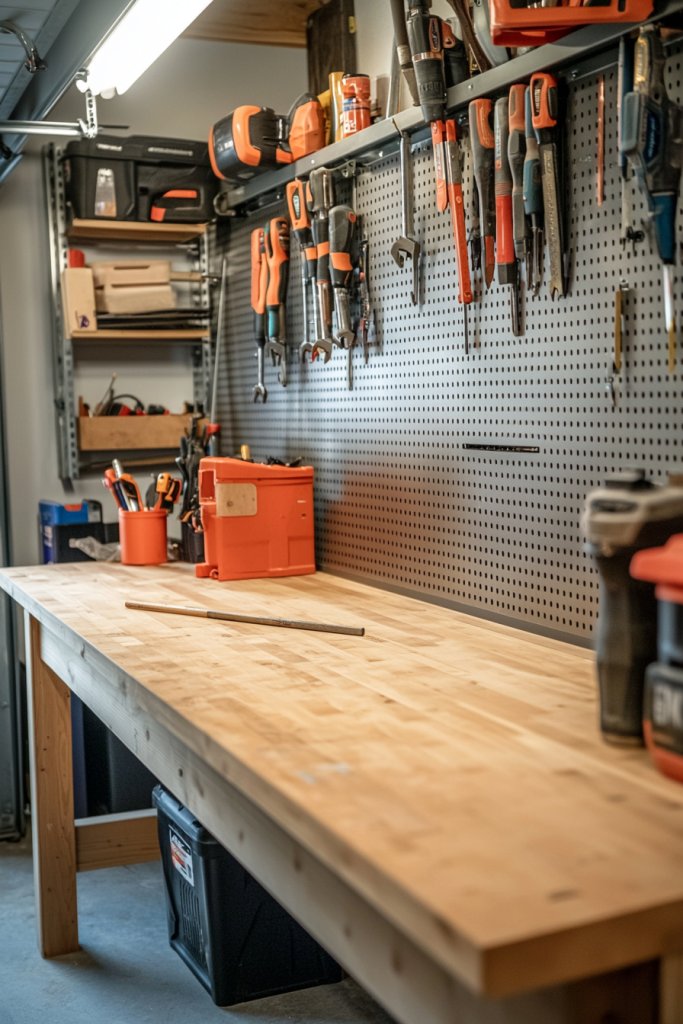
Transforming part of your garage into a functional workshop can make DIY projects more enjoyable and efficient. By carving out a designated area equipped with a sturdy workbench and a wall-mounted tool wall, you’ll have a dedicated space that encourages creativity and keeps clutter at bay.
This zone acts as your personal crafting hub, where everything is within arm’s reach, and the space feels organized and inspiring. Plus, a well-planned workshop zone can boost your motivation to tackle home improvements or hobbies regularly.
Visualize this setup: a robust wooden or metal workbench, about waist-high, with a smooth surface for cutting, assembling, or painting. Behind it, a slatwall panel or pegboard covers the wall, dotted with hooks, baskets, and shelves holding tools like hammers, screwdrivers, pliers, and measuring tapes.
The area is well-lit with bright, adjustable LED lights—perhaps a task lamp hanging overhead. The color palette is neutral with pops of color from tool handles or small containers, creating a functional yet inviting space.
The sound of power tools echoes softly, and the scent of fresh wood or metal adds to the workshop vibe, making it a dedicated zone that feels both practical and motivating. To create this space, start by selecting a sturdy workbench—either build your own with reclaimed wood or buy a ready-made option.
Mount a slatwall or pegboard on the wall above, securing it tightly with appropriate anchors. Organize your tools into categories and hang them on hooks or store in small bins attached to the panel.
Add lighting and a comfortable chair if space allows. Use wall-mounted shelves for larger supplies, and consider installing a small trash bin nearby for easy clean-up. With these simple steps, you’ll have a fully functional, clutter-free workshop zone ready for any project.
8. Use Magnetic Strips for Small Metal Tools and Parts

Magnetic strips are a clever, space-saving solution for organizing small metal tools like screwdrivers, wrenches, and fasteners. Instead of cluttered drawers or scattered on work surfaces, these strips keep essentials visible and within easy reach.
Their sleek, minimalist design adds a modern touch to your garage while improving workflow, especially when you’re in a hurry. Magnetic strips also prevent small items from getting lost in cluttered corners, making your entire workspace more efficient and safer.
Imagine a narrow, aluminum or steel strip mounted horizontally on a wall, with tools like pliers, screwdrivers, and wrenches securely held in place with their metal shafts and handles. Small metal parts such as nails, screws, and washers can also cling to the strip, providing a tidy display.
The tactile experience of grabbing a tool from the strip is satisfying, and the visual order instantly brightens the workspace. The metal surface glints slightly in the garage lighting, adding a polished look.
This setup makes your tools more accessible and your garage more organized, with everything you need clearly visible and easy to grab. Starting is straightforward: purchase a magnetic strip or bar—options range from simple adhesive-backed models to heavy-duty mounted versions.
Clean the wall surface thoroughly, then securely attach the strip using screws or strong adhesive, depending on the weight of your tools. Arrange your tools in a logical order—perhaps by size or frequency of use—and hang the most-used items at eye level for convenience.
For a budget-friendly alternative, repurpose a strong metal strip from a hardware store or salvage yard. With minimal effort, you’ll enjoy a clutter-free, highly functional tool storage solution that transforms your garage into an organized workspace.
9. Add Decorative Baskets for Quick Access Items
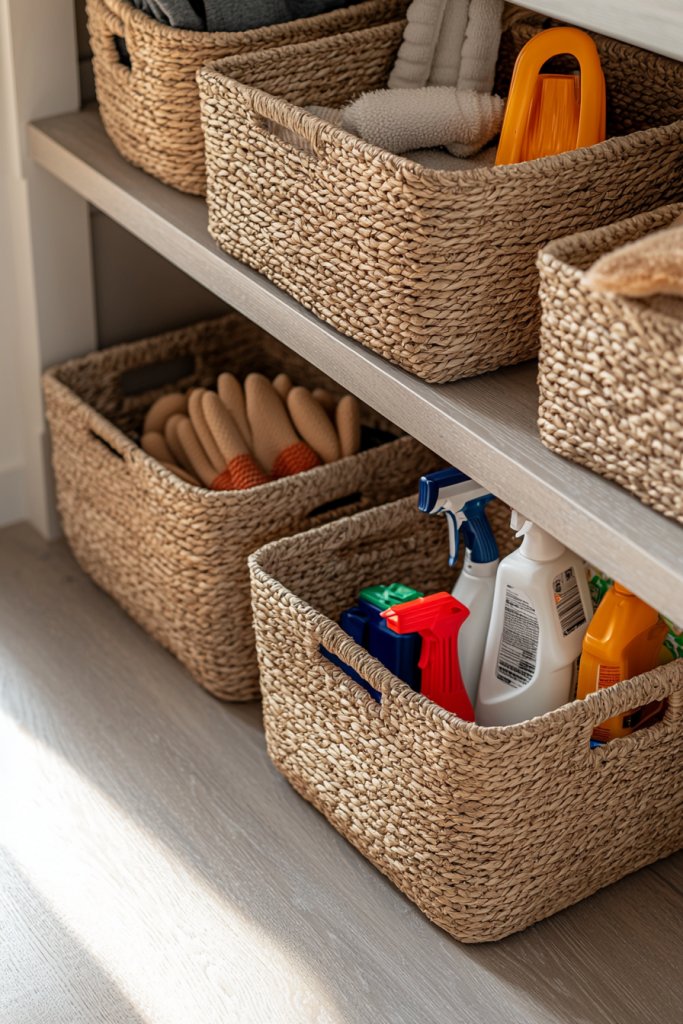
Incorporating decorative baskets into your garage organization can elevate functionality while adding a touch of style. These woven or fabric baskets are perfect for storing everyday essentials like gloves, cleaning rags, or car wash supplies, all within easy reach.
Their attractive appearance can soften the utilitarian feel of the garage, making the space feel more inviting and cohesive. Plus, their open design allows you to see at a glance what’s inside, reducing search time and keeping clutter contained.
Visualize a set of textured baskets—perhaps in natural jute, soft cotton, or colorful woven materials—placed on open shelves or atop storage cabinets. They add warmth and visual interest, contrasting nicely with metal shelves or plastic bins.
Inside, you might find neatly folded gloves, microfiber cloths, or spray bottles, all organized and easy to grab. The baskets’ tactile textures create visual depth, and their varied colors can complement your overall garage decor.
When you open a cabinet or look across the space, these baskets add an inviting, homey touch while keeping essentials tidy and accessible. To implement, select baskets that match your style—think woven with leather handles for a rustic look or sleek fabric in bold colors for a modern vibe.
Place them on open shelves or inside cabinets, grouping similar items together. Label each basket with a simple tag or sticker for quick identification, or skip labels for a more casual feel.
Fill them with your most-used items, and regularly rotate or clean out as needed. This simple addition makes your garage more organized, visually appealing, and welcoming, turning a purely functional space into one that feels thoughtfully curated.
10. Install Fold-Down Wall Tables for Space-Saving Work Surfaces
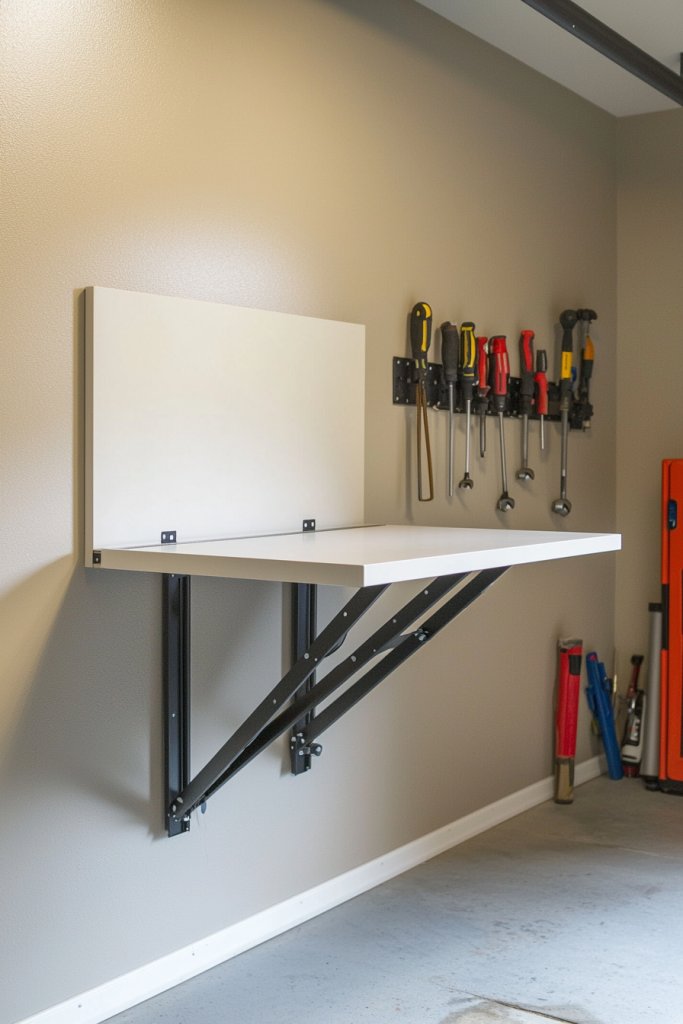
A fold-down wall table is a versatile addition that transforms your garage from cluttered storage into a functional workspace whenever needed. When folded down, it provides a sturdy surface for projects, repairs, or even as a quick spot to sort items.
When not in use, it folds neatly against the wall, freeing up valuable floor space for parking or movement. This space-saving design is perfect for those who want a practical solution without sacrificing open space or aesthetic appeal.
Picture a sleek, wall-mounted table with a smooth wooden or laminate surface, about 2-3 feet wide, with sturdy hinges that lock into place when open. The table is painted or finished in a neutral tone—think matte gray, warm wood, or crisp white—that complements your garage decor.
When folded down, it’s flush against the wall, creating a clean, minimalist look. The surrounding area remains open and uncluttered, ready for parking or other activities.
The tactile experience of opening and closing the table is smooth, and the sturdy surface feels reassuringly solid for any DIY task or casual use. Implementation is simple: purchase a fold-down table kit or build one yourself using durable plywood or reclaimed wood.
Attach heavy-duty hinges to the back edge of the table and secure it to a sturdy wall stud with lag bolts. When folded down, use a latch or support bracket to keep it stable.
Clear the area beneath the table for easy access, and consider adding a small storage shelf or hooks nearby for tools and supplies. With a few basic tools and materials, you can create a practical, space-efficient work surface that easily disappears when not in use, maximizing your garage’s functionality.
11. Incorporate Multi-Functional Storage Benches
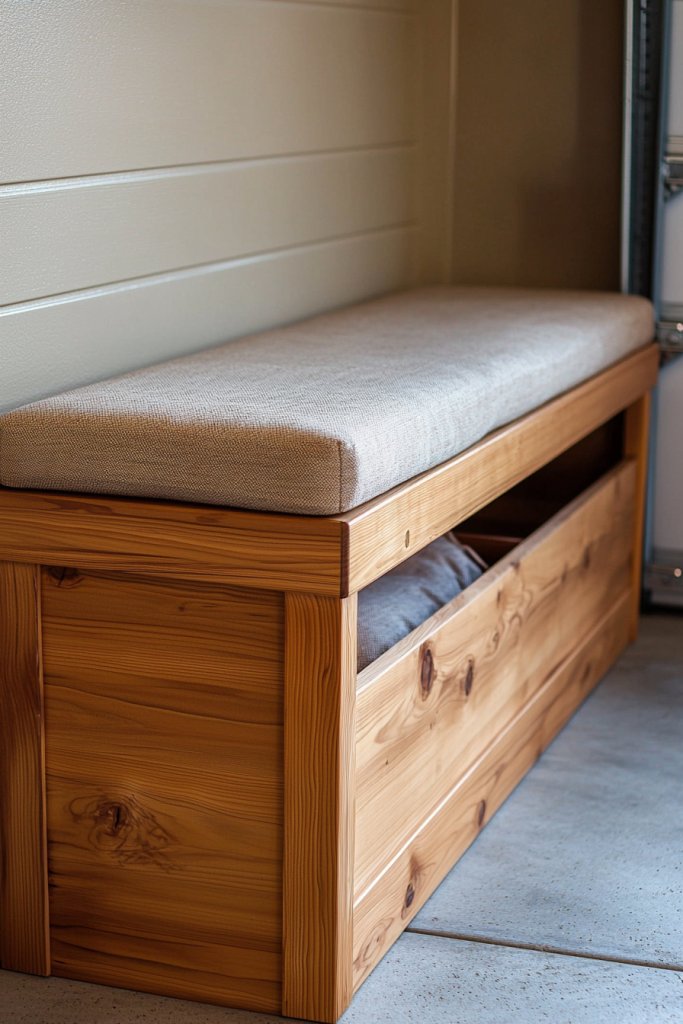
A multi-functional storage bench is a smart way to combine seating and organization into one sleek piece, transforming your garage into a more inviting and practical space. Imagine a sturdy wooden or metal bench with a cushioned top in a neutral or bold color, paired with hidden compartments underneath that hold sports gear, gardening tools, or seasonal decorations.
This dual-purpose furniture not only provides a comfortable spot to sit while putting on your shoes or sorting your gear but also helps keep clutter out of sight, maintaining a clean, organized look. The surface can also serve as a handy spot for sorting mail, stacking small tools, or placing decorative accents like a woven basket or a vintage lantern for added charm.
Visually, these benches often feature a modern or rustic design, with warm wood tones like oak or reclaimed barn wood, complemented by soft textiles such as a patterned cushion or a faux leather seat. The compartments are typically accessed via lift-up lids or sliding drawers, seamlessly integrated into the design so they don’t detract from the overall aesthetic.
You might see a bench with a distressed finish for a farmhouse vibe or a sleek black metal frame for an industrial look. The space underneath can be left open for quick access or fitted with baskets or bins for extra storage, creating a balanced blend of form and function.
To implement this idea, start by selecting a sturdy wooden or metal storage bench that fits your space and style. Measure your available area and choose a piece with built-in compartments or plan to add storage bins or baskets inside.
If you prefer a DIY approach, repurpose an old wooden chest or create a custom cushion using foam padding and a durable fabric cover. Place the bench near your entryway or work zone, and fill the compartments with your commonly used items like gloves, small tools, or sports accessories. This simple addition instantly elevates your garage’s usability and appearance without breaking the bank.
12. Use Vertical Wall Slatwall Panels for Customizable Storage Options
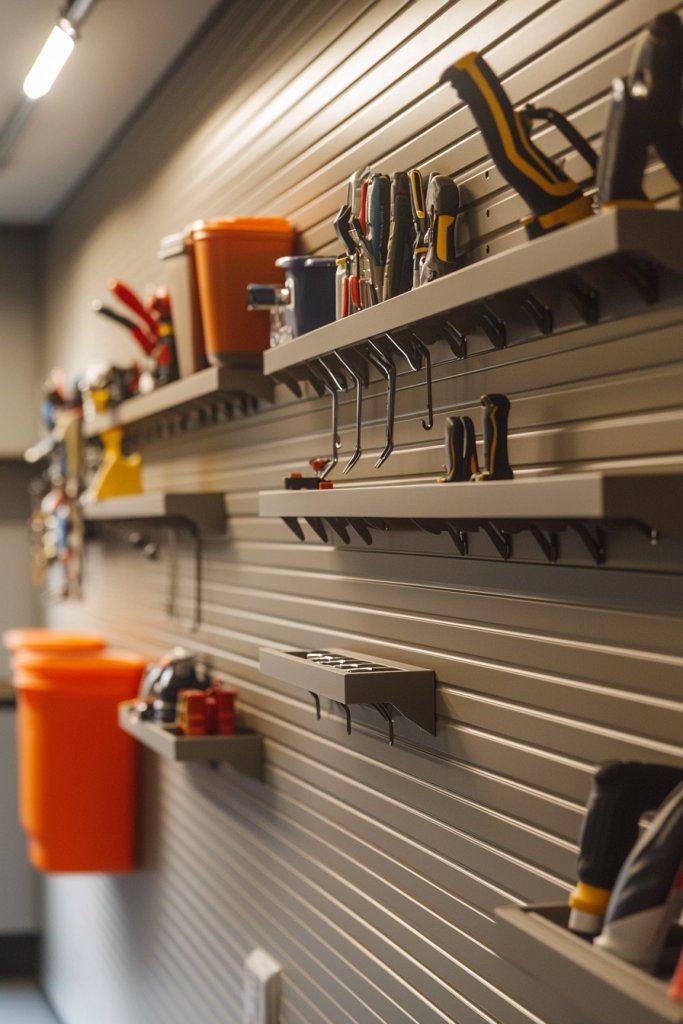
Vertical wall slatwall panels are a versatile and highly customizable solution that turns plain garage walls into efficient storage hubs. Picture a sleek, matte-finished panel made of durable MDF or PVC, fitted with evenly spaced horizontal slots.
These slots accommodate a variety of hooks, baskets, and shelves that you can reposition at will, allowing your storage setup to adapt as your needs change. Whether you want to hang long-handled tools, organize sports gear, or display gardening supplies, slatwall panels make it easy to create a tailored system that keeps everything within reach and off the floor.
Visually, slatwall panels add a clean, modern look to your garage. They come in neutral tones like white, gray, or black, which blend seamlessly with different decorating styles.
Accessories such as metal hooks, plastic baskets, and small shelving units snap into place effortlessly, creating a layered, organized appearance. The panels can be installed on entire walls or just in specific zones—such as behind your workbench or along an open wall—adding a sense of order and spaciousness.
Their streamlined design also makes cleaning easier, as dust and cobwebs don’t accumulate in the same way as traditional shelving. Getting started is straightforward: measure your wall space and select a slatwall panel size, then mount it securely using appropriate anchors and screws.
Choose accessories based on your storage needs—long hooks for brooms, smaller baskets for screws, or adjustable shelves for larger items. Attach the panels at a height that makes accessing your tools comfortable and convenient. With a few basic tools and some patience, you can quickly transform an empty wall into a highly functional, visually appealing storage system that grows with your garage organization goals.
13. Hang Pegs for Small Hand Tools and Cordless Drills
Hanging small hand tools and cordless drills on wall-mounted pegs is an effective way to keep your garage tidy and your essential tools always within arm’s reach. Visualize a neat row of sturdy wooden or metal pegs installed at varying heights—some for hanging screwdrivers, pliers, or paint scrapers, and others for power tools like drills or sanders.
This setup not only declutters your workbench or drawers but also prevents tools from getting lost or damaged. It’s especially helpful for frequently used items, making your projects more efficient and less frustrating.
In terms of appearance, pegboards or individual hooks arranged on a wall can create an organized, industrial-inspired look. You might choose natural wood pegs against a painted wall for a warm, rustic feel, or sleek metal hooks for a minimalist, contemporary vibe.
Color-coded or labeled hooks can add a layer of visual order, helping you quickly identify the tool you need. The tactile experience of grabbing a tool from an accessible spot also adds to the satisfaction of a well-organized garage.
To implement this, start by selecting sturdy wall-mounted pegs or hooks designed for tool storage. Measure your space and mount them at heights that suit your reach and workflow—generally around eye level for most tools.
Use a drill to secure the hooks into wall studs or appropriate anchors if mounting on drywall. Arrange your tools logically—heavy or bulky items on lower hooks and delicate or small tools higher up.
Keep frequently used tools in the most accessible spots, and consider adding labels or small containers nearby for organizing small parts like nails or screws. With a simple setup, your garage will be instantly more functional and clutter-free.
14. Install Wire Grid Panels for Display and Storage
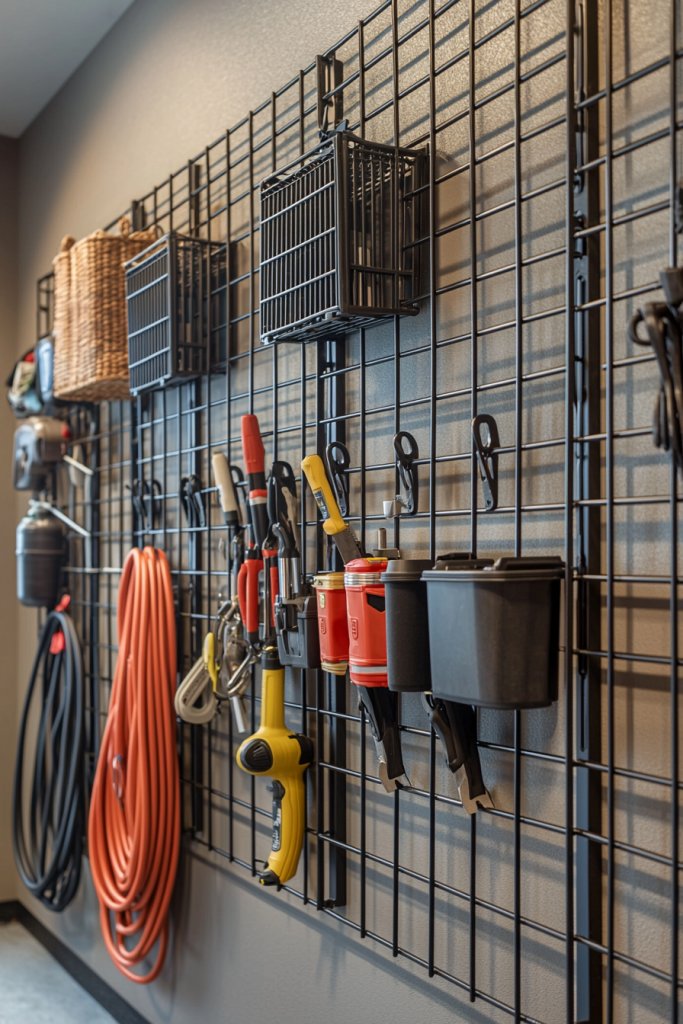
Wire grid panels are a flexible and stylish solution for creating a dynamic display and storage area in your garage. Imagine a large, black or galvanized metal grid mounted on the wall, with various hooks, baskets, and shelves attached at different heights.
These panels can hold everything from gardening gloves and safety glasses to seasonal decorations or small hardware bins. The open grid design allows for excellent visibility and airflow, making it easy to find what you need at a glance while giving your garage an industrial-chic vibe.
Visually, wire grid panels offer a light, airy feel that complements modern, rustic, or urban decor styles. They can be mounted over painted drywall, pegboard, or slatwall for added versatility.
Accessories such as small wire baskets, hooks, or clip-on labels can be arranged in multiple configurations, creating a colorful, organized display. The texture of the metal adds an interesting contrast to softer textiles or wooden elements in the space, and the open design prevents clutter from feeling overwhelming.
These panels are perfect for transforming blank wall space into a highly functional and visually appealing storage zone. Start by choosing a wire grid panel size that fits your available wall space, then secure it with appropriate anchors and screws.
Attach hooks, baskets, or shelves according to your storage needs—large baskets for bulky items or smaller hooks for tools and accessories. Arrange items thoughtfully, grouping similar objects together for quick access.
You can also personalize the display with labels or decorative elements to make your garage feel inviting and organized. With minimal tools and a little planning, wire grid panels turn an empty wall into a versatile storage showcase that keeps your tools and supplies beautifully organized.
15. Use Ceiling-Mounted Storage for Large Items like Ladders and Kayaks
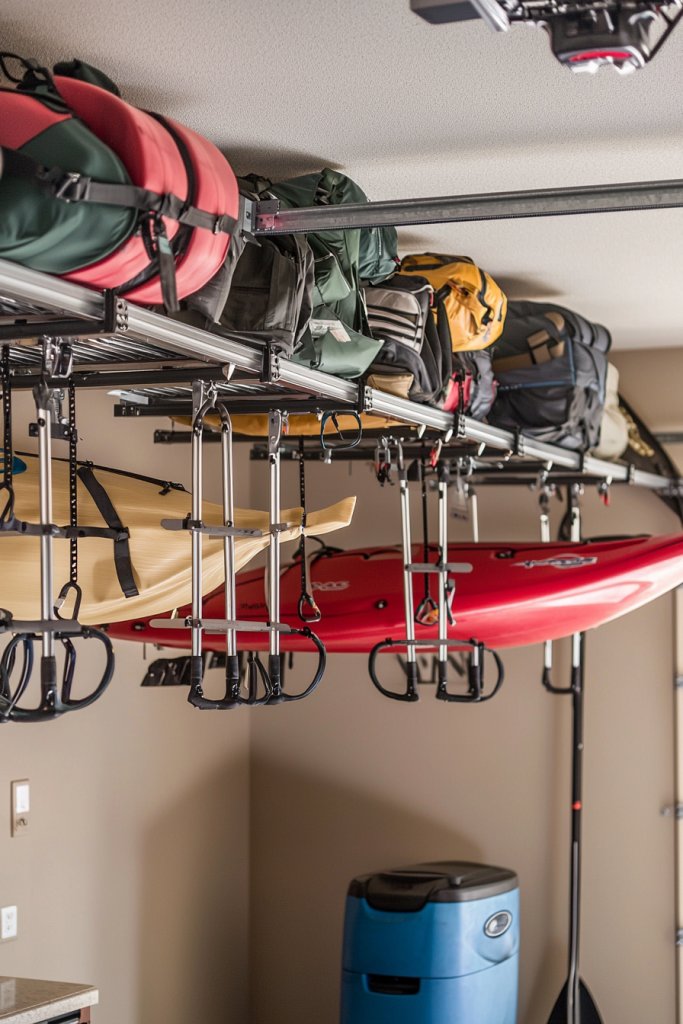
Ceiling-mounted storage is an ingenious way to reclaim valuable floor space by suspending large, bulky items such as ladders, kayaks, or camping gear from the ceiling. Visualize sturdy metal hooks and racks securely attached to ceiling joists, with your oversized equipment hanging neatly overhead.
This setup creates a clean, open floor plan and keeps your big gear safe and accessible without cluttering your workspace. It’s especially perfect for seasonal items you only need occasionally, helping your garage stay organized year-round.
In appearance, ceiling storage solutions often involve heavy-duty racks or sling-style straps in neutral tones like black or metallic finishes. The suspended items hang at varying heights, depending on ceiling height and item length, creating a layered visual effect that maximizes space without looking crowded.
The space beneath remains open for vehicles or daily use, while the overhead storage keeps your large gear out of the way yet ready when needed. The overall effect is a streamlined, efficient space that balances practicality with a minimalist aesthetic.
Implementation begins with measuring your ceiling height and selecting appropriate ceiling hooks or racks designed for heavy loads. Locate ceiling joists with a stud finder and securely attach the mounting hardware using lag screws or anchors.
Attach straps or slings to your large items, then hang them from the ceiling hardware, ensuring weight is evenly distributed. Double-check stability and clearance to prevent swinging or accidental contact. With a few tools and some careful planning, ceiling-mounted storage offers a simple, effective solution to free up your garage floor and keep your oversized gear organized and safe.
16. Incorporate Decorative Wall Art and Labels for a Cohesive Look
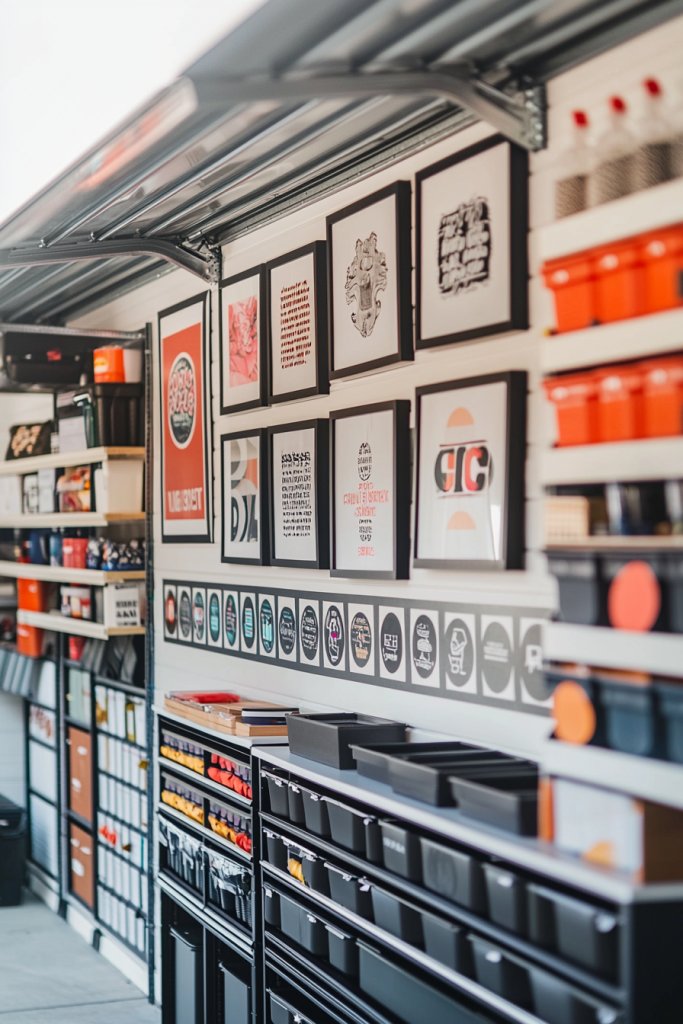
Transforming your garage into a stylish, organized space starts with the right decorative touches. Adding wall art and labels creates a polished look that makes organization feel intentional rather than cluttered.
Think sleek metal or wooden signs with inspiring or humorous quotes, vintage-inspired metal wall plaques, or modern geometric decals that bring personality to your space. Complement these with clear, beautifully designed labels on storage bins and shelves, using chalkboard tags, sleek adhesive labels, or hand-painted wooden signs to clearly identify contents.
Combining visual appeal with practicality helps you maintain a cohesive, inviting atmosphere that encourages regular tidiness. Imagine walking into your garage and being greeted by a large, framed typography print that says “Garage Goals” or a rustic metal sign with a motivational quote like “Clean Space, Clear Mind.” The walls are adorned with coordinating labels in a consistent font and color palette—perhaps black and white or muted earth tones—that tie everything together.
Textured elements like burlap or canvas around labels add warmth, while a few decorative objects like vintage gauges or sculptural metal pieces add visual interest without clutter. The overall effect is a space that feels curated, inspiring you to keep it organized and stylish.
To recreate this look, start by choosing a unifying color palette and style—industrial, farmhouse, or modern—and sourcing or making your wall art and labels accordingly. Select durable materials like metal, wood, or acrylic for signs, and use a label maker, chalkboard paint, or hand-painting for personalized labels.
Mount your art and signage with sturdy hooks, nails, or adhesive strips, placing larger pieces where they’ll make the biggest impact. Use labels consistently across storage bins and shelves, and consider adding a few decorative objects to balance function with aesthetic appeal. With these simple steps, your garage will look both organized and thoughtfully designed.
17. Use Stackable Storage Drawers for Small Parts and Hardware
Keeping tiny items like nails, screws, and fasteners organized can be a game-changer in maintaining a clutter-free garage. Stackable storage drawers provide a compact, efficient solution that makes finding small parts quick and easy.
These drawers come in various sizes, often with clear fronts so you can see the contents at a glance. Label each drawer with categories such as “Nails,” “Screws,” “Anchors,” or “Washers” for maximum clarity.
Their modular nature allows you to customize your setup as your collection of small hardware grows, stacking neatly on shelves or inside cabinets for a tidy, organized appearance. Visualize a row of small, colorful drawers stacked on a sturdy wooden or metal shelving unit.
Each drawer’s transparent front reveals its contents: shiny silver screws, brass nails, or tiny plastic clips. The labels are crisp and clean, perhaps printed on white adhesive paper with black text for easy readability.
The entire system feels orderly and accessible, minimizing the frustration of rummaging through a jumble of small items in a box or drawer. The smell of fresh wood or plastic, combined with the satisfying click of closing drawers, adds to the sense of control and efficiency.
To implement this, gather a set of stackable plastic or wooden drawers—many affordable options are available online or at home improvement stores. Label each drawer clearly using a label maker, printable labels, or permanent marker.
Set up your drawers on a stable shelf or inside a dedicated storage cabinet, grouping similar items together. For added durability, consider using drawer liners or small clear storage bins inside the drawers for extra organization. This simple system keeps your hardware visible, accessible, and neatly contained, saving you time and reducing clutter.
18. Hang Coats and Aprons on Stylish Hooks by the Entry

Creating a designated spot for outerwear and work aprons immediately elevates your garage’s organization and makes everyday routines smoother. Stylish hooks—think sleek metal, rustic wood, or decorative ceramic—offer a practical yet attractive way to keep coats, jackets, and aprons off the floor and within easy reach.
Position these hooks near the garage entrance or work zone to encourage quick access and prevent clutter from spreading throughout the space. Adding a small bench or shelf nearby for shoes or accessories completes the functional entryway, making your garage feel more welcoming and organized.
Picture a row of matching hooks mounted on a reclaimed wood board or industrial metal strip above a narrow bench. Your outdoor jackets and work aprons hang neatly, their colors adding visual interest—perhaps a pop of red, navy, or classic denim.
The hooks are sturdy enough to hold heavier items, and the area feels inviting, with a faint scent of fresh air and outdoor gear. Small baskets or cubbies underneath can hold gloves, hats, or work vests, while a decorative rug anchors the space and adds warmth.
This setup transforms cluttered chaos into a stylish, functional entry point. To set this up, choose durable hooks suitable for the weight of your items—metal hooks are a popular choice—and mount them on a sturdy backing like reclaimed wood, metal, or a painted wall.
Decide on the number of hooks based on your needs and space. Install the hooks at a comfortable height, ensuring easy access for everyone in the household.
Add a small bench or shoe rack beneath for convenience. Finish the look with matching labels or decorative elements like a vintage clock or small framed quote to inspire organization and make the space inviting.
19. Mount Long Shelves for Bulkier Items and Storage Bins

Long, sturdy shelves are essential for handling larger items like paint cans, toolboxes, or bulky storage bins. Installing these shelves high on the wall maximizes vertical space and keeps heavy or oversized items off the floor, making your garage safer and more functional.
Use materials like heavy-duty wood or metal brackets with thick plywood or pre-made shelving units for durability. The shelves can be painted in neutral tones for a clean look or left natural for a rustic vibe, depending on your style.
Properly secured, they provide a reliable surface for storing your most substantial garage essentials. Imagine a row of long, well-organized shelves running along one wall, each loaded with labeled containers, large paint cans, or coiled hoses.
The shelves are painted a subtle neutral hue or left raw, blending seamlessly into the garage’s overall aesthetic. Clear, oversized storage bins sit neatly side by side, their labels facing outward, so you can quickly identify contents like “Lawn Tools” or “Holiday Decorations.” The space feels open and uncluttered, with everything in easy reach but out of sight when not needed.
The sturdy shelves add a sense of order and efficiency to the entire garage. To install, measure the wall space carefully and select appropriate brackets designed to support heavy loads.
Attach the brackets securely to wall studs using a drill and proper anchors if needed. Place the long shelf boards on the brackets, ensuring they’re level.
Use quality storage bins or large plastic containers with lids for organizing bulky items, and label each for quick identification. Regularly review and update your storage to maintain the system’s effectiveness. With this setup, your garage can handle large, heavy items without sacrificing style or accessibility.
20. Incorporate a Shoe and Boot Rack to Tidy Footwear
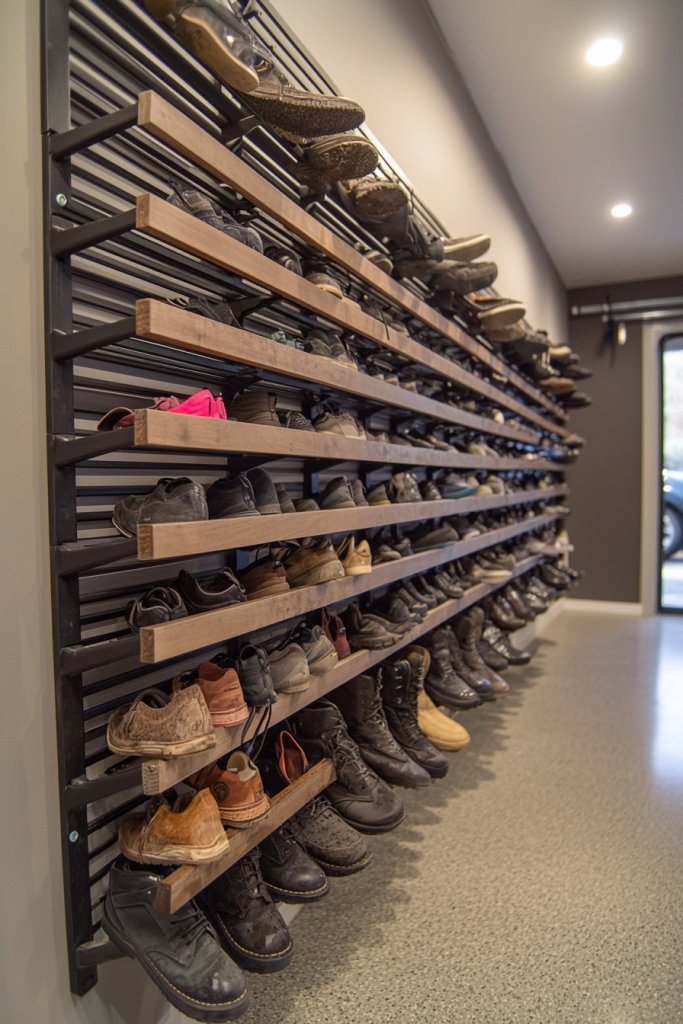
A dedicated shoe and boot rack helps keep muddy footprints and clutter at bay, transforming your garage into a cleaner, more organized space. A sleek, functional rack—whether a simple wall-mounted unit, a vertical shoe tower, or a cubby-style bench—provides a designated spot for footwear, making it easier to grab and go.
Choose materials like metal, wood, or sturdy plastic that can withstand moisture and heavy use. Incorporating a shoe rack near the entry or mudroom area of your garage creates a tidy transition from outdoors to indoors, preventing shoes from piling up on the floor.
Picture a compact, wall-mounted metal shoe rack with individual slots or cubbies filled with sneakers, work boots, and rain boots. The rack’s finish is matte black or brushed metal, blending with industrial or modern decor.
Nearby, a small mat or tray catches dirt or water, while a couple of decorative baskets store extra laces or cleaning supplies. The space feels organized and inviting, encouraging family members to put shoes away immediately.
This simple addition not only tidies the space but also extends the life of your footwear by keeping it off the dirty floor. To set up, select a shoe rack that fits your space and footwear volume—wall-mounted or free-standing options work well.
Position it near the garage entrance or main work area for convenience. Use durable, easy-to-clean materials, and add labels or decorative tags if you want a personalized touch.
Place a small mat or tray underneath to catch dirt or moisture. Encourage everyone to use the rack consistently, and periodically clean or reorganize it to keep your garage looking neat and welcoming.
21. Use Decorative Caddies for Cleaning Supplies and Car Wash Items
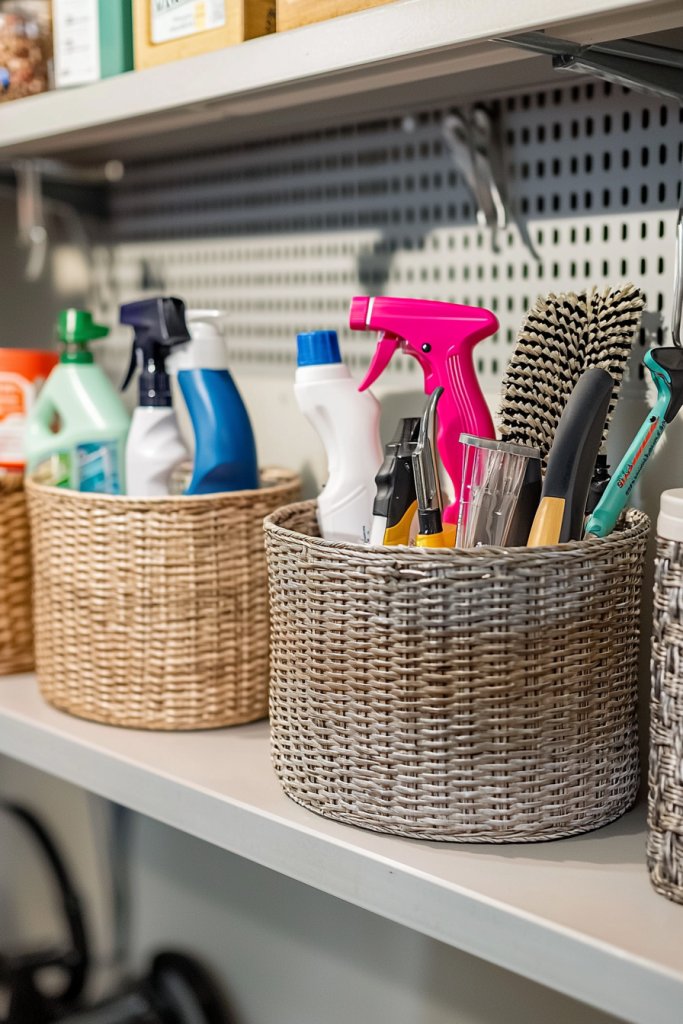
Keeping cleaning supplies organized doesn’t have to mean sacrificing style. Decorative caddies add a charming touch to your garage while keeping essential items within easy reach.
Imagine a sturdy wire basket painted in a sleek matte black or a woven rattan caddy with leather handles—these pieces blend function with aesthetics effortlessly. They sit neatly on shelves or hooks, and their attractive design elevates the overall look of your storage space.
Filling them with colorful spray bottles, soft microfiber cloths, and neatly labeled bottles creates a vibrant, inviting corner that encourages regular tidying. Visually, these caddies can be a focal point or a subtle accent, depending on your decor style.
You might choose a vintage-inspired metal caddy with distressed paint for rustic charm, or a modern acrylic container with a sleek, transparent finish that showcases your supplies. The textures vary from smooth plastic to woven fibers, adding tactile interest.
Brightly colored bottles, coordinated with matching labels, stand out against neutral or pastel backgrounds, making it easy to locate what you need without clutter. The scent of lemon or lavender cleaning products can subtly fill the air, enhancing the fresh, organized feel.
Implementing this idea is simple and budget-friendly. Start by selecting a decorative caddy that matches your style—metal, wicker, or plastic options all work well.
Gather your cleaning supplies, and consider labeling each bottle or container with clear, waterproof labels. Place your caddy in a designated spot, such as a corner shelf or wall-mounted hook, to keep everything contained.
If desired, add a small tray or dish for frequently used items like sponges or scrub brushes. This setup keeps your garage tidy, attractive, and ready for any mess or project.
22. Create a Chalkboard or Whiteboard for Organization Notes
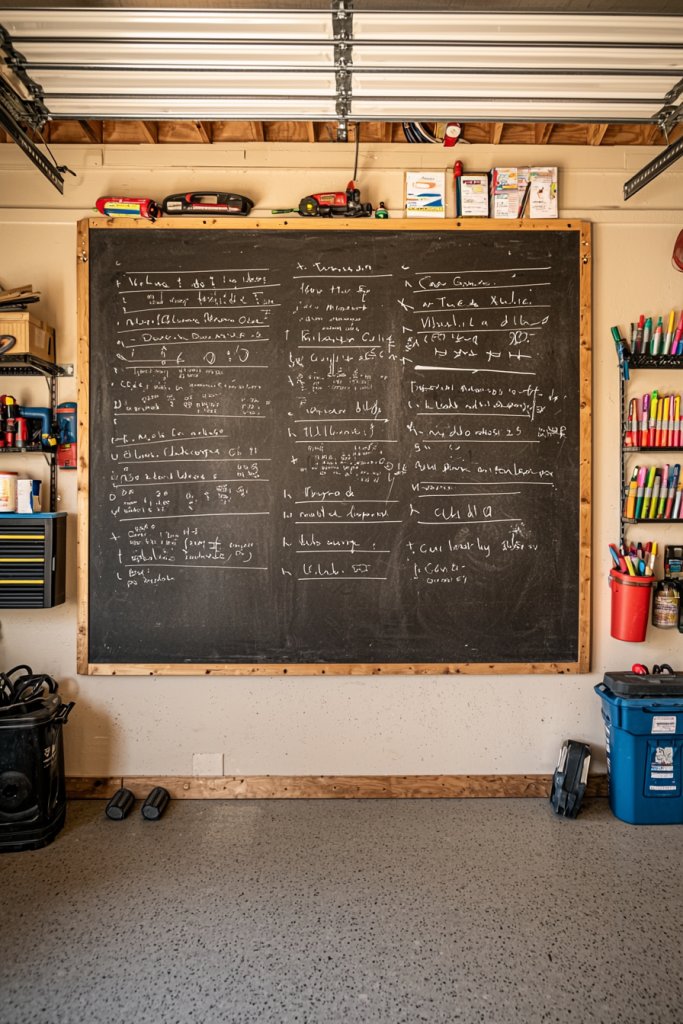
A chalkboard or whiteboard transforms your garage into a functional hub for planning, reminders, and project tracking. It provides a dedicated space to jot down weekly tasks, maintenance schedules, or shopping lists, making organization visual and accessible.
Picture a large, framed whiteboard mounted on a wall near your work zone, with colorful markers standing by—ready for quick notes or motivational quotes. Alternatively, a rustic chalkboard with a wooden frame adds a vintage charm, perfect for a cozy, inviting garage atmosphere.
This simple addition turns your space into a command center that keeps you on track. Visually, these boards serve as a focal point.
A whiteboard’s glossy surface reflects light, brightening the space, while chalkboards with a matte black finish add a touch of industrial style. You can personalize the look with decorative borders, colorful handwriting, or even magnetic accessories like clips and hooks for small notes or photos.
Position it at eye level for easy access, and consider adding a small tray or ledge underneath to hold markers or chalk. When filled with neatly organized notes, it creates a vibrant, dynamic element that motivates you to stay organized.
Getting started is straightforward. Choose a size that fits your wall space—large enough to hold your plans but not overwhelming.
Mount your whiteboard or chalkboard using appropriate hardware, ensuring it’s secure. Stock up on your favorite markers or chalk, and consider creating a color-coded system for different types of notes. Make it a habit to update your board regularly, turning your garage into a well-coordinated, stress-free zone where everything has its place and purpose.
23. Use Furniture-Style Storage Solutions for a Homey Feel
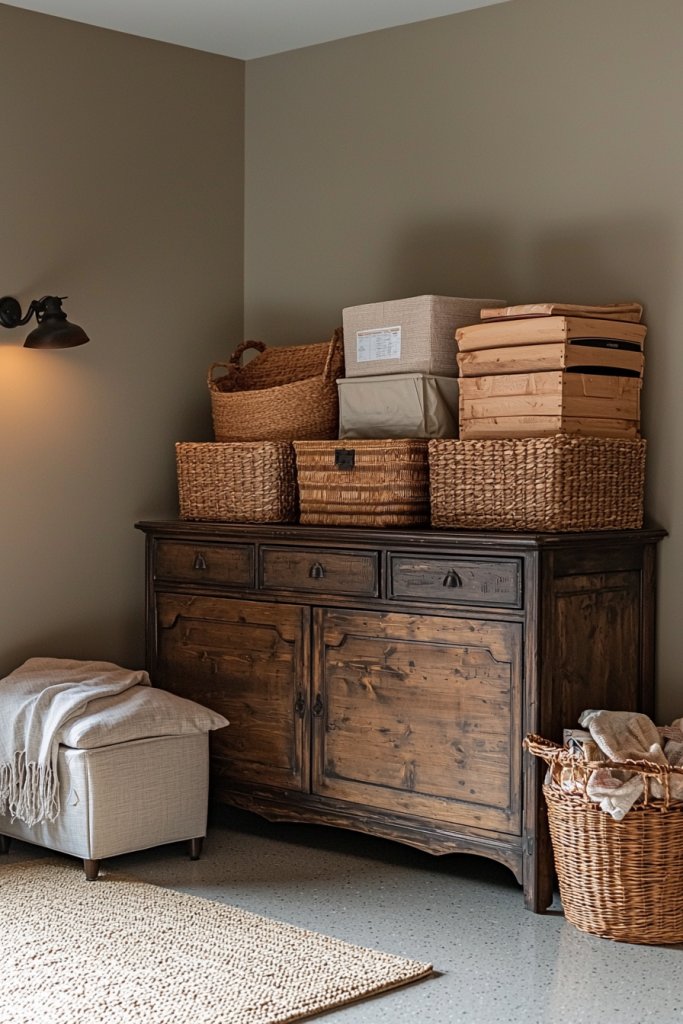
Incorporating furniture-style storage into your garage transforms it from a utilitarian space into an inviting, organized retreat. Think of a vintage wooden sideboard or a cozy-looking storage ottoman that doubles as seating.
These pieces add warmth and personality, making your garage feel more like an extension of your home. They can store bulky tools, sports gear, or outdoor accessories out of sight while offering a charming surface or seating area.
The soft curves, warm finishes, and stylish hardware create a welcoming atmosphere that encourages tidiness and comfort. Visually, furniture-style storage pieces come in a variety of styles—from rustic reclaimed wood with distressed paint to sleek, modern cabinets with minimalist handles.
The textures range from smooth lacquered surfaces to rough-hewn wood grains, adding tactile richness. You can accessorize with decorative baskets on top or place a colorful cushion or throw pillow on a bench for extra comfort.
These pieces can be positioned along walls or at the entryway, providing both function and aesthetic appeal, making the garage feel more like a cozy extension of your living space. Implementing this concept is simple and customizable.
Start by selecting a piece that fits your storage needs and style, such as a vintage cabinet, a painted dresser, or a storage bench. Organize your items inside with baskets, bins, or boxes for easy access.
For added convenience, choose pieces with built-in compartments or drawers. Place your furniture in strategic spots—near the garage door or work area—and style the surface with decorative accents like a small plant, a jar of frequently used tools, or seasonal decor. This approach makes organization feel less like a chore and more like an inviting, stylish space.
24. Hang Decorative Mirrors to Enlarge the Space Visually
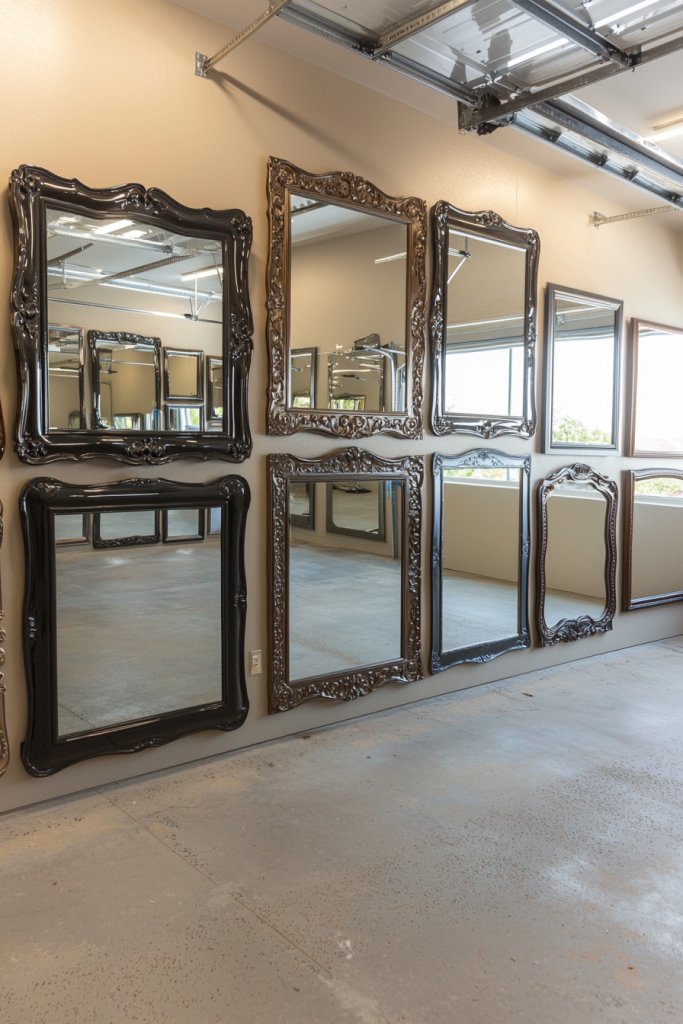
Adding decorative mirrors to your garage is an effective way to create the illusion of more space while elevating the overall decor. Large, framed mirrors with ornate or sleek minimalist frames reflect light and make the room appear brighter and more open.
Consider hanging a sizable vintage mirror with a distressed wooden frame or a modern, frameless glass panel above your workbench. The reflection of tools, shelves, and lighting can give your garage a fresh, airy feel, even if space is limited.
Visually, mirrors bring a sense of depth and dimension. They bounce light around the room, highlighting your storage solutions and decorative elements, and can serve as focal points or subtle accents.
A well-placed mirror can also reflect outdoor views or garden elements if your garage has windows, further enhancing the space’s openness. Pairing a mirror with a few decorative wall hooks or a sleek console table underneath can heighten the aesthetic appeal, blending style with function in a seamless way.
Getting started is easy. Select a mirror that complements your existing decor—think about size, style, and frame material.
Mount it securely at eye level or above your work area using appropriate hardware. For added style, frame it with reclaimed wood, metal, or painted finishes that match your garage’s theme.
Consider pairing the mirror with a small shelf or hook for hanging tools or accessories nearby. Regularly clean and maintain the mirror to keep it looking pristine, and enjoy the expanded, brighter feeling it brings to your garage.
25. Incorporate Colorful Accents and Textiles for a Cohesive Decor
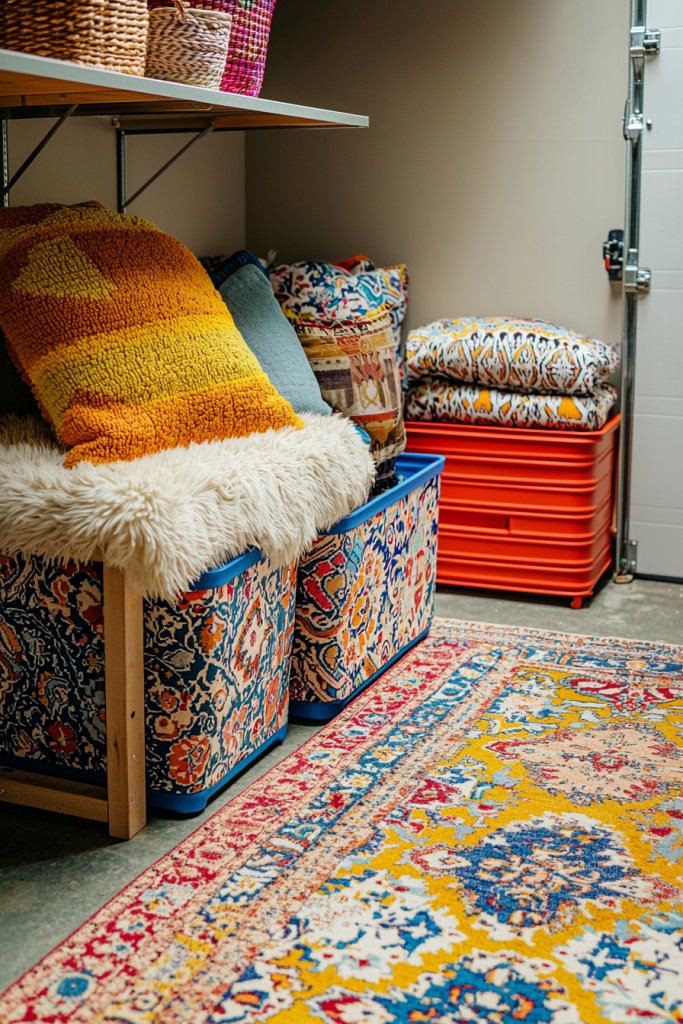
Introducing colorful accents and textiles transforms your garage into a vibrant, welcoming space. Think of a plush, soft rug in cheerful stripes or geometric patterns spread near your work area or entryway.
Bright cushions or seat pads on storage benches add comfort and a pop of color, while coordinating curtains or fabric wall hangings can soften the space’s industrial edges. These elements tie everything together, making the garage feel less like a storage unit and more like an extension of your home’s style.
Visually, colorful textiles create focal points and add warmth. A bold, patterned curtain can hide clutter behind shelves, while a textured throw blanket draped over a storage bench adds visual interest.
Combining different textures—like a shaggy rug, woven baskets, and velvet cushions—creates a layered, cozy atmosphere. Use a color palette that complements your overall decor—perhaps navy, mustard, and blush for a trendy look or soft pastels for a calming vibe.
When paired with neutral storage units, these accents breathe personality into your garage. Implementing this idea is simple and budget-friendly.
Start by choosing a few key textiles—such as a colorful rug, decorative pillows, or curtains—that match your preferred palette. Layer them in strategic spots to add visual interest.
Incorporate small textile accessories like throw blankets or fabric storage bins to keep clutter contained while adding warmth. With just a few thoughtfully selected pieces, your garage will feel more inviting, cohesive, and stylish—an organized space you’ll love spending time in.
Conclusion
With so many creative and functional garage organization ideas—from clever wall-mounted solutions and overhead racks to stylish storage cabinets and decorative accents—there’s a perfect system for every space and style. Implementing even a few of these tips can transform your cluttered garage into an organized, inviting area that maximizes storage and enhances your home.
Don’t wait—start customizing your garage today and enjoy the satisfaction of a tidy, efficient space that works for you. Your dream garage is just an idea away!
Leave a Reply